Device Maintenance
Check for System updates
Perform a software update
Important: Depending on your software version, it may be necessary to repeat this process multiple times. Some carriers may require your device to be connected to Wi-Fi to check for and install updates.
If a system update is available, you should install it to keep your phone or tablet running smoothly. However, please be aware that during the update process, your device cannot be used and files will be inaccessible. You also will not be able to make calls, even to emergency services. Additionally, there may be some differences to the device's interface when the update completes.
Using two fingers, swipe down from the top of the screen, and then tap the Settings icon.
Swipe to and then tap Software update, or System updates. It will vary between models.
Tap Download and install, Check for system updates, or Check for software updates, depending on your carrier. If an update is available it should begin downloading automatically, although you may need to tap Download now on some devices.
When the download is complete, follow the on-screen instructions to install the update.
You can also tap the switch to enable or disable Auto download over Wi-Fi. When this option is turned on, your phone or tablet will automatically update when it's connected to a Wi-Fi network. If this option is turned off, you will need to update your device manually.
If you'd like to see the software version currently on your device, open Settings, tap About phone or About tablet, and then tap Software information.
Software update via Smart Switch
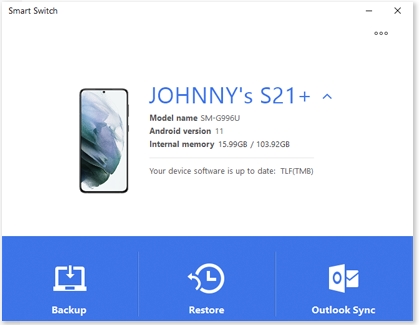
Not only is Smart Switch great for transferring data, it’s also an easy way to update your device’s software. When you open Smart Switch on your Mac or Windows PC, you’ll see an option to update to a new software version if one is available.
Using the USB cable that came included in the box, connect your Galaxy device to a computer that has Smart Switch installed. You may need a USB adapter with some PCs.
Open Smart Switch on the computer and allow it to detect the device. If an update is available, the Update button will appear.
Click Update on your PC and follow the on-screen prompts to download and install the update.
Note: Don't disconnect the USB cable or use your device until the update is complete. Your Galaxy device will reboot as part of the update process.
Quick optimization
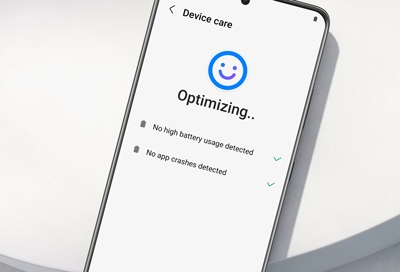
The Quick optimization feature improves your device's performance by identifying apps that use excessive battery power. It also clears away unneeded items from memory, deletes unnecessary files, scans for malware, and closes apps running in the background. Optimizing your phone is quick and simple.
From Settings, swipe to and tap Battery and device care. Tap Optimize now, and then tap Done.
Note: The Optimization feature will not appear when Device care determines your phone is in Great condition.
Battery
It's important to charge your device's battery properly so it can keep up with you throughout the day. Follow these tips for the best results:
Use your Samsung charger and avoid third-party accessories.
Ensure the charger is connected securely and is not being blocked by your device cover or case.
Make sure the charging indicator appears on the device's display when the charger is connected.
Use a power outlet instead of your computer for a better charge.
Disconnect the device from the charger once the battery is fully charged.
Do not leave your device connected to the charger for long periods of time or overnight.
If you are having trouble and your device is not charging properly, please see our guide on Galaxy device will not charge.
Clean storage
If you are worried about your device being overloaded with unnecessary files, it's about time you clear out your storage.
From Settings, swipe to and tap Battery and device care.
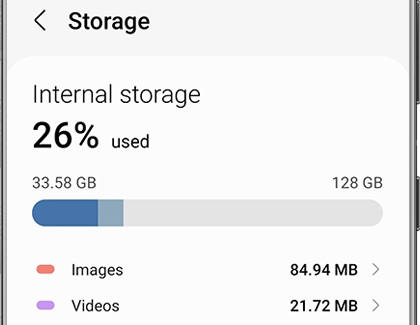
Tap Storage, and then tap on a category that has items you'd like to remove, such as Images.
Touch and hold an item to select it, and then select the additional items you'd like to remove.
Tap Delete or Delete all when you've selected everything, and then tap Move to Trash.
Clean memory
Is your device getting glitchy and slow? Clean up your device's memory to improve its performance.
From Settings, swipe to and tap Battery and device care. Tap Memory, and then tap Clean now to free up memory by stopping background apps.
If you'd like to keep certain apps running in the background, you can tap Excluded apps and add your preferred apps to the list so they do not get closed when you use this feature.
A more thorough way to clean the phone's memory is to reboot it occasionally. You can restart the phone any time by swiping down from the top of the screen using two fingers to open the Quick settings panel, and then tapping the Power icon. Tap Restart and then tap Restart again. If necessary, you'll need to enter your PIN or password when the reboot is complete.
You can also have the phone reboot automatically on a schedule, such as late at night when you won't be using it.
From Settings, swipe to and tap Battery and device care.
Tap More options (the three vertical dots), and then tap Automation.
Tap Auto restart at set times, and then tap the switch to turn it on.
Tap the day or days you want to the phone to automatically restart, and then tap Time to choose what time to restart. The phone will automatically reboot at the set time if the screen is off, the phone is not being used, and the battery is at least at 30%. You'll need to enter your PIN or password to use the phone after the restart, but you'll still get notifications, and your alarms will go off in the morning!
Set the date and time
Set the time and date automatically
Note: Using a mobile connection while traveling abroad could result in increased charges and fees. Please contact your network provider for more details.
When the Automatic date and time feature is enabled, your device will use your mobile network to determine the date and time. This means your device's settings will change based on the area you’re currently visiting or your time zone’s Daylight Savings cycle.
Navigate to and open Settings. Tap General management, and then tap Date and time.
Make sure the option for “Automatic date and time” is enabled.
As long your phone or tablet is connected to a mobile network, the date and time will be set automatically based on the network’s settings.
You can check if you’re connected to a network by going back to Settings and then tapping Connections.
Note: When Automatic date and time is turned on, the options for manually changing the date and time will not appear.
Set the time and date manually
Note: Many apps and websites will not operate correctly, and you may see security warnings, if the time and date is not accurate.
If you’re having trouble connecting to a network or if you simply prefer setting the time yourself, you can change the date and time manually. When you select a time zone that uses Daylight Savings (such as EST, PST, etc.), your device will automatically change the time on the appropriate date, so you don't have to worry.
Navigate to and open Settings. Tap General management, and then tap Date and time. Make sure the switches next to “Automatic date and time” and "Automatic time zone" are turned off. When the automatic setting is disabled, options for manually changing the time will appear.
You can change the following settings:
Select time zone: Choose the appropriate region and time zone. Even though it’s set to manual, your phone will still automatically change during Daylight Savings Times, based on the zone you picked.
Set date: Select a date from the calendar, and then tap Done.
Set time: Change the time by swiping or typing, and then tap Done.
Note: If Automatic date and time is enabled again, the options for manually changing the date and time will not appear.
Use a 24-hour time format
Do you like using military time? If so, your Galaxy device has an option to make the clock appear in a 24-hour time format. It’s easy to switch, and you can always change it back to a standard clock later.
Navigate to and open Settings. Tap General management, and then tap Date and time.
Tap the switch next to Use 24-hour format.
Now the clock will appear in military time! It doesn’t matter if your device's time is set automatically or manually; you can still use the 24-hour format.
If you ever want to turn this feature off, you can simply tap the switch again.
Use About phone to find the IMEI, model number, or serial number
Although the IMEI, serial number, or model number may sound complicated, viewing them is very simple. You can easily view these numbers directly on the phone or tablet. All you have to do is:
Navigate to and open Settings, and then tap About phone or About tablet.
However, there are other ways to check your IMEI or serial number. Here is a list of alternative methods you can use:
The back of your device: The IMEI and serial number are printed in small text on the back of the device near the bottom.
Under the battery: If you have a removable battery, look under or below the battery for the device's IMEI or serial number.
The packaging: The original box may list the device's full IMEI and serial number.
Your carrier's website: Your account details may list the device's IMEI and serial number.
Bill of sale: Review your sales receipt or contract for your device's IMEI and serial number.
Samsung Members: If you have a Samsung account and the Samsung Members app installed, the serial number stored in Samsung Members is actually your phone or tablet's IMEI number.
Dial *#06# on the phone to display the IMEI and serial number.
Note: This only works when supported by your carrier.
Advanced device care options
Battery usage
In the Device care menu, you can view your phone's estimated battery life based on your recent activity. You can also closely monitor how much battery different apps are using.
Open Settings, swipe to and tap Battery and device care, and then tap Battery. Your battery usage will appear at the top of the screen. From here, you can pinpoint what's draining your battery.
Watch the video and read the following sections to learn more ways to save battery power.
Screen timeout
Sometimes your phone just needs to take a timeout. If needed, you can shorten your phone's screen timeout to save battery life.
Navigate to and open Settings, and then tap Display.
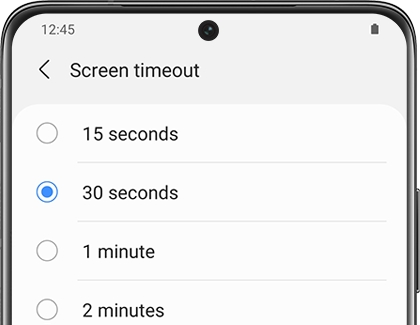
Tap Screen timeout, and then select your desired option.
Choose 15 seconds to save the most battery life.
Note: The screen timeout is set to 30 seconds by default.
Accidental touch protection
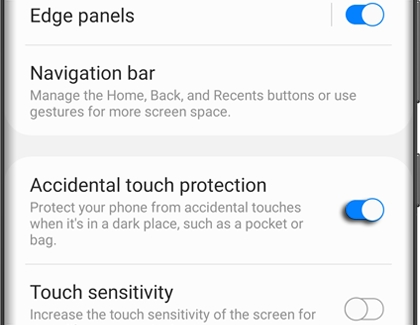
You can reduce battery drain and stop embarassing pocket dials by blocking accidental touches. That way, you won't have any more mishaps.
Navigate to and open Settings, and then tap Display.
Swipe to the bottom of the screen.
Tap the switch next to "Accidental touch protection" to turn it on or off.
Adaptive brightness
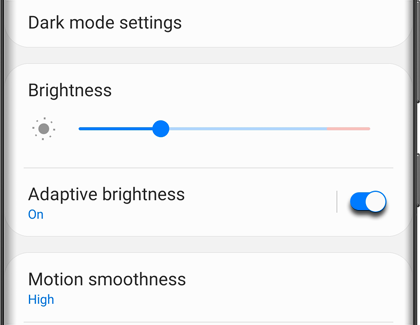
If the screen's hurting your eyes, turn on Adaptive brightness. This feature will learn your usage patterns and automatically adjust the screen's brightness based on your prior adjustments. It also can help extend your battery life!
Navigate to and open Settings, and then tap Display. Tap the switch next to "Adaptive brightness" to turn it on or off.
Power saving mode
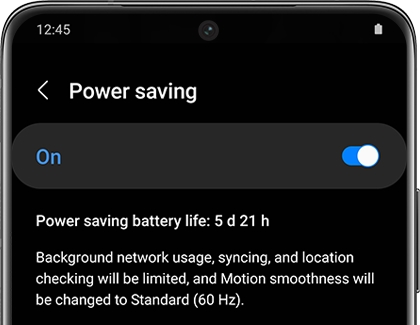
Note: Using Power saving mode can affect app and device performance. Some tasks and features may take longer to complete or update. Additionally, apps running in the background may not receive updates or send you notifications when Power saving mode is enabled.
Before you turn in for the night, change your phone's power mode. This will decrease your phone’s performance and save battery life.
Navigate to and open Settings, and then tap Battery and device care.
Tap Battery, and then tap Power saving.
Tap the switches next to your desired settings or customizations.
Finally, tap the switch at the top of the screen to activate Power saving mode.
You will not be able to adjust the settings once the mode is enabled. If you want to change any of the settings, you'll need to temporarily disable Power saving mode.
Adaptive Wi-Fi
If you're always on Wi-Fi browsing your favorite blogs and video channels, you can save power on that too. Plus, you can reduce battery usage by analyzing Wi-Fi usage.
Open Settings, tap Connections, and then tap Wi-Fi.
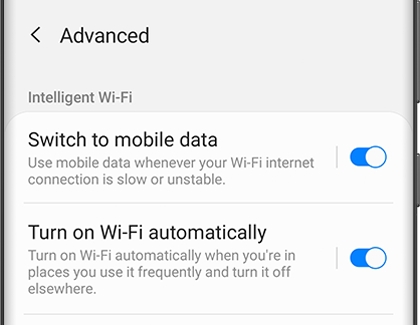
Tap More options (the three vertical dots), and then tap Advanced.
Tap the switch next to Turn on Wi-Fi automatically.
Note: This feature is not available on all phone models. Additionally, it may only work when a SIM card is inserted.
Sleeping apps
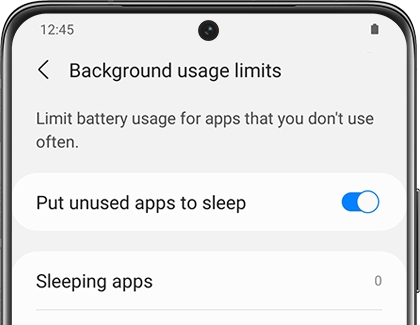
Opening apps all day can drain your phone's battery quickly, but you can save some power with sleeping app settings.
If there are certain apps you rarely use, you can set them to sleep in the background so your battery won’t drain as fast. You can also set apps to sleep automatically when you haven’t opened them in a while.
Power saving mode
If you know you'll be away from a charger for an extended period and you want to make sure your device will last, just turn on Power saving mode. This way, you won’t have to worry about a low battery.
First, navigate to Settings, and then tap Battery and device care. Tap Battery, and then tap Power saving. Tap the switch to turn it on. This will limit certain things on your device, such as background network usage and syncing.
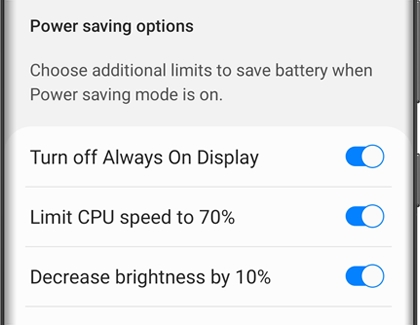
You can use additional power saving options as well:
Turn off Always On Display: This will disable the Always On Display feature.
Limit CPU speed to 70%: Decreases the processing speed of your device.
Decrease brightness by 10%: Dims your device’s screen by 10%.
Limit apps and Home screen: This option will provide you with maximum power saving by limiting background activity, using a simplified Home screen, and limiting available apps. It will also turn off Edge panels.
In order to turn these options on or off, Power saving must be disabled. Once you've made your desired adjustments, you can turn Power saving back on. You can also save battery power by putting unused apps to sleep with sleeping apps settings.
Note: Devices with One UI 2.5 or lower will have different power saving options, such as Optimized, Medium power saving, and Maximum power saving. To find these options, open Settings, tap Device care, tap Battery, and then tap Power mode.
-
Mobile 8 AM - 12 AM EST 7 days a week
-
Home Electronics & Appliance 8 AM - 12 AM EST 7 days a week
-
IT/Computing 8 AM - 9 PM EST 7 days a week
-
Text Support 24 hours a day 7 Days a Week