Add an account
Add a Samsung account
The best way to get the most from your Galaxy phone or tablet is to add a Samsung account, so you can experience all of the exclusive features.
To add a Samsung account, navigate to Settings, and then Samsung account at the top. Then, enter your Samsung account info to sign in. If you don't already have an account, don't worry. Just tap Create account to make one, or create one on the Samsung Account website.
Once your Samsung account is added, you can manage and edit your account preferences, like changing your password if needed.
Add a Google account
Can't live without Google? To use the Google Play Store and download apps from it, you need to add a Google account.
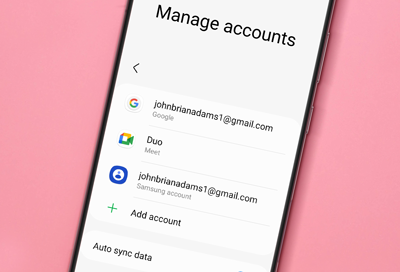
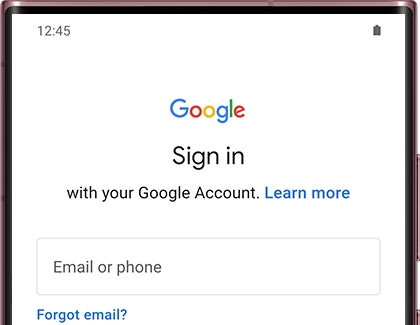
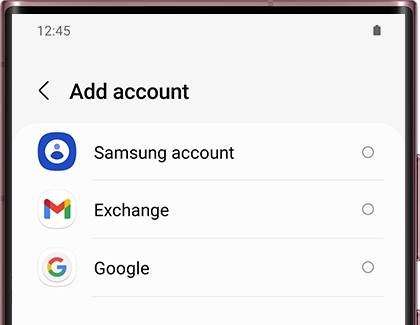
From Settings, swipe to and tap Accounts and backup. Tap Manage accounts, and then tap Add account. Tap Google, and then enter your Google account information to sign in.
When you add your Google account, you'll be able to access emails using the Gmail app on your phone or tablet, as well as use Google apps and Google services.
Add an email account
Last but not least, add an email account and receive your emails through the Email app.
Navigate to Settings, and then swipe to and select Accounts and backup. Tap Manage accounts, and then tap Add account. Tap your email provider and then enter your account credentials. Depending on your provider, there may be additional requirements to complete the setup on your device. If needed, sign into your account via the internet, and then turn on access to allow use of the app.
If necessary, you can download and install the Samsung Email app using Galaxy Store or Play Store, or download and install the app for your email provider. After installing, open the app and select the desired email account you wish to add. Follow the on-screen prompts to complete the setup.
Account settings
Access your account settings on the phone or tablet to sync data to your account as well as other devices signed into the same account. Some accounts will allow you to access your profile and other options. Each account has its custom settings, but you can configure common settings for all accounts of the same type.
Open Settings, and then tap Accounts and backup. Tap Manage accounts, and then tap an account to customize its settings.
Note: Account settings and available features vary between account types.
Remove an account
If needed, you can easily remove your accounts whenever you want, whether it's a Samsung, Google, or email account. You can always add them again later on, using the same steps in the previous sections.
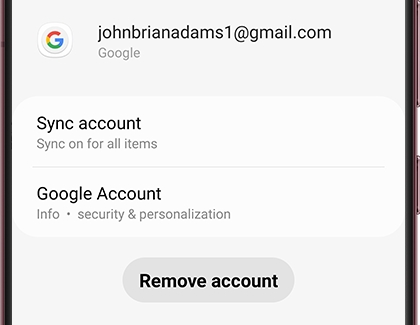
Open Settings, and then tap Accounts and backup. Tap Manage accounts, and then tap the account. Next, tap Remove account. Some accounts may have additional steps like entering your password, so check the screen for any extra steps.
Back up and restore
Content types that can be backed up using Samsung Cloud
Note: Individual files over 1GB will not be uploaded.
Backing up your data is a little different than syncing. When you back up, you save your device's files to the cloud, so they can be redownloaded later. These files won't automatically appear on your other devices unless you manually restore them. Syncing, on the other hand, automatically adds updated information to a device.
Below are some apps on your phone or tablet that support the back up and restore feature. We've also listed what kinds of data will be backed up from these apps:
Call logs: Call and message history
Clock: Alarms, world clocks, and timers
Apps: Installation files and app settings
Calendar: Events and tasks saved on your phone or tablet
Messages: Enhanced messages, multimedia messages, and text messages
Contacts: Contacts, email addresses, and business cards saved on your phone, tablet, or USIM
Home screen: Layout, wallpapers, and Samsung DeX settings (your default wallpapers won't be backed up)
Settings: Accessibility settings, ringtones, Samsung Keyboard options, Wi-Fi settings, and Always on Display settings (your default ringtone won't be backed up)
Voice Recorder: Saved audio clips recorded using the Voice Recorder app
Samsung Daily: Your personalized content preferences and settings
Note: Samsung Daily is only available on select phones, such as the S8. Newer phones use Samsung News instead; however, this service cannot be backed up.
Back up your Samsung Cloud data
Make sure you don't lose that precious video of your baby's first steps. Manually back up your data whenever you have new files, so you can relive your special moments.
Manual backup
From Settings, tap your name at the top of the screen.
Tap Samsung Cloud.
Select the data you'd like to back up, such as Messages or Calendar, and then tap Back up at the bottom of the screen.
The backup will begin uploading to the cloud. It may take some time if you have a lot of files.
Feel free to navigate away while the backup is in process. It will continue in the background and a notification will appear when it is complete.
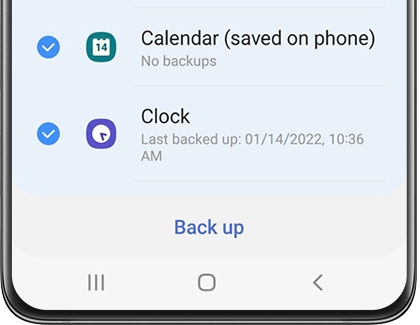
To learn more about the syncing process, tap More options (the three vertical dots), and then tap More information.
Automatic backup
When you enable the Automatic backup feature in Samsung Cloud, your data is backed up automatically once every 24 hours, as long as your phone or tablet is charging and connected to a Wi-Fi network. The screen also needs to be off for at least an hour. You can also customize what files are automatically backed up.
From Settings, navigate to and tap Accounts and backup.
Tap Manage accounts, and then select your Samsung account.
Tap Sync account, and then tap Auto back up.
Note: If the Auto back up option does not appear, your carrier does not support this feature.
Tap the switch next to the data you'd like to back up, such as Messages or Calendar. That's it!

Note: Content will not automatically back up if the cloud storage is full.
Restore backup data using Samsung Cloud
Once everything is backed up on Samsung Cloud, restoring your data is simple. You can even transfer it to another device using the Restore feature.
From Settings, tap your name at the top of the screen.
Tap Samsung Cloud, and then tap Restore data.
Select your desired device backup, and then select the content you want to restore.
Next, tap Restore, and then tap Install if prompted.
The backup will begin downloading. It may take some time if you have a lot of files.
Tap Done when it's finished.

Back up and restore using Google
Google is another great option to back up and restore your data. Your Google account can be used to sync data between multiple devices, just by logging in to the same account on each device.
Open Settings, and then tap Accounts and backup.
Tap Back up data under Google Drive. If prompted, sign in using your Google account credentials.
Tap Back up now to begin syncing your data.
To restore your data, tap the switch next to Automatic restore under Google account.
Note: The Automatic restore option may not be available on all models.

Back up data with a microSD card
If you'd rather use a method that doesn't require the internet, you can try using a microSD card. Simply insert one into your phone or tablet and then copy your files to the card with the My Files app, so they'll be safe and sound.
Restoring backed up files is as easy as backing them up! Just copy them to the phone or tablet, or even copy them to another device.
Note: Not all phone or tablet models support microSD cards.

Back up with Smart Switch on PC
Smart Switch on your PC is another great option for backing up your contacts, music, photos, and more. You can use this method if you need to transfer content to a new Galaxy phone, or if you'd like to have an extra backup just in case.
After you've made a backup of your files on your PC or Mac, just connect your new phone using a USB cable. Then, you can move your data to your phone! Or, access your data another time if you need to restore it.

Manage Google settings
Did you search for cats on Google and now you're getting endless cat ads? No worries, you can reset your ad settings or adjust other settings for Google Services. Just make sure you've added your Google account to your phone or tablet, so you can access Google Services.
To manage the Google Services setting on your device, go to Settings, tap Google, and then select the Google Services setting you want to change. After that, adjust those settings according to what you prefer.
Ads: Opt out of ad personalization or reset your advertising ID.
Autofill: Use autofill to fill in passwords, addresses, credit card numbers, and other personal info that is saved on your device.
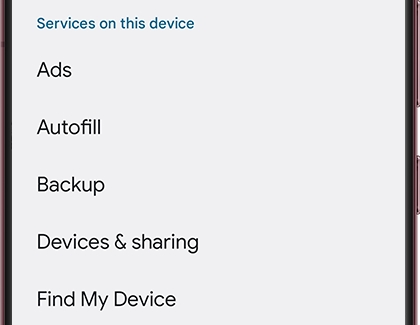
Backup: Change the settings for backing up your data to Google Drive, such as turning back up on or off and selecting your account. You can also change the data that is backed up, like apps, text messages, or device settings.
Devices & sharing: Edit the options for Nearby Share and casting to your other devices.
Find My Device: Quickly access the Google Find My Device app.
Mobile data & messaging: Configure your data management settings.
Parental controls: Set up parental controls for your device.
Personal Safety: Silence your notifications when driving with Do Not Disturb.
Personalize using shared data: Allow Google to use your data on apps such as Drive, Gmail, and Google TV.
Set up & restore: Use your Google account to restore contacts on your device, set up a nearby device, and set up your work profile.
Settings for Google apps: Access settings for your connected apps, contacts sync, Google Fit, Google Play, Google Wallet, and voice and search assistant.
Note: These options may vary. For full details, please visit Google's Account Help page.
Set up and manage your Samsung account
Note: If you experience issues with your Samsung account, please contact us. If your phone, tablet, or TV is already logged in to a Samsung account, you will need to log out of that account to create a new account. Please see the section titled "Log out or remove your account" for more information.
Your Samsung account can be set up from your phone, tablet, computer, and even your TV. Since Galaxy phones and tablets have Samsung account software built right in, you can quickly create your account when you first receive your device. If you didn't sign in while setting up your device, you can always sign in later. You can also update your account information at any time.
Set up and manage an account on your phone or tablet
Navigate to and open Settings, and then tap Samsung account at the top of the screen.
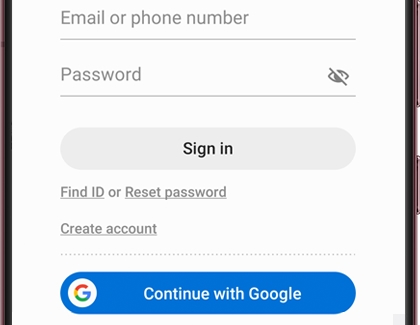
Enter your email or phone number if you have an existing account, or tap Find ID, Create account, or Continue with Google.
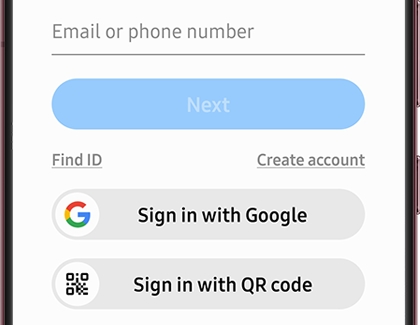
Note: The email address you enter when signing up will become your Samsung account username.
Follow the on-screen instructions to sign in or create your account. If you're signing in to an existing account, you may be required to perform two-step verification.
Once you have signed in, your account name will appear at the top of the Settings screen; tap your name to manage your account.
Next, tap Profile info. Tap the info you want to change, and then make your edits. For example, you can change your birth date or preferred nickname.
If you'd like to change the email address associated with your account, tap Email while on the Profile info page. Tap Change, and then follow the on-screen instructions to change the email address.
To confirm your identity, a verification email will also be sent to the address you entered to ensure that it was you that signed up. If you are having trouble with the verification email, please see the section titled "Verify your Samsung account via email."
Set up and manage an account on a computer
To sign in to or create a Samsung account from a computer, you'll need to use an internet browser. Keep in mind only one Samsung account is supported per email address.
Navigate to the Samsung Login page. Enter your credentials, and then select Sign in to log in to your account. Or, select Create account to make a new one.
Note: The email address you enter when signing up will become your Samsung account username.
You can also select Find ID, Reset password, or Continue with Google.
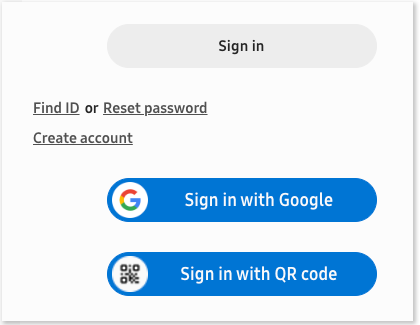
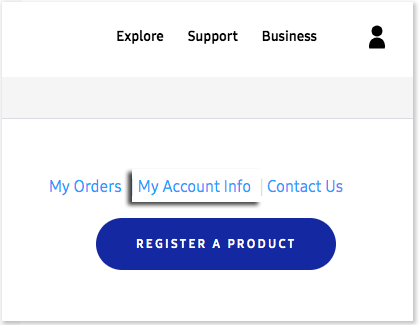
Once you've signed in, select your profile picture in the upper right corner. Select My Account, and then select My Account Info.
Enter the information you want to update. When you're done, select Save at the bottom of the screen to save changes.
To change your email address, select Samsung Account settings. Select Email ID, and follow the prompts.
To confirm your identity, a verification email will also be sent to the address you entered to ensure that it was you that signed up. If you are having trouble with the verification email, please see the section titled "Verify your Samsung account via email."
Set up and manage an account on a Samsung TV
On your TV, navigate to and select Settings, and then select General.
Select System Manager, and then select Samsung Account.
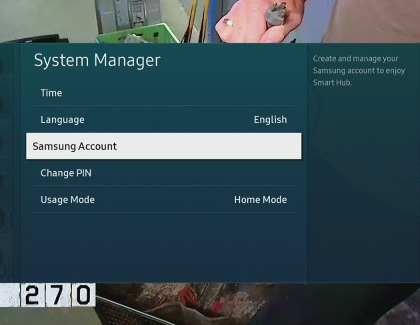
You can log in here, or create a new account. Follow the on-screen instructions to add your account.
Note: The email address you enter when signing up will become your Samsung account username.
To manage your account, navigate back to System Manager.
Select Samsung Account, and then select My Account. From here, you can edit your desired information.
To confirm your identity, a verification email will also be sent to the address you entered to ensure that it was you that signed up. If you are having trouble with the verification email, please see the section titled "Verify your Samsung account via email."
If you need to update your region or country, you'll have to contact Samsung Support. Keep in mind that changing your country will delete your purchase history, as well as services including Find My Mobile, Samsung account (SEMS), Call & text on other devices, Samsung Cloud, Samsung Apps (Android), Samsung Notes, Samsung Health, Samsung Pay, Samsung Payment Service, Easy Signup, Gallery, and smart assistant information.
Verify your Samsung account via email
After you sign up for a Samsung account, you will receive a verification email to help confirm your identity. Verifying your identity is important for security reasons and also because we will send you an email whenever you need to reset your password.
Navigate to and open the inbox for the email address associated with your Samsung account.
If you can’t find the email in your inbox, please check the spam mail box.
Open the email from Samsung account and either click the Account Verification button in the email, or copy the URL and paste it into your web browser.
From there, please follow the on-screen instructions to finish verifying your email address.
If you continue to experience issues with the verification email from Samsung, please see our Email verification guide.
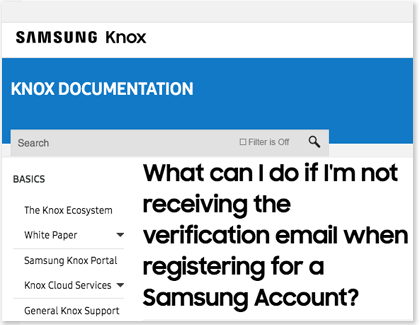
Note: You can sign up for multiple Samsung accounts if you have multiple email addresses. However, each account is treated separately. Even if the owner is the same person, the information on each account is managed independently.
Sign in with two-step verification
Note: If you cannot access your Samsung account because two-step verification isn't working, please contact Samsung Support for further assistance.
Samsung accounts now require a mandatory two-step verification process. This means there's an extra step when logging into your account.
Navigate to your Samsung account, and then enter your account credentials.
A security notification will be sent to the Galaxy phone that has the phone number associated with your Samsung account. If you have another Galaxy device that is signed into your Samsung account, a verification code will also be sent to that device via notification. You can register up to three phone numbers to your account.
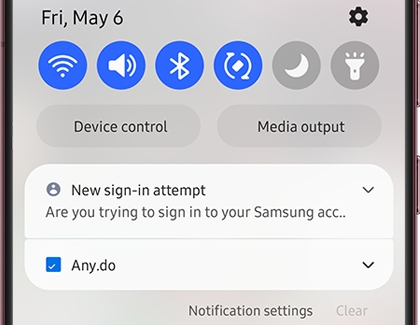
The phone notification will say "Did you just sign in to your Samsung account?" Tap the notification, and then tap Yes.
The phone will display a verification code. Enter this code in to the designated field, and then select Verify.
If the password was entered correctly, you will be signed in! If something went wrong, you can send another verification code.
If you'd like to change the associated number or email address, or if you'd like to add an additional authentication method, please see the next section for more details. You can learn even more about two-step authentication by checking out our guide.
Adjust your number, email, and other two-step verification settings
If needed, you can change your two-step verification settings, such as the phone number the code will be sent to. The settings menu also allows you to pick an authenticator app and view backup codes as an alternative way to sign in.
First, you'll need to navigate to the two-step verification Security settings page. You can access it from a phone, tablet, or a web browser on your computer.
Phone or tablet: Navigate to and open Settings, and then tap your name at the top. Tap Security settings, and then tap Two-step verification. Enter your Samsung account's password, and then tap OK.
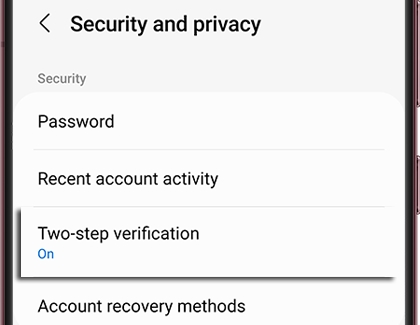
From a web browser: Navigate to the Samsung Login page and sign in to your account. Hover over your profile picture, and then select My Account. Select My Account Info, and then select Security. Enter your Samsung account's password, select Confirm, and then select Two-step verification.
Once you've reached the Security settings page, the steps are more or less the same, whether you're on a handheld device or a computer.
To change which phone number will receive verification codes, select Text messages. Select Add, enter your desired phone number, and then select Verify or Send code.
A code will be sent to the phone number you just added; enter the code to verify your identity. Now whenever you need to perform two-step verification, a code will be sent to that phone number and any other digital devices registered under the same Samsung account.
If you have more than one number added to your account, you can delete any you are not using.
Phone or tablet: From the Security settings page, select Text messages. Tap More options (the three vertical dots), and then tap Delete. Select the number you want to remove, and then tap Delete.
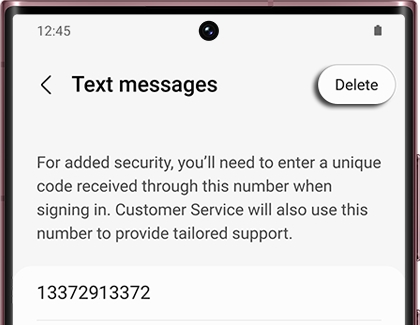
Web browser: From the Security settings page, select Text messages. Select Delete next to the number you want to remove.
Note: Delete or More options will not appear unless you have multiple numbers added.
To change which registered devices will receive a verification code, select Galaxy device notifications or Send code to your devices from the Security settings page. Select the switch(es) next to your desired device(s) to turn verification notifications on or off.
You can use an Authenticator app instead of regular two-step verification if you prefer. Select Authenticator app from the Security settings page, and follow the on-screen instructions to link the app.
As an extra precaution, you can also use backup codes to sign in to your account. Select Backup codes from the Security settings page to view your current codes. You can download the codes or request new ones if needed. Select Done when you're finished.
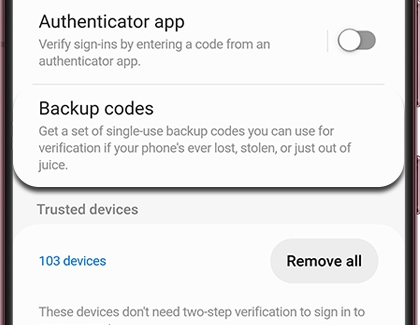
Trusted devices are devices that do not need two-step verification to sign in to your account. If you have security concerns, such as your account being compromised, you can tap Remove all or Remove all devices to delete every device that is registered as trusted.
Note: Devices will be added as trusted devices again once you go through the verification process.
Find your Samsung ID
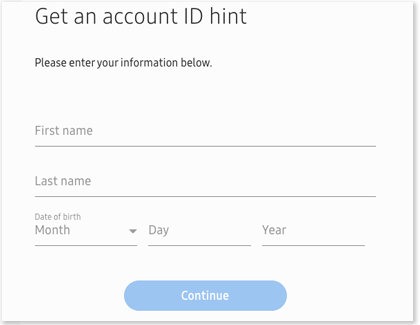
If you forgot the ID to your Samsung account, you can find it on your phone, tablet, or computer. Navigate to the account retrieval page on the Samsung website, enter your information, and then select Continue. Your Samsung account ID (email address) will be partially displayed. Next, select Go to your Samsung account to sign in.
If you still have difficulty recovering your ID, please contact us for help.
Change or reset your password
Did you forget the password to your Samsung account or have a hard time remembering it? There are options for resetting or changing your password, so you don't have to keep guessing.
Reset your password
On a Galaxy device, there is a Reset password option. Select this on the Samsung Login page to make a new password.
If you can't find this option or if it isn't working, you can also reset your password through a browser.
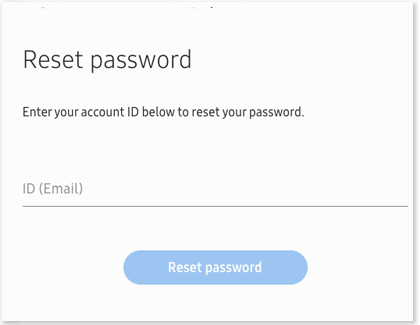
Use a web browser to navigate to the Reset password page on the Samsung website, and then enter the email or phone number associated with your Samsung account.
Then, select Reset password. An email will be sent to your inbox; follow the instructions in the email to reset your password.
If you still have difficulty resetting your password, please contact us for help.
Change your existing password
Navigate to your Samsung account on your Galaxy phone or tablet by opening Settings and then tapping your name at the top of the screen.
Tap Security and privacy, and then tap Password.
Enter your current password, and then enter your desired new password. Enter the new password one more time to confirm, and then tap Save.
You will be logged out from the Samsung account on your Galaxy device as a security precaution, and a popup message with appear. Enter the new password you just created, and then tap Sign in.
You may be required to go through the two-step verification process to log back into your account.
Log out or remove your account
You can log out of your Samsung account on a computer by using the website, but logging out on a phone or tablet is a little different. To "log out" on a phone or tablet, you actually have to remove the account. Doing so may disable some features, but you can always add the account back later if you like.
If you want to permanently delete your Samsung account, please refer to the next section.
Log out on a phone or tablet
To log out from a phone or tablet, navigate to and open Settings, and then tap your name at the top.
Swipe down to the bottom and tap Sign out.
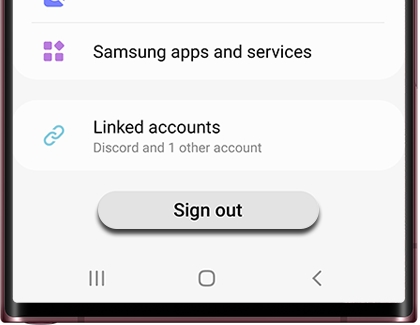
Tap Sign out again, enter your account password, and then tap OK.
Log out on a PC or Mac
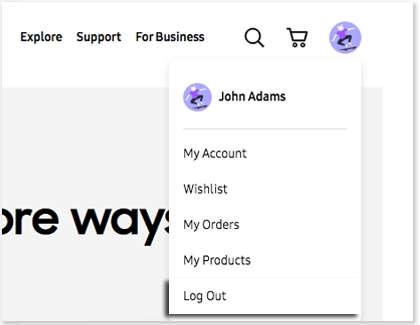
To log out of your Samsung account on a computer, you'll need to use an internet browser. Navigate to the Samsung website, select your name in the upper right corner, and then select Log Out.
Note: If you remove your Samsung account from your device, your synced data will be deleted from the device and new data will no longer be synced. All the data stored on your device that hasn't been synced with Samsung Cloud will remain on the device.
Delete your account
Deleting your Samsung account will also delete your Samsung purchase history, content subscriptions, content uploads, and personal profile information. This information cannot be recovered, so be certain you want to delete your account before you continue.
If you are unable to delete your account, you may have unresolved payment issues. Contact Samsung Support for further assistance.
Using an internet browser, navigate to the Samsung Login page.
Log in using your ID and password, and then select My Account info.
Select the Profile card, and then select Samsung Account settings.
Select Delete account, then review the precautions, and then follow the on-screen prompts to finish deleting it.
External storage transfer
MicroSD card types
Unless you are a tech wizard, you probably aren't aware that microSD cards come in multiple classes. Other than storage capacity, there are different factors that separate them. Some also come with extra features that give them distinct classifications.
MicroSD cards offer capacity up to 2GB.
MicroSDHC (High Capacity) cards offer capacity up to 32GB.
MicroSDXC (extended Capacity) cards offer capacity from over 32GB and up to 2TB.
Each type of card has a speed rating of 2, 4, 6, 8, or 10, from slowest to fastest.
While you can use any class of microSD cards in your phone or tablet, the microSDXC card is recommended for high-resolution video recording, due to its large storage capacity and high-speed read and write capability. For less demanding use, such as still photography, regular microSD or microSDHC cards will be sufficient.
Insert the microSD card
Note: Not all phone or tablet models support microSD cards. On these models, there will only be a slot for the SIM card.
MicroSD cards give you tons of space on your phone or tablet, but they are really tiny. Just be careful not to drop or lose the microSD card.
Insert the ejector tool (which comes with your phone or tablet) into the hole in the SIM and microSD card tray on the top of your phone or tablet. If you have any issues removing or inserting the SIM card tray, service may be necessary. If you need a replacement SIM ejector tool, you may be able to get one from your carrier or an electronics retailer.
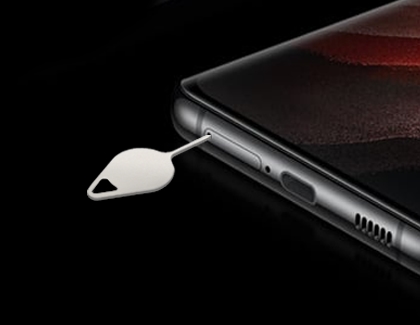
Important: Be careful not to insert the ejector tool into any of the microphone or speaker holes along the edge of your device. Look for the outline of the tray to make sure you're in the right place.
When the tray pops out, pull it out of the phone or tablet.
Carefully place the microSD card into the larger opening in the tray - the SIM card slot is the lower, smaller opening. Then, reinsert the tray into the device.
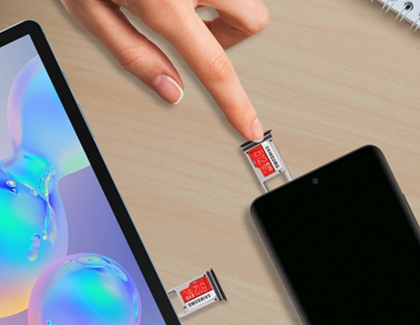
If you have trouble getting the SIM and SD card tray out or it becomes damaged, service may be necessary.
Transfer media to a microSD card
Just insert your microSD card and you can begin transferring your files. You can also use the options in Device care to help clear space.
With your microSD card inserted, navigate to and open the My Files app.
Find the file(s) you want to move, and then touch and hold the file(s).
Tap Move or Copy at the bottom of the screen, and then navigate back to the My Files Home page.
Tap SD card - this will only show up if you have a SD card inserted. Navigate to the folder where you'd like to place the files.
Tap Move here or Copy here and the files will be placed on the SD card.
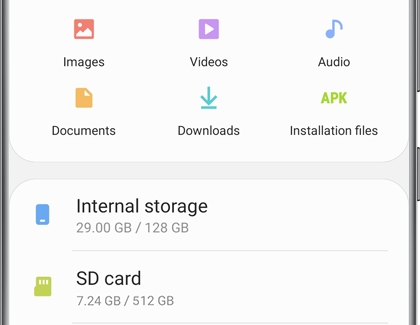
Note: You can only move or copy files this way in the My Files app. You cannot move or copy files to other apps, such as Gallery.
Move apps to microSD card
Before you relocate an app to a new storage location, make sure you have a microSD card inserted. Otherwise, your apps will have nowhere to go.
Note: Many apps are not eligible to be moved to the microSD card.
If you do not see the Change option available, you can't change the app's storage location. For example, preloaded apps cannot be moved.
Navigate to Settings, and then tap Apps.
Swipe to and select the app you want to move.
Tap Storage, and then tap Change. If Change does not appear, this app cannot be moved.
Choose SD card, and then tap Move to change the app's storage location.
If needed, follow the on-screen instructions to complete the move.
Unmount and remove the microSD card
Need to remove the microSD card from your phone or tablet so you can upgrade? No worries, we'll walk you through it. Remember, you must unmount the microSD card before removing it.
Navigate to and open Settings.
Tap Search, and then search for and select Storage.
Tap More options (the three vertical dots), and then tap Storage settings.
Tap Unmount, and then insert the ejector tool into the hole in the SIM and microSD card tray on the top of your phone or tablet. If you have any issues removing or inserting the SIM card tray, service may be necessary. If you need a replacement SIM ejector tool, you may be able to get one from your carrier or an electronics retailer.
Important: Be careful not to insert the ejector tool into any of the microphone or speaker holes along the edge of your device. Look for the outline of the tray to make sure you're in the right place.
When the tray pops out, pull it out of the phone or tablet.
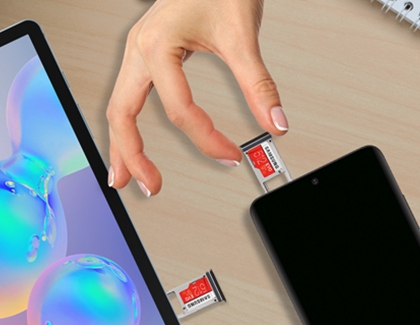
Remove the microSD card from the tray, and then insert the tray back into the device.
If you have trouble getting the SIM and SD card tray out or it becomes damaged, service may be necessary.
Thank you for your feedback!
Thank you for your feedback! Your comment has been submitted.
Continue shopping with Samsung

From $189.99 before trade-in

From $199.99 before trade-in

From $1299.99 before trade-in
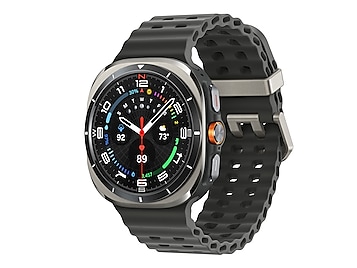

From $449.99 before trade-in


From $1099.99 before trade-in
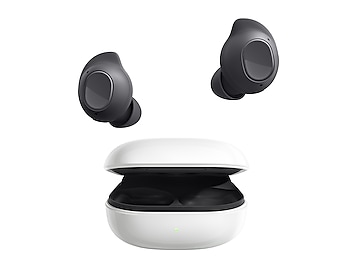

From $64.99


From $299.99
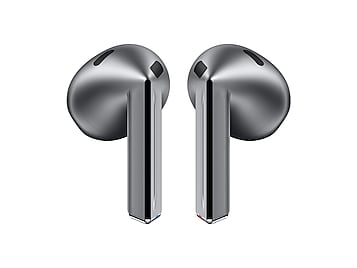

From $139.99 before trade-in
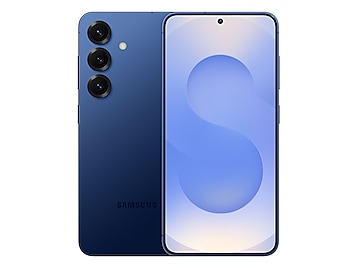

From $799.99 before trade-in

From $999.99 before trade-in

From $999.99 before trade-in


From $1999.99


From $1999.99

From $879.99 before trade-in

From $849 before trade-in
Contact Samsung Support
