Galaxy Store
Download apps
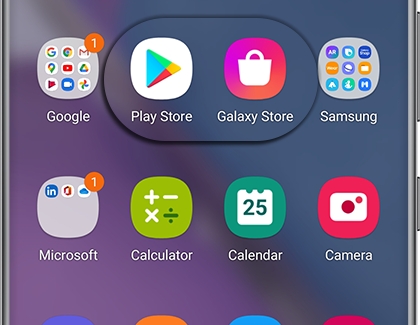
There are two app stores available on Galaxy phones or tablets: the Google Play Store and the Galaxy Store.
The Google Play Store can be found on the Apps screen or inside the Google folder. Meanwhile, the Galaxy Store can be found in the Samsung folder or on the Apps screen.
Pick an app store, and browse through the available apps by using the sort and search options. When you find the app you want to download, tap it, and then tap Install.
Note: Only apps that are compatible with your device are available for download.
Uninstall apps
If you don't need an app anymore, just get rid of it.
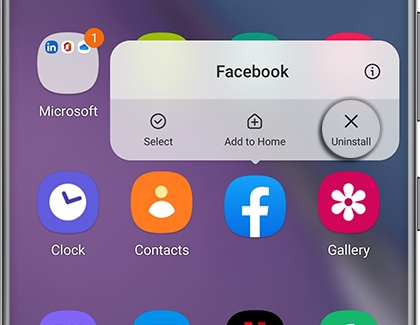
From the Home screen, swipe up or down to access your Apps screen. Touch and hold the app you want to uninstall, and then tap Uninstall.
Note: Some preloaded apps cannot be uninstalled.
Reinstall Galaxy Store apps
If you originally installed the app using the Galaxy Store, open the Galaxy Store, and then tap Menu (the three horizontal lines).
Tap My apps; from the Apps tab, find the missing app and tap the Download icon.
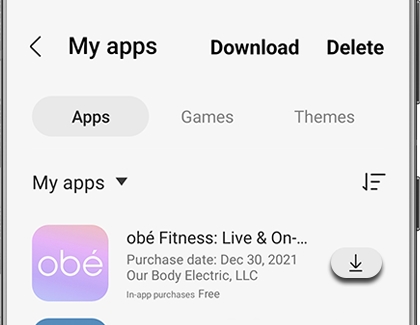
If you want to reinstall a purchased theme, tap the Themes tab at the top, and then tap the Download icon.
Note: Galaxy Themes is not available on Galaxy tablets, only phones.
Set up Game Launcher
Before you get too excited and rush into your game, let's set up the Game Launcher. It should be on by default, but you can always double-check just in case.
From Settings, tap Advanced features, and then tap the switch next to Game Launcher to turn it on if needed.

Next, open the Game Launcher app. It may be on the Apps screen or in the Samsung folder.
Review the information about usage data and then tap Allow.
If desired, you can check off "Show games in Game Launcher only" to hide your gaming apps in the App screen and make them only appear in Game Launcher. Tap Menu (the three horizontal lines), and then tap Settings. Tap Show games apps, and then tap choose your desired option.
Navigate back the main screen in Game Launcher. Tap one of your games to start playing, or explore Game Launcher to see the other options available.
Note: If Game Launcher is not available in the Settings menu, you must install and launch a game first.
Tune your device's performance
Note: Battery power efficiency may vary by game.
With Game Launcher, you can tune the performance level of your games to save battery power. Maybe you're stuck on a long trip with no charger and need to save your battery. Fine tune your gaming performance with a few quick steps:
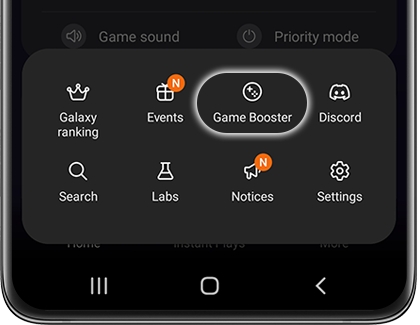
Open Game Launcher, and then tap Menu (the three horizontal lines).
Tap Game Booster to access the Game Booster settings.
Then, tap Game optimization near the bottom of the screen.
From here, you can choose between your desired performance modes: Performance, Standard, or Battery saver.
Change sound settings
Maybe you don't like the music or sounds in that horror game. That's no problem with the Game sound feature. You can easily mute games from Game Launcher instead of fighting with your device's Volume keys.
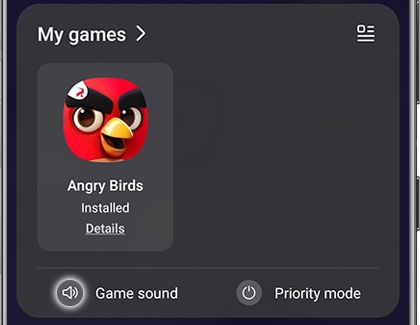
Navigate to and open Game Launcher. Tap Game sound at the bottom of the My Games section to silence all of your gaming apps. To unmute, tap Game sound again.
Samsung AR Zone
Bixby vision opens up a world of Augmented Reality capabilities on your Galaxy phone. Did you ever wonder how you'd look with a rainbow colored beard? Would you like to have a cartoon version of yourself to send as a sticker in a message?
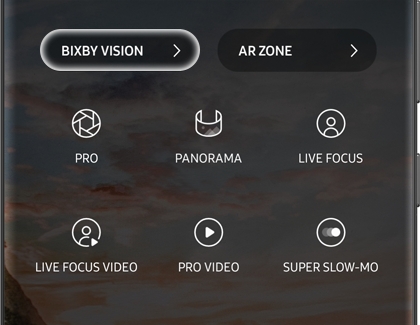
Just open the Camera app and tap MORE. Tap AR Zone to access all the fun and useful features of AR.
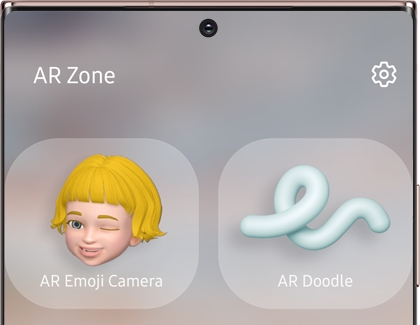
AR Emoji Camera: Create your own AR Emoji, or use one of a number of fun characters and see it react to your motions and expressions. Capture a photo or video to share with friends.
AR Doodle: Record fun videos with virtual handwriting or drawings on faces or anywhere else.
AR Emoji Studio: Create a custom look for your AR Emoji.
AR Emoji Stickers: Create animated stickers you can use in messages, featuring your own AR Emoji.
Deco Pic: Fun filters and stickers for adding that extra punch to your photos and videos.
Picture link: Lets you set an object as an AR marker that can play sounds, show pictures, and more when you point the camera at it.
Quick Measure: Lets you measure objects and distances without having to find a tape measure.
3D Scanner: Only available on the Note10 and S20, the 3D Scanner lets you scan an object and then use the scanned object as a character in your videos.
Note: Additional third-party apps may be available. Available apps may vary based on software version.
Bixby
Your very own virtual assistant, Bixby is at your service. Whether Bixby's reminding you about an appointment or identifying landmarks, Bixby is always there to help with your everyday needs. Go on, say a command and start getting things done the easy way.
Set up and use Bixby Routines
Access Bixby Routines
There are two different ways to access Bixby Routines on your phone:
Navigate to and open Settings, then tap Advanced features, and then tap Bixby Routines.
Or, you can open the Quick settings panels by swiping down from the top of the screen using two fingers. Swipe left, and then touch and hold Bixby Routines.
To make accessing Bixby Routines easier, you can add an icon to your phone's App screen. While in Bixby Routines, tap More options (the three vertical dots), and then tap Settings.
Tap the switch next to "Show Bixby Routines on Apps screen."
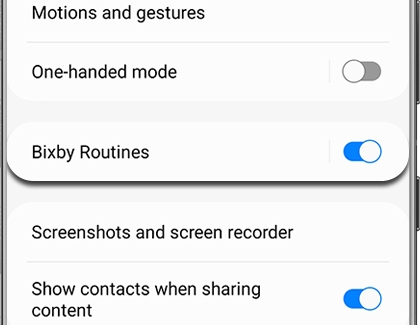
Note: If you do see the Bixby Routines icon in the Quick settings panel, you can easily add it to the panel.
Add common routines
From getting out the door in the morning to getting ready for bed, there’s a Bixby Routine for every part of your day. You can activate recommended routines or make your own:
Navigate to and open Bixby Routines on your phone, and then tap the Discover tab. You’ll see all kinds of routines, from Good morning to Workout.

Tap a routine to customize it – you can change the conditions and some other basic settings.
Tap Edit to customize additional settings to your liking, such as adding more actions.
When you're finished, tap Next. You can set a name for your custom routine, as well as an icon and color that will be displayed in My routines. Then, tap Done.
Create a custom routine
Bixby routines are powerful tools that you can use to customize your experience in very specific ways. You can choose from a wide variety of triggers that can perform almost any task on your phone.
Navigate to and open Bixby Routines, and then tap the Add routine tab.
Tap the picture under If. Tap an item on the list of possible triggers. Each trigger will have additional options and instructions.

Once you've set up the trigger, tap the picture under Then. Tap a category for the action you'd like to perform, and then tap the action you'd like to perform. Many actions will have additional options and settings.
By default Bixby routines will stop the action when the trigger ends, and return any changed settings to their previous state. You can disable this by tapping Reverse these actions and then tapping the switch at the top of the screen.
When your trigger and action are set up, tap Next. You can set a name for your custom routine, as well as an icon and color that will be displayed in My routines. Then, tap Done.
Favorite routines
If you’d like to set a frequently used routine as a favorite, you can do so with the My routines tab. Your favorites will appear at the top of the screen in My routines, and all routines, including your favorites, will be below.
Navigate to and open Bixby Routines, an then tap the My routines tab.
Tap a routine and then tap the Favorite icon (the star) at the bottom.

Tap Back to see your routine listed under Favorites.
You can also check on your completed routines using the History option. Tap More options (the three vertical dots), and then tap History. You’ll see the start and end times for your recent routines, as well as when they were used.
Use Bixby Vision
Access Bixby Vision
Note: When you launch Bixby Vision for the first time, you will be asked to review and accept Terms of Service, Samsung Privacy Policy, and allow permissions.
To help you discover more, Bixby Vision is built into your Camera, Gallery, and Samsung Internet.
Camera: Bixby suggests information based on what’s live in the viewfinder. From the Camera app, tap MORE and then tap BIXBY VISION to use it.
Gallery: If you’ve already taken or downloaded a photo, Bixby can analyze what’s inside it. From the Gallery app, tap your desired image, and then tap the Bixby Vision icon (it looks like an eye).
Samsung Internet: Learn more about pictures by having Bixby analyze what you’re looking at. From the Internet app, tap on and then hold the image you want to view with Bixby Vision, and then tap Search with Bixby Vision.
Use a lens in Bixby Vision
With Bixby, you can look at the world in a new way. The possibilities are endless.
Just open the Camera app, tap MORE, and then tap BIXBY VISION in the top left corner. If it's your first time using Bixby Vision, agree to the Terms of Service and Privacy Policy. Next, agree to the different permissions, and if desired, tap Add to add a shortcut to your phone's Home screen for easier access.
You can now use Bixby Vision inside your phone's Camera app. The search results will show up right away when Bixby scans an image. Simply scroll through the lenses and tap the one you want to use.
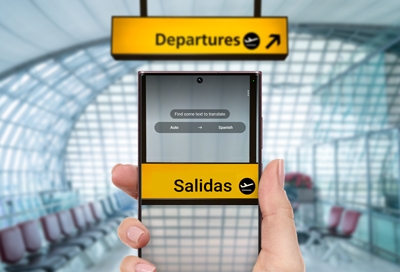
Here are the features available in Bixby Vision:
Wine: See the bottle’s rating or learn more about the vineyard it came from.
Translate: Automatically translate text from another language in the live preview on your screen. You can tap the T icon at the bottom to see the extracted text. Then, select Translate, Copy, Select all, or Search. Please see the next section in this article for more details.
Discover: Point the camera at something and see similar things on Pinterest.
Text: Copy printed text into the clipboard. You can also quickly translate or perform a web search on text that Bixby identifies.
Scene describer: Point the camera at a scene, then tap Capture. Bixby will speak a description of the scene that it sees.
Object identifier: Point the camera at an object and Bixby will tell you what it sees.
Text reader: Point the camera at some text to have it read aloud.
Color detector: Point the camera at an object, and Bixby will tell you what color it is.
Additional lenses are available to assist users with low vision. While using Bixby Vision, tap More options (the vertical three dots) and then tap Settings. Tap Accessibility modes and then tap the switch to turn it on. By default all the lenses will be enabled, but you can select which lenses will be available with the switches.
Note: Available lenses may vary depending on your Bixby Vision software version. The QR code lens can be accessed via the Quick settings panel: swipe down from the top of the screen using two fingers, and then swipe to and tap the Scan QR code icon.
Use Bixby Translate
Maybe you’re learning a new language, or maybe you came across some text that you can’t quite read. Just use the Bixby Translate feature to easily understand what you’re looking at.
Open the Camera app, then tap MORE, and then tap BIXBY VISION.
Swipe to or tap the Translate icon at the bottom of the screen. It looks like the letter A with two arrowed boxes.
Next, tap Auto at the top of the screen. Tap the switch next to Auto detect language to allow Bixby Vision to automatically detect the source language. Or, deselect the switch and tap a language in the list.
Tap Back to return to Bixby Vision's main interface. Next, tap the target language (on the right side), and then tap your desired language. You can also select a language under Recently translated.
Now you’re ready to translate; point the camera at the text and Bixby Vision will provide the translation. You can tap Copy all or Save image as well.
Galaxy Wearable
The Galaxy Wearable app lets you connect your Galaxy watch or other wearables to your phone. Streaming music, receiving notifications, and downloading workout information are just a few of the benefits of connecting with Galaxy Wearable.
Customize Galaxy Themes
Download themes
Themes allow you to apply a design of your choice to your device, from wallpapers and icons to default applications such as Phone, Messages, and Calendar. You can express your personality through the various choices!
From a Home screen, touch and hold an empty area, and then tap Themes.
If it's your first time using Themes, read the information, and then tap Continue or Agree.
Swipe up to view the available themes and then select the one you want to download.
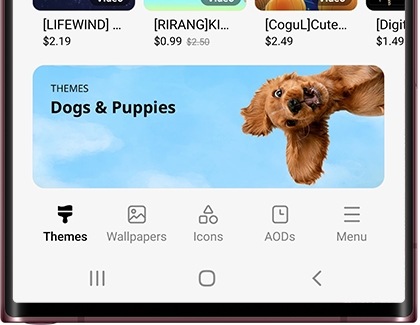
Tap Download if it's a free theme, or tap the price (e.g. $0.99) if it's a paid theme.
Choose between Select payment method or Use discounts. If needed, enter your payment information.
Tap Pay to confirm.
You can also tap Download trial for paid themes if you'd like to test it out first. You can only update a theme if the seller or creator of the theme has released an updated version.
Change your theme
You've had that theme for quite some time. If you want to change your theme and you already have another one downloaded or saved, all you need to do is apply it.
From a Home screen, touch and hold an empty area, and then tap Themes.
To view all your themes, tap Menu (the three horizontal lines), then tap My stuff, and then tap Themes.
Select your desired theme, view the details, and then tap Apply.
If needed, tap Apply one more time to confirm.
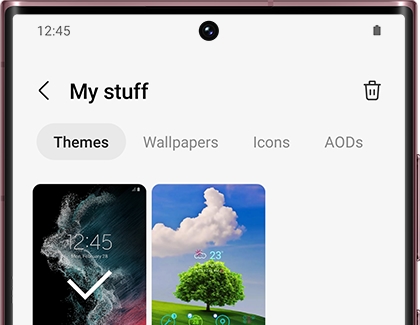
Note: Once you apply a theme, it cannot be undone. You will have to apply the default theme or another theme if you no longer want to use it.
Download icons
Want to show off your passion for your favorite hobby? Try customizing your device by downloading new icons.
From a Home screen, touch and hold an empty area, and then tap Themes.
Tap Icons, swipe up to view the available icons, and then select the one you want to download.
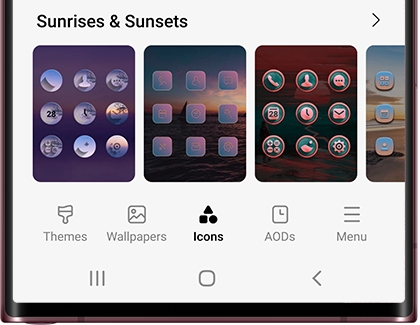
Tap Download if it's a free icon set, or tap the price (e.g. $0.99) if it's a paid icon set.
Choose between Select payment method or Use discounts. If it's your first time using Themes, read the information, and then tap Continue.
Tap Pay to confirm.
Change your icons
Maybe you're a little tired of those icons. If you want to change your icons and already have another set downloaded or saved, just follow these steps to apply it.
From a Home screen, touch and hold an empty area. Tap Themes, and then tap Icons.
To view all of your icons, tap Menu (the three horizontal lines), then tap My stuff, and then tap Icons under My stuff.
Select your desired icons, and then tap Apply.
If needed, tap Apply one more time to confirm.
Delete themes
Oops, you downloaded the wrong theme by mistake. Just delete it; it's no trouble at all.
From a Home screen, touch and hold an empty area, and then tap Themes.
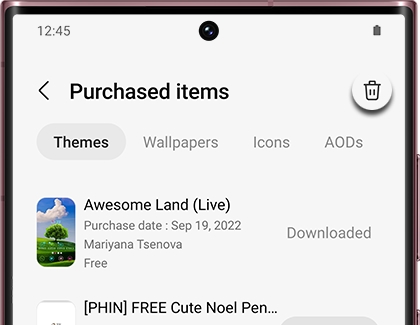
Tap Menu (the three horizontal lines), and then tap Purchased items.
Tap Delete (the trash icon) in the upper right corner and select the theme or themes you'd like to remove.
Tap Delete at the bottom to confirm.
Delete icons
If you change your mind, you can delete icons any time you want.
From a Home screen, touch and hold an empty area, and then tap Themes.
Tap Themes, and then tap Menu (the three horizontal lines).
Tap Purchased items, and then tap Icons.
Tap Delete (the trash icon) in the upper right corner and select the icons you'd like to remove. Tap Delete at the bottom to confirm.
Recover purchased themes
No one wants to pay twice for the same thing. If you connect your device to a Samsung account, you can recover purchased items, even if you purchased them on another device.
From a Home screen, touch and hold an empty area, and then tap Themes.
Tap Menu (the three horizontal lines), and then tap Purchased items.
Tap Download next to the theme you want to recover on your phone. You can repeat this process as many times as needed.
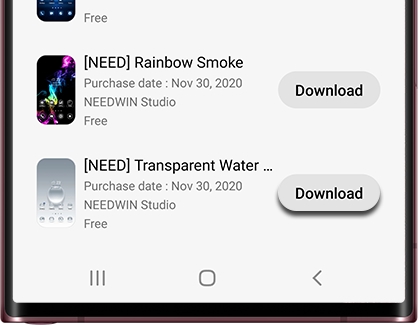
Note: You can recover purchased wallpapers or icons from the same page. Simply use the menu at the top of the screen.
Get started with PENUP
Get the PENUP app
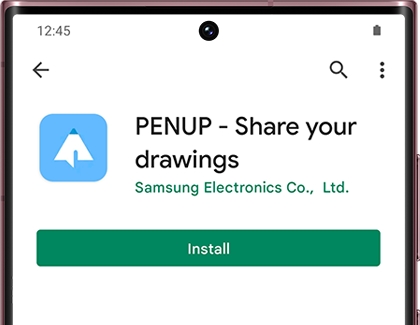
If you don’t already have the PENUP app installed, you can download it from the Galaxy Store or Play Store. Please see the next section for setting up an account with PENUP.
When the app is ready, you can start using coloring tools! Select from options like Water Color, Calligraphy Brush, Air Brush, and Marker Pen to create your own artwork.
Create or sign into a PENUP account
Technically, you don’t need an account to use PENUP, but then you won’t get to use all of the awesome features. We highly recommend creating an account.
Navigate to and open PENUP. If it's your first time using it, agree to the different permissions. Tap More options (the three vertical dots), and then tap Sign in. Choose the type of account you want to sign up with, such as your Samsung account.
If needed, enter that account’s login information, and allow the different permissions. Next, enter your desired username and select artists you are interested in. Then, tap Done at the top of the page.
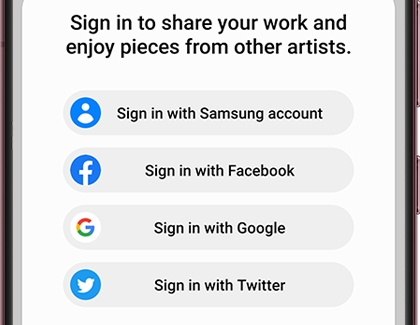
To sign out of your account, tap More options, tap Sign out, and then tap OK.
Samsung Members
When you want instant access to specs, features, support information, and other helpful content, Samsung Members is the app you need. In Samsung Members, you'll also find diagnostics along with engaging articles to help you make the most of your Samsung experience.
Secure Folder
Keep your personal information private with Secure Folder. It creates a secure, encrypted space on your phone that no one can access without a special PIN. It's all thanks to the overlapping defense and security platform, Samsung Knox.
Samsung Health
If you’re training for a marathon or want to go for a casual run, you can keep track of it with Samsung Health. It lets you track your daily activities, meals, and more. Measure your heart rate after a good workout, set goals for yourself, and even speak to a doctor with the virtual consultation feature.
Use Samsung Notes features and settings
Samsung Notes features and settings
If you’ve taken tons of notes on your phone, Samsung Notes may become messy. Don't worry, it has features that will make organizing your notes much easier.
For example, you can place your notes into different categories for simpler navigation. Or, you can search for notes with specific titles or subjects instead of sifting through all of your notes.
Here are some of the most helpful features in Samsung Notes:
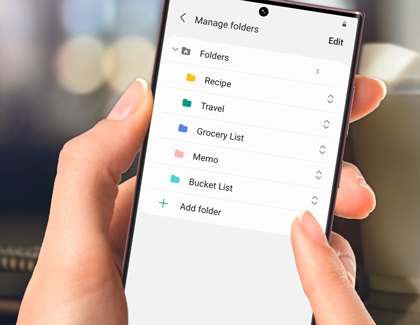
Quick highlight: You can quickly highlight a section of text and select an action. With your S Pen, press and hold a word, and then drag your pen to highlight more text. A list of actions will appear: Cut, Copy, Paste, Dictionary, Show clipboard, and Share.
Note: This feature is only available on the Note series.
Zoom in and out: Simply pinch the screen to zoom in or out.
Note: The amount of Zoom that is supported will vary by device.
The search function: Use this feature to search for and find the exact note you need. Tap the Search icon, and then enter the words you want to search for.
Organize your notes: You can use several different features to organize your notes. Tap More options (the three vertical dots), and then tap Edit. Select your desired notes, and then choose your desired option. You can tap Move to place them in a different folder, tap Share to send them elsewhere, or tap Delete to remove them from your phone.
Lock your notes: If you want to keep some notes private (like your poetry collection), you can lock them. Open your desired note, tap More options (the three vertical dots), and then tap the Lock icon. Next, follow the on-screen prompts to create a password for your note.
Note: If you want to change the password, navigate to Samsung Notes' settings, tap Note unlock methods, and then tap Change password. A Samsung account is required to lock notes.
Sort your notes: You have so many notes, you don't know what's what. To help you figure it out, you can sort them. From the Samsung Notes home screen, tap the Filter icon, and then choose your desired option, such as Date created. You can also change the overall layout of your notes. Tap More options (the three vertical dots), and then tap View to change the layout of how the notes are displayed.
Action icons: This feature creates icons in your handwritten notes. Just tap the different icons to make calls, send emails, solve equations, and go to websites straight from icons. Tap Menu (the three horizontal lines) located at top left, tap the Settings icon, and then tap the switch next to Action icons.
Save your notes
Your notes will be automatically saved in Samsung Notes, but they can also be synchronized with your Samsung account. Or, back up your notes using the different file options available in Samsung Notes. You can also use Samsung Cloud to sync your notes across all of your other Galaxy devices.
Open the Samsung Notes app, then tap Menu (the three horizontal lines), and then tap the Settings icon.
Tap Sync with Samsung account, and then allow the permissions.
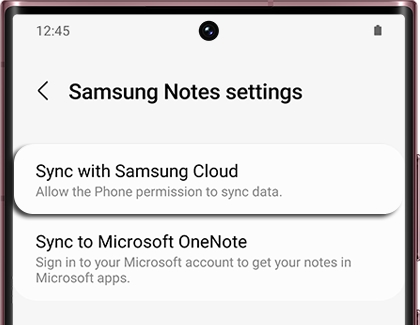
Tap the switch at the top of the page to turn the feature on or off. You can also tap Sync Notes data to choose whether syncing happens through Wi-Fi only or Wi-Fi or mobile data.
If you want to save your note as a different type of file, you have plenty of choices. You can save it as a PDF, Microsoft Word file, a PowerPoint file, an image, or a text file. Select the note that you want to back up, and then tap More options (the three vertical dots). Next, tap Save as file, and then select your desired file format.
Now that your notes are synchronized with your Samsung account, you can also make them available in Microsoft Office by syncing Samsung Notes with Microsoft OneNote!
Import or export data in Samsung Notes
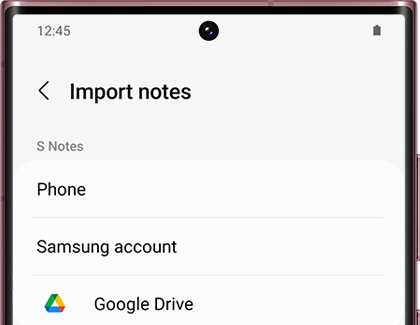
Maybe you have notes saved in Google Drive that aren't showing up in Samsung Notes. No worries, you can easily import them to your phone, so they show up in the app.
To import data to Samsung Notes, open the app, then tap Menu (the three horizontal lines), and then tap the Settings icon. Tap Import notes. Tap the source you want to import from (i.e. Samsung account), and then follow the on-screen prompts.
You can also import and export PDFs in Samsung Notes! You won't be able to edit the PDFs, but you can draw on them or annotate them in the app.
Update Samsung Notes
You should always make sure to keep Samsung Notes updated, in case any new note-taking features are added.
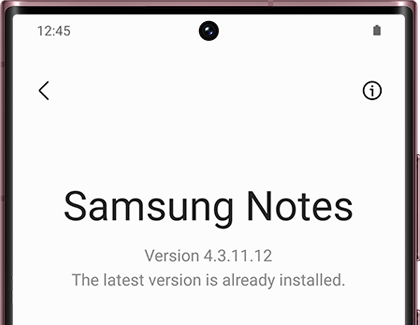
In the app, tap Menu (the three horizontal lines), and then tap the Settings icon. Tap About Samsung Notes, and then tap Update if one is available.
You can enable automatic updates from the Galaxy Store and Google Play Store to keep Samsung Notes always up-to-date.
Manage note styles, templates, and folders
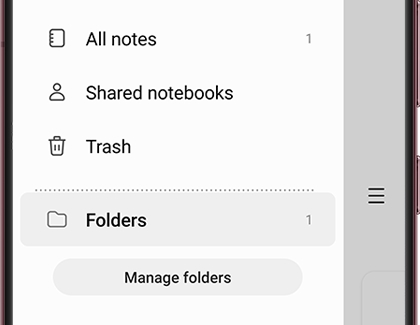
You should keep your notes in Samsung Notes nice and tidy, so you'll always be able to locate what you need. The app comes with several different ways to organize and style your notes.
Place all your related notes in the same folder or give them the same template to keep them consistent.
Share your notes
Did you draw a cute picture or write down important meeting details in Samsung Notes? You can send it as different file types to yourself, a friend, or a coworker right from the app. For example, you can email the work notes as a Word doc or PDF!
Open the Samsung Notes app, then select your desired note, and then tap More options (the three vertical dots).
Tap the Share icon, and then choose your desired file type. You can choose between Samsung Notes file, PDF file, Microsoft Word file, Microsoft PowerPoint file, Image file, and Text file.
After you’ve selected the file type, select your preferred sharing method, such as text message, email, and so on. Next, send the file the way you normally would.
Note: Some files cannot be sent through certain sharing options. Make sure you’ve selected an appropriate sharing method for the file type.
Use handwriting functions
You can write in Samsung Notes using an S Pen! Just take out your S Pen on a compatible phone and begin creating a note in the app. Your handwriting can also be edited and converted to text. If the S Pen isn’t your thing, you can still use the keyboard or even your finger to write notes.
Samsung Pass
Imagine not having to enter your password every time you need to log in. Samsung Pass uses biometric data like your fingerprint or iris to authenticate your identity. No more memorizing all those different IDs and passwords for each site.
Samsung Pay
There's a reason Samsung Pay is the most accepted mobile payment. With it, you can enjoy a streamlined payment process, exclusive deals, and rewards. Samsung Pay also lets you conveniently keep all your cards (including gift and membership) in one place for easy access.
Set up the SmartThings app
If you haven't installed SmartThings yet, download it from the Play Store first.
You will need to use your Samsung account to access SmartThings. If you don’t currently have an account, you can create one.
When you're ready, navigate to and open SmartThings on your phone.
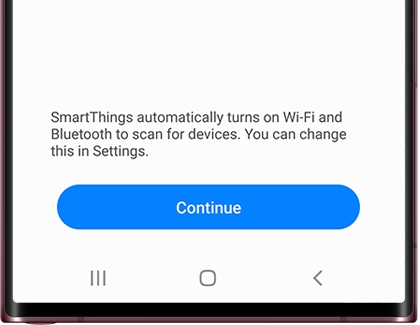
If it's your first time using it, review the information, tap Continue, and then tap Continue again.
Next, allow the different permissions.
Now that SmartThings is set up, you can start adding devices. To learn about SmartThings' other features, see the other sections.
Navigate SmartThings
SmartThings has various features to help organize devices and improve your overall experience. We know that all of these terms can be a little overwhelming at first, so here’s a breakdown of what they all mean:
Device: This is where you can view, control, edit, or delete any devices you’ve added to SmartThings.
Rooms: Lets you organize your devices into individual rooms so you can better manage the layout of your smart home.
Scenes: Lets you send different commands to multiple devices simultaneously.
Routines: Create routines where your devices will automatically activate at a specified time.
Favorites: Keep your commonly used devices, automations, SmartApps, services, and so on all in one place for easy access.
Lighting groups: Add multiple lightbulbs or lights to a group so they can all turn on at the same time.
Life: Access and use different services that will help make your life a little easier, such as SmartThings Find or SmartThings Monitor.
SmartApps: Use preconfigured routines for a wide range of purposes. For example, you can set up a routine where you'll get alerts when severe weather is in your area.
Members: Lets you add other people who can view or control your connected devices.
History: View activity and events that recently occurred, such as when an automation is triggered.
Notifications: View and adjust notifications for SmartThings and your connected devices.
Android Auto: Control SmartThings from your car. You can choose up to 6 items to control.
Companion apps: Connect to other compatible apps, such as Calendar, and use them in conjunction with SmartThings.
Voice assistant: Choose a voice assistant, such as Bixby, to control your devices.
Labs: Try out experimental features, such as Galaxy Upscale, Gentle wake-up, Offline Diagnosis, and more!
Mall: View and purchase Samsung accessories that are compatible with SmartThings!
Customize a Home screen
You can reorganize your location’s Home screens, so it’s easier to control and keep track of your smart devices and rooms. For example, maybe you aren’t really using devices in a certain room but don’t want to delete them. In that case, you can just temporarily hide the room from the Home screen.
Check out our guide on SmartThings Home screens to learn how to do this and more.
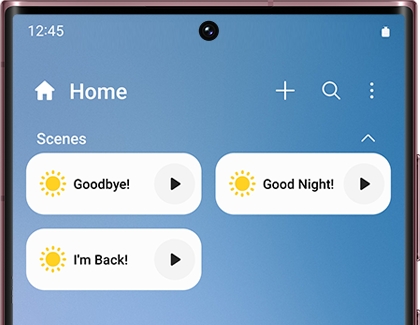
Adjust settings in the app
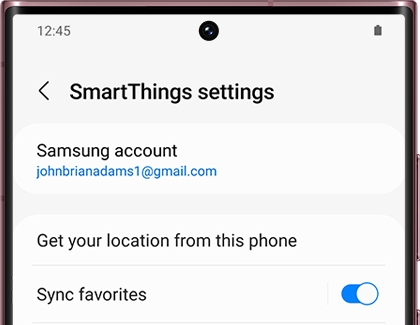
Besides just your devices’ settings, the SmartThings app also has general settings that you can adjust to customize your experience. For instance, you can make Bluetooth turn on automatically whenever you open the app, so your devices will connect instantly. You can also customize your linked services, such as Google, or make your phone undetectable for privacy reasons.
Check out our guide on SmartThings settings to start changing things to suit your preferences.
Thank you for your feedback!
Thank you for your feedback! Your comment has been submitted.
Continue shopping with Samsung

From $209.99 before trade-in

From $1459.99 before trade-in
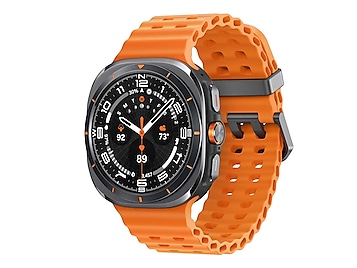

From $419.99 before trade-in
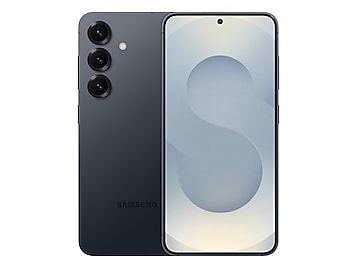

From $779.99 before trade-in
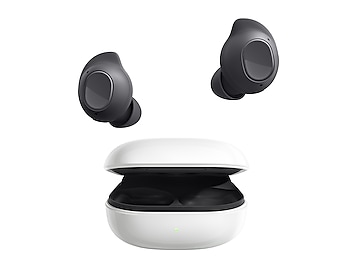

From $69.99
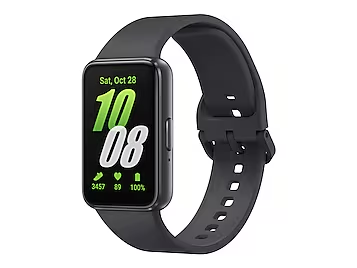

From $49.99 before trade-in
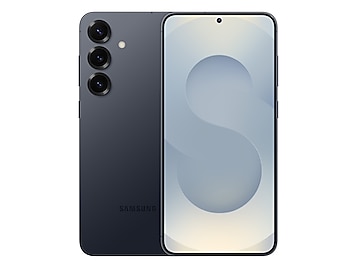

From $999.99 before trade-in
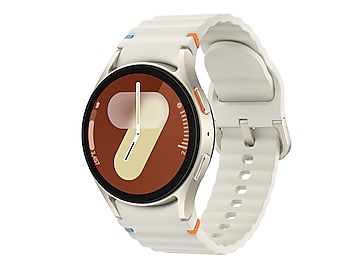

From $239.99 before trade-in
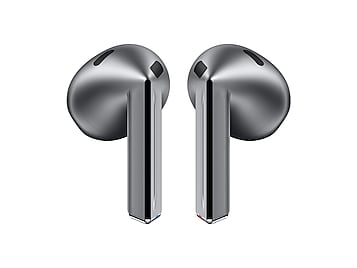

From $179.99 before trade-in
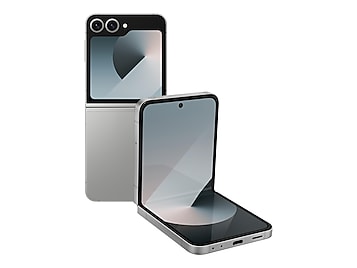

From $949.99 before trade-in

From $1199.99 before trade-in


From $169.99

From $999.99 before trade-in

From $549


From $1899
Contact Samsung Support
