Gallery

Friends looking at photos on phone outside

View and edit pictures and videos

If you spent an hour trying to take that perfect selfie or video, you can look back at your hard work by viewing it in Gallery.

  1. Navigate to and open Gallery, and then tap the Pictures tab. To search for a specific picture or video, tap the Search icon in the upper right corner. You can search by its tag, album name, or other details.

    Pictures taken Today in the Gallery app
  2. On newer devices, there is an option to group similar-looking pictures together. When this happens, not all of your images will appear in the Picture tab; instead, you'll see a small number (i.e., 2, 3, or so on) in the corner of some image thumbnails. Tap the thumbnail to view the images that have been grouped together.

  3. If you do not wish to use this feature and would like all your pictures to display, simply tap the Group similar images icon at the top of the screen (it looks like a square).

  4. Once you've found your desired photo or video, tap the thumbnail to view it. Tap More options (the three vertical dots) to be given additional options. You can view the file's details, print a photo, set an image as your background, and more!

  5. If you'd like to edit a photo or video, navigate to and select it. Tap Edit (the pencil icon), and then use the available tools to adjust the photo or video:

    • To rotate horizontally or vertically, tap the Rotate icon (the circular arrow).

      Editing options for photos in the Gallery app
    • To flip horizontally (mirror it), tap the Flip icon (the line and two arrows).

    • To change the aspect ratio, tap the Aspect ratio icon (it should say "Free"), and then choose your desired option. You can also rotate the photo or video up to 45 degrees by moving the slider in either direction.

    • To adjust the perspective, tap the Perspective icon (it looks like a window). Choose either Horizontal or Vertical, and then use the slider to change the perspective.

    • To select a certain portion of the picture, tap the Lasso icon (it looks like a dotted circle). Use the different tools to draw and select your desired portion of the picture. This is not available when editing videos.

    • To add filters, tap the Filter icon (it looks like three circles). Choose your preferred filter from the default options. Or, tap My filters to create a new filter or apply one you've created in the past.

    • To adjust the brightness and other lighting settings, tap the Brightness icon (it looks like a sun). From here, you can adjust the light balance, contrast, saturation, and more. 

    • To draw, add stickers, or write text, tap the Smiley face icon. Use the provided options to decorate the picture or video. While drawing, you can undo or redo edits by tapping the Undo or Redo icons.

    • To access even more editing options, tap More options (the three vertical dots) in the lower right-hand corner. Here you can use the Object eraser, Color mix, and other helpful options. 

  6. If you are unsatisfied with the edits you made, tap Revert to undo all of them.

  7. To save your edits over the existing picture or video, tap Save in the upper right-hand corner. If you'd like to save a new picture or video with the edits and keep the original, tap More options (the three vertical dots), and then tap Save as copy.

    Note: If you tap Back while editing, a popup will appear and ask if you'd like to save or discard your changes.

Video brightness

Your Galaxy device has an amazing screen, so make the most of it! The Video enhancer feature works with most streaming apps to give you bright, vibrant color.

From Settings, tap Advanced features and then tap Video brightness. Select Normal or Bright

If you select Bright, a list of compatible apps will appear. You can select which app(s) are automatically enhanced by tapping the switch(es).

Normal chosen under Video brightness

Delete pictures and videos

Your friend photobombed an otherwise great picture or video. Delete their prank in just a few steps.

  1. From Gallery, tap Albums, and then tap your desired album.

  2. Touch and hold the thumbnail of the photo(s) or video(s) you want to delete. Tap Delete, and then tap Move to Trash to confirm.

  3. If you want to permanently delete images or videos from the Trash, open Gallery, and then tap Menu (the three horizontal lines) at the bottom.

  4. Tap Trash, and then tap More options (the three vertical dots). Tap Empty, and then tap Delete.

Delete highlighted on a Galaxy phone

Take a screenshot

Use button combinations

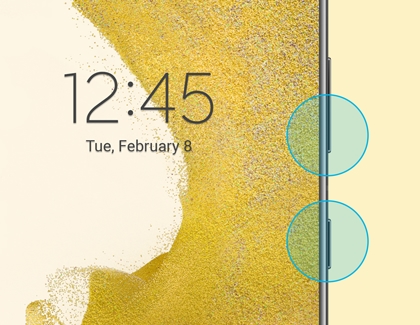
No matter what phone or tablet you have, the steps for taking a screenshot are similar, but it does vary slightly based on the model. Before you take one, you'll need to locate the Power and Volume down keys.

Usually, the Volume keys are on the left side and the Power button (or Side key) is on the right. However, for some models, the keys' locations may be reversed. Or, all the keys could be on the same side!

When you want to take a screenshot, just hold the Volume down key and the Power key (Side key) simultaneously. The screen will flash, indicating that a screenshot was captured.

Volume down and Power key highlighted on the S21 Ultra

Certain tablets may have a physical Home key instead. You can press and hold the Power and Home keys simultaneously to take a screenshot.

Use palm swipe

Note: This function may not be available on all Galaxy devices. The Galaxy Tab S6 Lite does not support Palm swipe to capture due to a hardware limitation. However, you can use the tablet keys or the Air command menu to take a screenshot instead. You can then view and share your screenshot in the Gallery app.

Wait, there's another way to take a screenshot. On some devices, you can use Palm swipe to take a screenshot without even pressing a button.

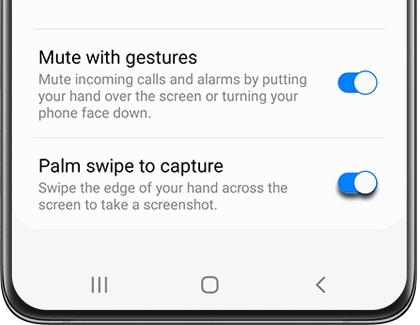
From Settings, search for and select Palm swipe to capture. Then, tap the switch next to Palm swipe to capture. Now you'll be able to take a screenshot just by swiping the edge of your hand across your phone's screen.

Switch highlighted next to Palm swipe to capture

Use your voice

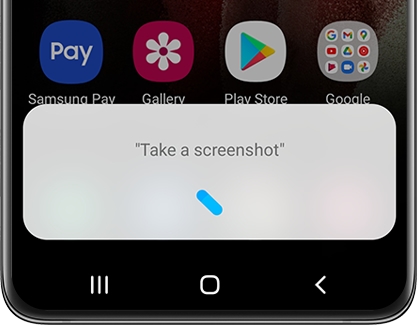
If you have Bixby Voice or Google Assistant set up, you can take a screenshot with a simple voice command. Say "Hey Bixby, take a screenshot," and Bixby will capture what's on your screen.

You can even string together complex commands and say "Hey Bixby, take a screenshot, and share on Twitter."

"Take a screenshot" displayed in a pop-up bubble

Use the S Pen

If you’re always using an S Pen with a compatible phone or tablet, why not take a screenshot with it as well? The S Pen's Screen write feature can easily snap a quick screenshot of whatever you're doing.

Remove your S Pen from your device, and then navigate to the screen you'd like to capture. With your S Pen, tap the Air command menu icon, and then tap Screen write. Your device will automatically take a screenshot of the page you're on. Use the controls to write or draw on the screenshot if you'd like. When you're done, tap the Save icon to store the screenshot in Gallery.

You can also use your S Pen to capture parts of an image with Smart Select.

Screen write options displayed on a screenshot

Use the Tasks Edge panel

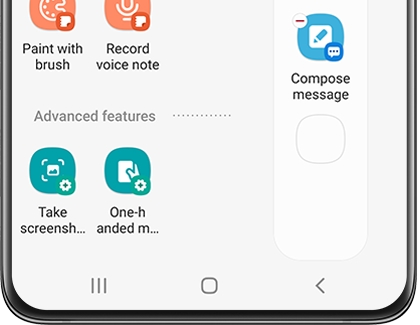
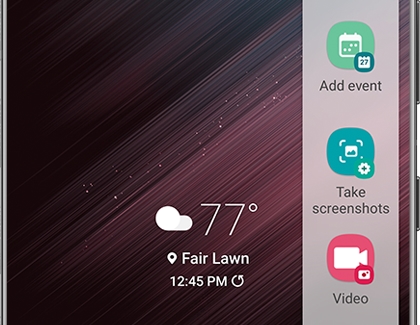
Your device's Edge panel can also help you out when taking a screenshot. You’ll just need to add the Tasks Edge panel and the Take screenshot shortcut.

  1. Open the panel by swiping left on the Edge panel handle on the right side of the screen.

  2. Tap the Settings icon at the bottom, and then swipe to and tap the Tasks panel to select it.

  3. Tap Edit under the panel. Your preferred shortcuts will appear on the right side; swipe to and tap Take screenshots on the left side to add this to your shortcuts.

    Note: The Take screenshots shortcut may be automatically added.

    List of tasks with icons on a Galaxy phone
  4. You can also select or deselect additional shortcuts if desired. To remove a shortcut, tap the red minus icon.

    Note: You cannot add more than twelve shortcuts.

  5. Tap Back twice to view your Home screen, and then navigate to a screen you’d like to capture. 

  6. Swipe left on the Edge panel handle again to open it. Swipe left a second time to view the Tasks panel.

    List of tasks on the Tasks panel with a Galaxy phone
  7. Next, tap Take screenshot. Your device will take a screenshot of the current screen. Now, you can easily use this shortcut whenever you need to capture your screen!

Screen recorder

Record your screen

Note: Screen recorder will not record phone, VOIP calls, or video calls. Additionally, some apps may block the screen recorder feature due to copyright restrictions. Availability of some features will vary by model and software version.

Instead of using a third-party app, record your screen on Galaxy phones with Screen recorder. Record anything that’s displayed on your screen! You can even use the front camera to record yourself during the video.

  1. Open the Quick settings panel by swiping down from the top of the screen with two fingers. Then, tap Screen recorder.

    Note: If the Screen recorder icon is not there, you can add it to the Quick settings panel.

    Screen recorder icon highlighted on a Galaxy phone
  2. Choose your desired option, such as No sound, Media sounds, or Media sounds and mic, and then tap Start recording.

  3. Once the countdown finishes, your phone will start recording whatever’s on the screen.

  4. On devices that support it, you can add yourself to the video using the front-facing camera. Just tap the Front camera icon – it looks like a person icon. A small window will appear in the upper left corner and will record everything you do.

    Screen recorder panel with front camera on a Galaxy phone

    Note: The Galaxy Tab A8 does not support front camera recording with Screen recorder.

  5. For extra fun, you can also write on the screen while it’s recording. Tap the Pencil icon, select your desired color, and then use your finger or S Pen to write on the screen. However, you cannot interact with games, videos, or navigational options while you’re writing on the screen.

  6. Tap the Pencil icon again to stop drawing. Once you turn off the Pencil feature, the screen will go back to normal and you can continue recording regularly.

  7. When you’re done recording, tap the Stop icon. The video will be saved in Gallery. However, some screen recordings can only be accessed by opening the My Files app, tapping Internal storage, and then tapping the DCIM folder.

Access Screen recorder settings

Note: Availablilty of some settings will vary based on model and software version.

Do you want the video quality to be a higher resolution? No worries, you can easily adjust this and other settings to make your video perfect.

Open the Quick settings panel by swiping down from the top of the screen with two fingers. Then, touch and hold Screen recorder to opens its settings page.

Note: If the icon isn't there, you can add it to the Quick settings panel.

A list of Screen recorder settings on a Galaxy phone

Swipe up on the settings page to see the available options listed under Screen recorder:

  • Sound: Select what sounds the video will record. You can choose between No sound, Media sounds, or Media sounds and mic.

  • Video quality: Choose your desired quality for videos. The available options are 1080p, 720p, and 480p.

  • Selfie video size: Adjust the size of the popup window when you’re recording yourself using the front camera on devices that support the front camera when recording the screen.

    Note: The Galaxy Tab A8 does not support front camera recording with Screen recorder.

  • Show taps and touches: Small dots will appear whenever you touch or tap the screen while recording.

Share pictures and videos

If you want to send some new photos or videos to your friends, you can use Nearby Share, Quick Share, or Private Share. These features will let you send your images and videos directly to a compatible phone or tablet without opening any additional apps.

You can also use the Sharing panel to share your images and videos to your favorite apps, such as Instagram or Facebook.

  1. To begin, open Gallery and select the photo or video you’d like to share.

  2. Then, tap the Share icon at the bottom of the screen.

  3. Select your desired app and then follow the on-screen instructions to share your image or video.

Share icon highlighted on a Galaxy phone

Group similar images

With so many photos and videos, your Gallery can get a little disorganized. Just create an album to get rid of the clutter.

  1. From Gallery, tap the Albums tab, tap More options (the three vertical dots), and then tap Create album.

    Create album popup message
  2. Enter the desired name for your new album, and then tap Create.

  3. To add pictures or videos to your new album, tap the album. Tap Add items, and then tap the Pictures tab.

  4. Select the pictures or videos you want to add, and then tap Done.

  5. Then, choose how you’d like to move the pictures or videos by selecting Copy or Move.

samsung logo action minus
Contact us
We're here for you.
Was this content helpful?
We're here for you

Contact Samsung Support

Contact us online through chat and get support from an expert on your computer, mobile device or tablet. Support is also available on your mobile device through the Samsung Members App.
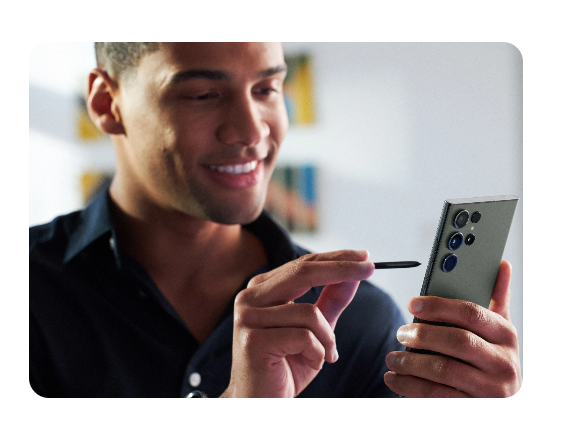
Table of contents