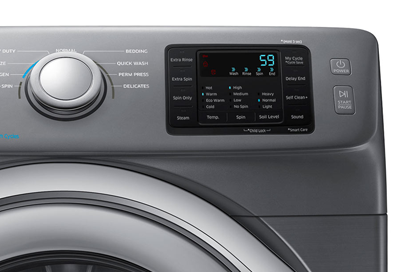
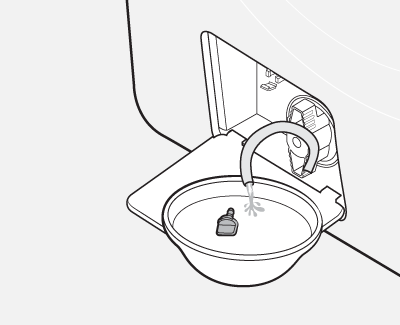
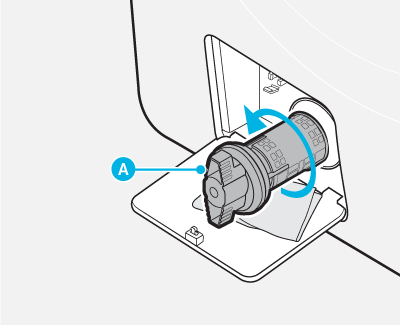
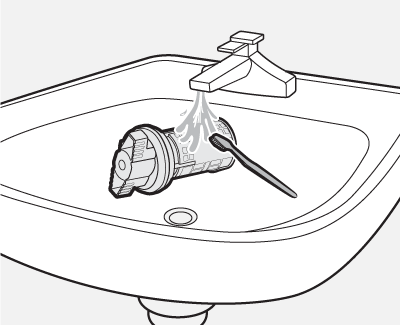
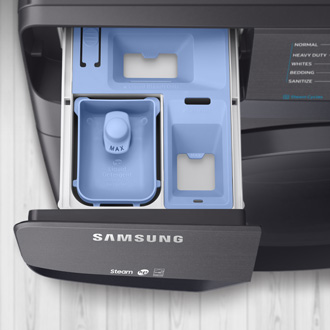
Samsung washing machine spins poorly

If the washer is unbalanced, it won't want to spin at high speeds, and this could take the form of spinning slowly, stopping mid-cycle, or throwing an error. Long cycle times or soaking wet clothes also indicate poor spinning performance. Here are the steps to correct your washer's balance and get spinning again.
Samsung washing machine and dryer mid cycle Samsung washing machine and dryer mid cycle

Samsung washing machine spins poorly

Note

Is your washer spinning at all?


The troubleshooting here is relevant if your washer is spinning (or at least it started to spin) but there's some issue with how it spins, such as it stopping mid-cycle. If your washer never even starts to spin at all, see our washer does not spin guide instead, as it has less troubleshooting steps to perform and could save you some time.

Checkpoint

Check your washing machine load size, and the cycle you are using

1
Check the load size and weight.
Check the size and weight of the load. A small load is 3-5 pounds (or 1/3 full), and a large load is 6-16 pounds (or 3/4 full). Just remember, one pair of jeans weighs about one pound. Check our laundry load size guide for more details.
2
Make sure the laundry is distributed evenly.

Under certain conditions, your laundry will not evenly distribute within the drum, which can cause imbalance as too much weight collects on one side.


  • Small loads: Small loads tend to collect together to one side, leaving the other side empty, which creates a weight imbalance. Add more to the load to balance it, or reduce the spin speed.
  • Large items: When washing bed sheets, blankets, or other large items that absorb a lot of water, they can become tangled and then cause unbalanced loads. In this case, manually redistribute the load to even out the weight distribution. Reducing the spin speed can also be helpful. (Do not wash floor mats, pillows, or dog houses.)
3
Match what is being washed to the correct cycle.
Each wash cycle is designed to wash specific fabric types and soil levels. Matching the cycle and type of laundry will result in the best performance. Choosing the wrong cycle for your laundry can cause errors, bad performance, or both. Our guide, washer cycles, settings, and features includes a list of every available wash cycle and when they should be used.
Did this resolve your issue?
If this didn’t resolve your issue, please click on “No” for more help.
Yes No
We’re happy to hear that your problem has been resolved.

Make sure the washing machine is level

Note

Level the pedestal first.


When using a pedestal or riser, it should be leveled first before the washer is installed on top.

1
Check the floor and surrounding space.

Before you begin the process of leveling, make sure to have one inch of separation between the washer and dryer and from any wall.


You'll also want to make sure the floor is stable and free from damage. A slippery floor can disturb the balance of the washing machine.

2
Gently slide the washer into position.

Excessive force may damage the leveling feet.

3
Try to rock and wobble the washer.

The washer should have a solid and firm connection at all four corners. If one corner wobbles, first shorten the legs of all the other corners. If they're already as short as they can be, then the wobbly corner's leg should be lengthened.

4
Release the locking nuts (front load only).

Use a flat blade screwdriver to loosen the locking nut of the legs you'll be adjusting.

5
Adjust legs and repeat the previous steps as needed.
Note

How many legs?


All front load washers have four adjustable legs. Some top load washers do too, while other top load models only have two or three adjustable legs, in which case the remaining legs are not adjustable.

Turn the adjustable legs clockwise to raise that corner of the washer, and counterclockwise to lower that corner of the washer.


Continue to make adjustments and repeat the previous steps until the washer is level. As you're making adjustments, keep in mind that the shorter you can keep the legs, the more stable the washer will be. Make sure that all feet are making contact with the floor.

6
Tighten the locking nuts (front load only).

Just like before, use a flat blade screwdriver to tighten the locking nut up against the washer.

7
Run a test cycle.

Run the washer with a small load of laundry to determine that it does not shake or vibrate when the washer spins. If it does, continue to adjust the legs until it does not.

Did this resolve your issue?
If this didn’t resolve your issue, please click on “No” for more help.
Yes No
We’re happy to hear that your problem has been resolved.

Clean the washing machine pump filter (front load only)

Note

Only front load models have pump filters.


If your model is not a front loader or does not have a pump filter, skip to the next checkpoint.


What does this have to do with a spin issue?


Before the washer spins, it tries to drain. If it's unable to drain, it never moves to the spin step. Since the pump filter should be cleaned routinely (about once a month or 40 washes, whichever is more frequent), we'll check this first.


If you've recently cleaned your pump filter within the last month and within the last 40 washes, you can skip to the next checkpoint. Otherwise you should take the time to clean it now.

1
Locate and open the pump filter.

To begin, open the pump filter door panel by pressing on the cover.

Location of the pump filter on Samsung Washer

2
Prepare to drain the water.

Locate the rubber drain hose and prepare to drain the water. You will need a towel and a container large enough for the amount of water in the washer, like an oil drain pan.


3
Remove the cap and drain the water.

Remove the cap from the drain hose by holding the hose and twisting the cap. The cap can be tough to remove because it forms an airtight seal, so make sure to use a little elbow grease. Once the cap is removed, drain the water.

Illustration of draining the water

4
Fully remove the pump filter.

Once all the water is drained, remove the washer pump filter by twisting it counter-clockwise.

On some Samsung washers, the washer pump filter (A) is similar to the cap on a medicine bottle. Push in and twist it to remove the cap.

Illustration of washer pump filter being removed

5
Clean the pump filter.

Using a small toothbrush or other similar soft bristle brush, wash any dirt or other materials from the pump filter. Inspect the drain pump impeller (located inside the pump filter housing) to make sure it is clean.

Illustration of pump filter being cleaned

6
Reinsert the pump filter.
Once the pump filter is clean, reinsert it and twist it clockwise until it's secured in the vertical position.
7
Reattach the pump filter's drain hose.
Place the pump filter's drain hose's cap firmly back on and secure the drain hose in the mounted clip before closing the panel.
Did this resolve your issue?
If this didn’t resolve your issue, please click on “No” for more help.
Yes No
We’re happy to hear that your problem has been resolved.

Make sure the washing machine's drain hose is installed correctly

Important

What if my washer's been installed for a long time and hasn't had an issue?


Issues caused by an incorrectly installed drain hose are not always experienced immediately after installation; they can be something that build up over time before reaching a point severe enough to cause drain or spin issues. The drain hose should still be checked even if installation was not recent.

1
Check that it's inserted between 6-8 inches.

The drain hose must be inserted into the drain pipe at least 6 inches, and no more than 8 inches. Use the hose guide included with the washer to help, and then once the drain hose is in place, secure it with a zip tie so it will not slip down farther.


If the drain hose is more than 8 inches deep, it creates a siphoning effect which will cause issues with the washer. If the drain hose is inserted less than 6 inches, it may fall out which will cause water to spill all over the floor.

Washer Drain Hose Guidelines

2
Make sure the drain hose does not form an airtight connection.

An airtight connection creates a vacuum or suction effect that also causes siphoning.

3
Measure and confirm the height of the drain hose.

Most homes will already have the correct measurements, but it is good to check anyway to be sure. The drain hose should be positioned at least 18 inches high and no more than 96 inches high. You should not use a drain hose extension kit.


These requirements are different if a sink is being used. The drain hose should be positioned at least 24 inches high for sinks and no higher than 35 inches.

4
Inspect the drain hose for damage, kinks, or bends.

The hose should run smoothly from the washer to the home's drainage system. Anywhere that it is bent or pinched can cause leaks or draining issues.


If the drain hose is damaged, request service.

5
Confirm the drain hose holder is installed.
Caution

Do not remove the drain hose screw


Do not remove the screw on the back of the washer that holds the drain hose against the washer. If the screw has been removed, screw it and the holder back in with any screw that fits. If the holder is missing, service is required.

It may be tempting to unscrew this clamp holding the drain hose to the back of the washer, especially if the drain hose doesn't quite reach as far as you want it to. However, removing this may cause the washer to drain automatically and give an LC or 4C error code.

Did this resolve your issue?
If this didn’t resolve your issue, please click on “No” for more help.
Yes No
We’re happy to hear that your problem has been resolved.

Run calibration mode on your washing machine

1
Remove everything from your washer.

Double check that there are no items left in the drum, such as socks.

2
Simultaneously press and hold Temp. and Delay End for 3 seconds until Cb appears on the display.

On some models, you do this while the washer is already on. On other models, you start with the washer off, hold the two buttons, and then touch Power to turn on the washer while holding the buttons.


Either way, if you're successful, Cb appears on the display and you can let go.


Temp. and Delay End is the most common button combination, but if that doesn't work or you don't have those buttons, check your user manual for instructions specific to your model. If your user manual does not cover Calibration Mode, then your model doesn't have it.

3
Press Start/Pause.

The tub will then rotate back and forth (the duration varies between 1 and 3 minutes), display EnEnd, or 0, and then turn off. The washer is now calibrated.

Did this resolve your issue?
If this didn’t resolve your issue, please click on “No” for more help.
Yes No
We’re happy to hear that your problem has been resolved.

Request Service

1
Request service.
If the tub did not spin when attempting Calibration Mode, visit our Support Center to request service.
Did this resolve your issue?
If this didn’t resolve your issue, please click on “No” for more help.
Yes No
We’re happy to hear that your problem has been resolved.
Was this content helpful?
We're here for you

Contact Samsung Support

Contact us online through chat and get support from an expert on your computer, mobile device or tablet. Support is also available on your mobile device through the Samsung Members App.
auto-contact_us-pc-2x auto-contact_us-pc-2x