Get ready to start using your new Galaxy phone

Getting a new phone can be very exciting, but also overwhelming and confusing. This guide is designed to teach you the basics of using a Galaxy phone, such as turning on the phone and making calls. We also cover navigation and keyboard settings, so you’ll become an expert quickly.
Galaxy S22 Ultra and a Galaxy S22 Galaxy S22 Ultra and a Galaxy S22

Get ready to start using your new Galaxy phone

Activate mobile service or SIM

Woman talking on the phone with her Galaxy S22 Ultra


If you’re looking to activate your new Galaxy phone, you will need to go through your carrier. We recommend contacting them for activation information and any questions you may have regarding your mobile service. You can check out our SIM card guide for instructions on using your SIM card, inserting and removing the card, and the type of card sizes that are available.

Read less

Turn your device on and off

Important
Do not use the device if the body is cracked or broken. Use the device only after it has been repaired.

You can use the Side button (which also acts as the Power button) to turn your device on and off, as well as restart it. Please see below for directions.

The Side button on the Galaxy S22 Ultra

  • To power on: Press and hold the Side button to turn the device on.
  • To power off: Press and hold the Side and Volume down buttons at the same time, and tap Power off. Tap Power off again to confirm.
  • To restart: Press and hold the Side and Volume down buttons at the same time, and tap Restart. Tap Restart again to confirm.


To learn more about powering off your device, swipe down from the top of the screen to open the Quick settings panel, and then tap the Settings icon. Tap Advanced features, then tap Side button, and then tap How to power off your phone.

Read less

Set up voicemail

Note
The options vary by carrier, but you can usually access your voicemail through the Phone app. Please contact your carrier for additional questions and information.

You can set up your voicemail service when you access it for the first time.

  1. Open the Phone app, and then touch and hold 1 or tap Voicemail.
    The number one button highlighted in the Phone app
  2. Follow the tutorial to create a password, record a greeting, and record your name.

You can also use visual voicemail.

  1. While the Phone app is open, tap the Visual Voicemail icon (it looks like an envelope), and then review the information.
  2. Tap Continue, and then allow the necessary permissions.
  3. Review the Visual Voicemail welcome message, and then tap Continue. Follow the prompts to set up your voicemail.
Read less

Lock or unlock your device

Use your device’s screen lock features to secure your device. It is recommended that you secure your device using a secure screen lock (Pattern, PIN, or Password). This is necessary to set up and enable biometric locks. By default, the device locks automatically when the screen times out.

  1. From Settings, tap Lock screen and AOD, tap Screen lock type, and then select a screen lock type (Pattern, PIN, or Password).
    List of Screen lock types such as PIN, Password, Pattern, and Swipe
  2. Follow the on-screen instructions to set up the screen lock.
  3. After you’ve set the lock, configure your desired Lock screen notifications. Then, tap Done.
  4. You can configure additional options from the Lock screen page:
    • Extend Unlock: Keep your device unlocked when trusted locations or other devices have been detected. A secure screen lock is required for this feature.
    • Secure lock settings: Customize your secure lock settings. A secure screen lock is required for this feature.
    • Touch and hold to edit: Touch and hold your Lock screen to edit it.
    • Always On Display: Enable the Always On Display screen.
    • Roaming clock: Show your home time zone and the current time while you're roaming.
    • Widgets: Select the widgets that will appear on the Always On Display screen.
Read less

Use the Phone app for calls

The Phone app allows you to make and answer calls from the Home screen, Recents tab, Contacts, and more. Contact your carrier for more information. The actual appearance of the Phone app screen varies by carrier.

Make a call

  • Using the keypad: From the Phone app, enter a number on the keypad and tap Call. Tap the Keypad tab if the keypad is not displayed.
  • Make a call from Recents: From the Phone app, tap Recents to display a list of recent calls. Select a contact, and then tap Call.
  • Make a call from Contacts: From the Contacts tab in the Phone app, select a contact, and then tap Call. You can also do this from the Contacts app.

Answer, decline, or end a call


When a call is received, the phone rings and the caller’s phone number or name will display. If you are using an app when a call comes in, a pop-up screen will display. You can easily answer or decline an incoming call using the provided options on the call screen or pop-up menu.

  • Answer a call: On the incoming call screen, drag or tap the Answer icon to answer the call.
  • Decline a call: On the incoming call screen, drag or tap Decline to reject the call and send it to your voicemail.
  • Decline a call with a message: You can choose to decline an incoming call with a text message response. On the incoming call screen, drag Send message upward and select a message, such as “I can’t talk right now.”
  • End a conversation: Tap End call when you are ready to hang up.

Actions while you’re on a call


You can adjust the call volume, switch to a headset or speaker, and even multitask while on a call.

  • Adjust volume: Press the Volume keys to increase or decrease the volume.
  • Switch to headset or speaker: Listen to the call using the speaker or through a Bluetooth headset (not included). Tap the Speaker icon to hear the caller using the speaker or tap the Bluetooth icon to hear the caller using a connected Bluetooth headset.
  • Multitask: If you exit the call screen to use another app, your active call is indicated in the Status bar.
    • To return to the call screen: Drag the Status bar down to display the Notification panel and tap the call.
    • To end a call while multitasking: Drag the Status bar down to display the Notification panel, and then tap End call.
  • Place a call on hold: Tap More options (the three vertical dots) and then tap Hold call. When you're ready to resume the call, just tap RESUME CALL on the phone screen.

Call log


The numbers of the calls you have dialed, received, or missed are stored in the Call log. From the Phone app, tap Recents. A list of recent calls will display. If the caller is in your Contacts list, the caller’s name is displayed.

Save a contact from a recent call


Use recent call information to create a contact or update your Contacts list.

  1. From the Phone app, tap Recents.
  2. Tap the call that contains the information that you want to save to your Contacts list, and tap Add to contacts.
  3. Tap Create new contact or Update existing contact.
  4. Enter the necessary information to create or edit the contact.
  5. Tap Save to confirm.

Delete call records


If your Call log is getting really long, you can delete some past records from it. You can also select multiple calls and delete them all at once.

  1. From the Phone app, tap the Recents tab.
  2. Touch and hold the call you want to delete from the Call log. Tap Delete to confirm.

Block a number


By adding a caller to your Block list, future calls from this number are sent directly to your voicemail, and messages are not received.

  1. From the Phone app, tap the Recents tab.
  2. Tap the caller you want to add to the Block list.
  3. Tap the Details icon, then tap Block, and then confirm when prompted.

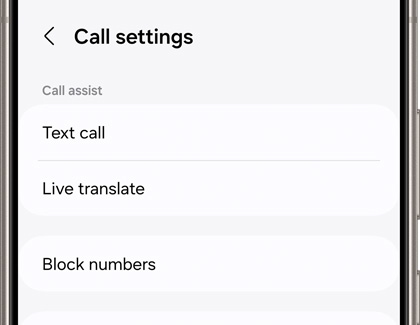
    Note: You can also modify your Block list in Settings. From the Phone app, tap More options (the three vertical dots), tap Settings, and tap Block numbers.

Speed dial


This feature lets you assign a contact to a number on your phone’s keypad (such as 2, 3, etc.). You can then dial the number by holding down the designated number on the keypad.

  1. From the Phone app, tap Keypad, tap More options (the three vertical dots), and then tap Speed dial numbers. The Speed dial number screen displays the reserved speed dial numbers.
  2. Tap an unassigned number.
    • Tap the drop-down menu (the downward arrow) to select a different Speed dial number than the next one in the sequence (such as 3, 4, etc.).
    • Number 1 is reserved for Voicemail.
  3. Type in a name or number, or tap Add from Contacts (the person icon) to assign a contact to the number.
    • The selected contact is displayed in the Speed dial number box.

Make a call with Speed dial


You can make a call using Speed dial. From the Phone app, touch and hold the assigned Speed dial number in the keypad (such as 2, 3, etc.). If the Speed dial number is more than one digit long, enter the first digits, and then hold the last digit.

Remove a Speed dial number


If desired, you can remove an assigned Speed dial number. You can always assign another number to that shortcut later on.

  1. From the Phone app, tap More options (the three vertical dots), and then tap Speed dial numbers.
  2. Tap the Delete icon (the red minus sign) by the contact you want to remove from Speed dial.

Emergency calls


You can dial the emergency telephone number in your region regardless of the phone’s service status. If your phone is not activated, you can only make an emergency call.

  1. From the Phone app, enter the emergency telephone number (911 in North America) and tap Call.
  2. Complete your call. During this type of call, you have access to most in-call features.

    Note: The emergency telephone number can be dialed even if the phone is locked, allowing anyone to use your phone to call for help in an emergency. When accessed from a locked screen, only the emergency calling feature is accessible to the caller. The rest of the phone remains secured.

Phone settings

Call settings screen displaying Text call, Live translate, and Block numbers


These settings allow you to modify settings associated with the Phone app. From the Phone app, tap More options (the three vertical dots), and then tap Settings.

Place a multi-party call


You can add another number to a phone call while the call is in progress. Options vary by carrier.

  1. From the active call, tap Add call (the plus sign) to dial the second call.
  2. Dial the new number and tap Call. When the call is answered:
    • Tap Swap to switch between the two calls.
    • Tap the On hold number to switch between the two calls.
    • Tap Merge to hear both callers at once (multi-conferencing).

Video calls


Video calls use your phone's cameras to record, so you and the recipient can talk and see each other in real time!

  1. Open the Phone app, enter a number, and then tap Google Meet call or Video call.
  2. Not all devices support video calling. The receiver has the option to accept the video call or answer the call as a regular voice call.

Real Time Text (RTT)


Type back and forth in real time with the other person while on a call. You can use RTT whenever you are calling someone whose phone also supports RTT or is connected to a teletypewriter (TTY) device. The RTT icon appears on all incoming RTT calls.

  1. From the Phone app, tap More options (the three vertical dots), and then tap Settings.
  2. Tap Real Time Text for the following options:
    • RTT call button: Choose a visibility option for the RTT call button, such as Always visible, which displays the RTT call button on the keypad and during calls.
    • Use external TTY keyboard: Hide the RTT keyboard when an external TTY keyboard is connected.
    • TTY mode: Choose the preferred TTY mode for the keyboard in use.

Call display while using apps


When calls are received while using other apps, they can be displayed as pop-ups. However, you can change this setting to match your preferences.


From the Phone app, tap More options (the three vertical dots), then tap Settings, and then tap Call display while using apps. The following options are available:

  • Full screen: Display an incoming call in the full screen Phone app.
  • Small pop-up: Display an incoming call as a pop-up at the top of the screen.
  • Mini pop-up: Display an incoming call as a smaller pop-up.
  • Keep calls in pop-up: Enable this option to keep calls in the pop-up after they are answered.
Read less

Use the on-screen keyboard

When you need to type something, text can be entered using a keyboard or your voice.

Toolbar


The toolbar provides quick access to features of the keyboard. Options may vary by carrier. Some options can always be displayed at the top of the keyboard. You can also tap Expand toolbar (the three horizontal dots) for even more options. If you'd like to customize your toolbar, just tap and hold an icon, and drag it to where you'd like it to appear.


Note: Some options will be limited by context. For example, you won't be able to insert an AR Emoji in a Google search box. You may also need to download an additional app for some options like Spotify or Bitmoji.

  • Emojis: Insert an emoji.
  • Expression: Select emojis, GIFs, AR emojis, and more.
  • GIFs: Add animated GIFs.
  • Voice input: Use Samsung voice input.
  • Settings: Access keyboard settings.
  • Handwriting: Use your handwriting to enter text. This feature is only available on phones that support the S Pen.
  • Search: Locate specific words or phrases in your conversations.
  • Translate: Type words or sentences to translate them into another language.
  • Samsung Pass: Use biometrics for secure access to apps and services.
  • Spotify: Add music from Spotify.
  • YouTube: Add videos from YouTube.
  • Clipboard: Access the clipboard.
  • Text editing: Use an editing panel to help pinpoint text that you want to cut, copy, and paste.
  • Keyboard size: Adjust the height and width of the keyboard.
  • Bitmoji: Create your own personal emoji and use it in stickers.
  • AR Emoji: Create your own personal emoji and use it in stickers you can share.
  • Mojitok: Create your own stickers or insert automatically suggested ones.
  • Writing assist: Use Galaxy AI-generated prompts and assistance.

Configure the Samsung keyboard


You can set customized options for the Samsung keyboard. From the Samsung keyboard, tap Settings (the gear icon) for the following options:

  • Languages and types: Set the keyboard type and choose which languages are available on the keyboard. To switch between languages, swipe the Space bar left or right.
  • Smart typing
    • Writing assist: Use Galaxy AI-generated prompts and assistance.
    • Predictive text: See suggested words and phrases as you type.
    • Suggest emojis: Include emojis when using predictive text.
    • Suggest stickers while typing: View recommended stickers while you are typing.
    • Auto replace: Automatically replace what you type with predictive text recommendations.
    • Suggest text corrections: Underline potential grammar errors in green and suggest corrections.
    • Text shortcuts: Create shortcuts for frequently used phrases that will be suggested when you type the shortcut. For example, you can have your email address suggested every time you type "email".
    • More typing options: Customize additional typing options. You can automatically capitalize sentences, insert a space when you use predictive text, add a period when you tap the spacebar twice, or enable text prediction for all supported input languages.
  • Style and layout
    • Keyboard toolbar: View or hide the keyboard toolbar.
    • High contrast keyboard: Adjust the size of the Samsung keyboard and change its colors to increase the contrast between the keys and the background.
    • Theme: Choose a theme for your keyboard.
    • Mode: Choose how the keyboard appears in Portrait and Landscape view. The standard keyboard stretches across the full width of the screen, a one-handed keyboard is smaller so you can easily reach it with the same hand that is holding your phone, the split keyboard makes it easier to type two-handed in landscape view, and a floating keyboard can be positioned anywhere you'd like.
    • Size and transparency: Adjust the size and transparency of the keyboard.
    • Layout: Display numbers and special characters on the keyboard.
    • Font size: Drag the slider to adjust the font size.
    • Custom symbols: Change the symbol shortcuts on the keyboard.
  • Other settings
    • Voice input: Select your desired Voice input.
    • Swipe, touch, and feedback: Customize gestures and feedback.
    • Handwriting: Customize handwriting options (this may not be available on all devices).
    • Translation: Select a translation provider.
    • S Pen to text: Use your S Pen to write in search fields, address bars, and other text areas.
    • Save screenshots to clipboard: Your device will save your screenshots to your clipboard.
    • Select third-party content to use: Enable third-party keyboard features.
    • Reset to default settings: Return the keyboard to its original settings and clear personalized data.
    • About Samsung Keyboard: View the software version and legal information for the Samsung Keyboard.
    • Contact us: Contact Samsung Support through Samsung Members (if supported by your carrier).

Use Samsung voice input


Instead of manually typing with the keyboard, you can enter text by speaking.

  1. From the Samsung keyboard, tap Voice input (the microphone icon) and say what you’d like to type.
  2. To set customized options for Samsung voice input, tap the Settings icon on the keyboard, and then tap Voice input. The following options are available:
    Settings icon highlighted on the top of the keyboard
    • Voice input type: Select your desired voice input, such as Samsung or Google.
    • Install offline language pack: Download a language pack.
    • Keyboard language: Choose the language for the keyboard.
    • Voice input language: Select the language for Samsung voice input.
    • Hide offensive words: Hide potentially offensive words with asterisks.
Read less

Navigate your phone with gestures

Your phone’s touch screen responds best to a light touch from the pad of your finger or a capacitive stylus. Using excessive force or a metallic object on the touch screen may damage the surface of the screen, and the damage will not be covered by the warranty. Read the information below to learn about the different ways to navigate your phone and the gestures that are used.

Tap


Lightly touch items (like apps) to select or launch them.

  • Tap an item to select it.
  • Double tap an image to zoom in or out.

Drag and drop


Touch and hold an item, and then move it to a new location.

  • Drag an app shortcut to add it to a Home screen.
  • Drag a widget to place it in a new location.

Swipe


Lightly drag your finger across the screen.

  • Swipe the screen to unlock the device.
  • Swipe to navigate through Home screens or menu options.

Touch and hold


Touch and hold items to activate them.

  • Touch and hold an app to display a pop-up menu of options.
  • Touch and hold a Home screen to customize the Home screen.

Zoom in and out


Bring your thumb and forefinger together or apart on the screen to zoom in and out.

  • Move your thumb and forefinger together on the screen to zoom out.
  • Move your thumb and forefinger apart on the screen to zoom in.
Read less

Transfer phone data with Smart Switch

You can transfer data from your old phone to your new Galaxy phone using Samsung Smart Switch. Transfers can be done wirelessly or by using a USB cable.


A wireless transfer is quick and lets you keep the devices plugged into their chargers during the transfer.

  1. First, make sure the Smart Switch app is installed on both devices, and plug them into their chargers.
  2. When you're ready, place the devices within 4 inches of each other.
  3. Launch Smart Switch on both devices. Open Settings, search for and select Smart Switch, and then tap Bring data from old device. Tap Bring data from old device again.

    Note: Alternatively, you can navigate to the Samsung folder on the Apps screen, and open Smart Switch from there.
  4. On the old device, tap Send data, and then tap Wireless.
  5. On your new device, tap Receive data, tap Galaxy/Android, and then tap Wireless.
  6. Next, complete the connection by tapping Allow on the old device. On your new device, choose the content you want to move, and then tap Transfer. Once the transfer is complete, tap Close on the new device and you’ll be good to go.
Note
If you use Smart Switch via a USB OTG connection, make sure your devices are at least 20% charged to ensure a safe data transfer. The transfer may take a while, depending on the volume of multimedia data. It is recommended to fully charge your devices before beginning the transfer.

A wired transfer is best if you don't have a lot of data on your old device. This is because wired transfers don't allow you to keep your devices connected to a charger during the transfer. If you have a lot of data to transfer, we recommend performing a wireless transfer instead.

  1. Connect the devices with the old device’s USB cable. Most cables will require you to use a USB-OTG adapter. If you have an iPhone with a Lightning to USB-C or an Android with a USB-C to USB-C cable, then you won't need an adapter; it will plug right into your new phone.
  2. Launch Smart Switch on both devices. On the new device, open Settings, search for and select Smart Switch, and then tap Bring data from old device. Tap Bring data from old device again.

    Note: Alternatively, you can navigate to the Samsung folder on the Apps screen, and open Smart Switch from there.
  3. On the old device, tap Send data, and then tap Cable.
  4. On the new device, tap Receive data, select the type of device you're transferring from (Galaxy/Android), and then tap Cable. Smart Switch will begin scanning the old device for transferrable content.
  5. After the scan, select the data you want transferred to the new device. An estimate of the transfer time will be displayed. If the transfer will take more than an hour, you may want to use a wireless transfer so both devices can be charged during the transfer. 
  6. When you are ready to start, tap Transfer.
  7. When finished, tap Done on the new device, and tap Close on the old device.
Read less
Was this content helpful?
We're here for you

Contact Samsung Support

Contact us online through chat and get support from an expert on your computer, mobile device or tablet. Support is also available on your mobile device through the Samsung Members App.
auto-contact_us-pc-2x auto-contact_us-pc-2x