Install your Samsung gas or electric range

A range is one of the most important appliances in your kitchen. Getting it installed properly will ensure you're equipped to prepare warm, delicious meals for your family for many years to come. We provide a thorough installation manual for every range model that covers all the important details, but this guide will help you choose the right Samsung range, prepare for its arrival, and give you tips for how to get the most out of your range.
Samsung electric range in a modern kitchen

Install your Samsung gas or electric range

Select a range

Samsung ranges come in a variety of options so that you can find one that fits right into your kitchen. You need to decide between slide-in or freestanding, as well as choosing what features you want to have. There are ranges that have steam clean, air fry, convection, and even ovens that connect to SmartThings so you can keep track of cooking times.

Space requirements


Your kitchen more than likely already has an established spot for the range, but you need to make sure there is enough space for it, as well as a wide enough path to get it to its final location. The dimensions and requirements for the range you buy will vary depending on the model you choose. The installation guides for our ranges are available on our website and provide detailed instructions as well as the specific dimensions. We highly recommend consulting the installation guide for your model to find specific information, but here are some things to keep in mind for any range:

  • Make sure the cabinets, wall covering, and countertops around the range can withstand heat up to 194°F (90°C).
  • There needs to be a minimum of 30 inches clearance between the top of the cooking surface and the bottom of an unprotected wood or metal cabinet. 24 inches clearance if the bottom of the cabinet is protected by no less than 1/4 inch flame retardant millboard covered with at least no. 28 MSG sheet steel, 0.015 inch stainless steel, 0.024 inch of aluminum, or 0.020 inch of copper.
  • There also needs to be a minimum of 15 inches clearance between the adjacent countertops on either side of the range and the adjacent cabinet bottoms.
  • Cabinet storage space above the cooking surface should be avoided to eliminate the need to reach over the heated surface. If you do have cabinet storage above the range, installing a range hood, or over-the-counter microwave that projects horizontally a minimum of 5 inches beyond the bottom of the cabinets can reduce the risk of burns.
  • If you are also installing a range hood, you can refer to our guide for installing a range hood.

Electric vs Gas


If you already have a gas line installed in your kitchen, you can easily go with a new gas range or switch from gas to electric. If you do not have an existing gas line and would like to switch to gas from electric, we recommend reaching out to your local gas company to ask about getting a gas line installed. These are the requirements for both gas and electric to help you decide:

Electric

  • Electric ranges need to be plugged into a 3-wire or 4-wire, single-phase A.C. 208Y/120V or 240/120V, 60Hz electrical system.
  • The power cord is not included with your range. If your home was built before the year 1996, you probably have a 3-prong range outlet, and will need a 3-prong power cord. Otherwise, you will need a 4-prong range cord. Your installer may be able to provide a cord, but confirm ahead of time so you are prepared.
  • A range cord rated at 40 amps with 125/250 minimum volt range is required. A 50 amp range cord is not recommended but if used, it should be marked for use with nominal 1 and 3/8 inches diameter connection openings. Care should be taken to center the cable and strain relief within the knockout hole to keep the edge from damaging the cable. Because range terminals are not accessible after the range is in position, flexible service conduit or cord must be used.
  • There are wiring diagrams for both 3 and 4-prong power cords included in the installation manual for your electric range.

Gas

  • Use only natural or LP (liquid propane) gasses. The range is designed to be used with natural gas. Please consult your gas supplier to have it converted to work with LP.
    Gas range cooktop
  • Gas ranges need to be plugged into a 120V, 60Hz AC outlet with a 20-amp circuit breaker or time delay-delay fuse and include a power cord.
  • The installation manual for your gas range contains specific details.
Read less

Delivery, installation, and haul-away options

You have delivery options when you purchase from Samsung. You can choose basic delivery or delivery with installation, which also gives you the option of “haul away.” Haul away means they will also remove and dispose of your old range.

Delivery only

  • The range will be delivered to your home, unboxed, and then moved to the room of your choice. If you have stairs in your home, please be aware the deliverers will only move the range a maximum of three flights of stairs.
  • Inspection of unit and confirmation of correct model.
  • Removal of packaging if requested during delivery.

Delivery and Installation

  • The range will be delivered to your home, unboxed, and then moved to the room of your choice. If you have stairs in your home, please be aware the deliverers will only move the range a maximum of three flights of stairs.
  • Installation of range, including replacing connectors with new parts, gas connectors for gas ranges, MIP fittings, and a 3 or 4-prong power cord.
  • Plugging in the range and confirming it is fully functional.
  • Leveling the new range.
  • Removal of the packaging.

Haul away


Haul away includes the removal of the old range. It must be emptied of any personal belongings beforehand.


Other retailers may have similar delivery, installation, and haul away options, but you will need to confirm their options with them when you purchase your new range.

Read less

Prepare for your new range

Now that you've decided on your new range, it's time to get ready for its arrival.

  1. If you have an electric range, you could unplug it and gently slide it out prior to the new range's delivery to clean the space under and behind it.
  2. If you have a gas range, you need to turn off the gas flow to the supply line before you can disconnect it. There should be a shutoff valve relatively close to your range or to the whole kitchen. You may want to discuss this with your gas provider to ensure that all safety measures are taken. Also, you will need to disconnect your gas line from your range and place a cap on the line until the new range arrives.
  3. Make sure you have a clear path to your kitchen for delivery of your new range. Check the dimensions of the model you purchased so you can determine which door will work best for bringing it inside, and make sure there is nothing in the way so it will be as easy as possible to get the range into place. This also includes making sure there is nothing in the pathway to the kitchen.
  4. Have a plan for what to do with your old range. Your delivery service more than likely offers a haul away option. If not, you will need to look into your local waste options and rules for proper disposal. If your old range still works, you may be able to donate it to a local charity. Some charities can even pick it up for you.
Read less

Install and set up the range

Your range is here, and it's time to install it. This section includes an overview of many things you need to get your range installed, but you should still refer to your user manual for specific details on your range.

Tools needed

  • Drill
  • Adjustable wrench
  • Pliers
  • 1/4 inch nut driver
  • Phillips screwdriver and flat screwdriver
  • Pencil and ruler
  • Level
  • For electric ranges: A 4 or 3-wire power cord (depending on your home and the outlet) and a strain relief (only for conduit installation).
  • For gas ranges: If you are installing the gas line for the first time, additional materials will be needed and are outlined in the installation manual for your gas range. Gas line installation is not covered in this guide.


The initial installation steps will differ if your range is gas or electric. For instance, a gas range will need to be connected to your home’s main gas supply, and an electric range will need to be supplied with proper voltage. It is recommended to contact a qualified electrician when installing an electric range.

  1. Unpack your range and its components, making sure to remove all packaging materials. Don't forget to check inside for packaging materials as well.
  2. For a gas range, the main gas supply valve should have already been shut off before disconnecting the previous range and should remain turned off until the new hookup is complete. Refer to your gas range's installation manual for the proper method of connecting the gas line as it may vary from model to model.

    Note: Do not forget to relight the pilot for other gas appliances when the gas is turned on again.
  3. For an electric range, you need to install the power cord. The installation will vary slightly depending on whether you need a 3-prong or 4-prong cord and the model of your range, so we recommend referring to your range's installation manual for this step.
  4. Install the anti-tip bracket. The bracket and its screws are included with your range.
  5. Plug in the range’s power cord and then slide the range into place. Make sure the range has fully slid into the anti-tip bracket.
  6. Using a wrench, raise or lower the leveling legs to ensure the range is level with the floor. Turning the legs clockwise will raise the range, and turning the legs counterclockwise will lower the range.
  7. For a gas range, assemble the surface burners, and then check the ignition and flame quality.
Read less

Do more with your range

The following articles will help you maintain your range, connect your range to the SmartThings app, and cook with your range.

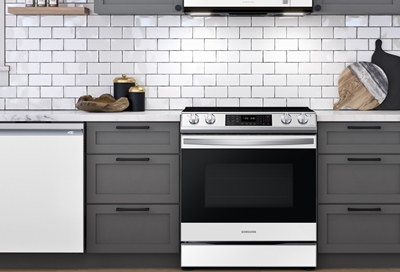
Take care of your range

Clean your oven: Your oven comes with a Self Clean cycle to handle all of the heavy work. After that, all that's left is cleaning the racks and the exterior.

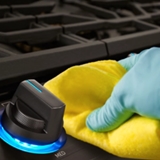
Clean your gas cooktop: There may be a lot of parts to your gas cooktop, but with the right plan, routine care will be easy.

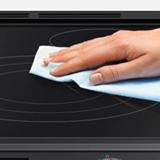
Clean your electric cooktop: This guide will explain everything you need to do (or avoid doing) to keep the glass cooktop looking pristine.

Connect your range


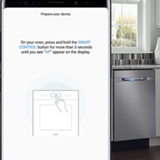
Connect to SmartThings: Use your range's Smart Control feature in the SmartThings app to monitor and control your gas or electric range.


Update the firmware: Your range can connect to the internet and receive firmware updates to fix and prevent issues without ever needing a visit from a service technician.


Use SmartThings Cooking: If you’re wondering what to make for dinner, just let SmartThings Cooking help you out. It’s available in the SmartThings app and has tons of unique recipes.

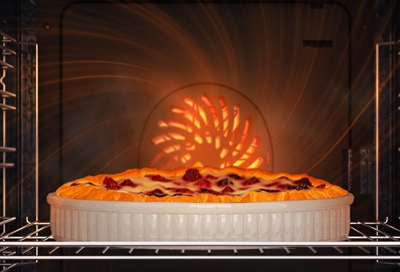
Cook with your range


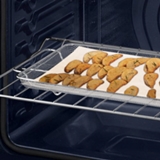
Use Air Fry mode: The Air Fry feature is ideal for cooking your favorite crispy foods like French fries and chicken wings.


Use Flex Duo: Flex Duo (aka Twin mode) on your wall oven or range lets you use different settings for the upper and lower compartments.


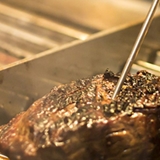
Use the temperature probe: Your oven comes with a temperature probe that tells you when meat has reached the internal temperature you want.

Read less
Was this content helpful?
We're here for you

Contact Samsung Support

Contact us online through chat and get support from an expert on your computer, mobile device or tablet. Support is also available on your mobile device through the Samsung Members App.
auto-contact_us-pc-2x auto-contact_us-pc-2x