Samsung dryer setup and installation

Whether you are thinking of buying, or have already purchased a new dryer or washer and dryer set, there is a lot to think about and prepare for before it arrives. You’ll need to consider the dimensions to make sure you have enough room, not just in your laundry space, but also in your doorways and pathways. You will also need to decide if you need a stacking kit or a new power cord, and how to remove and dispose of the old dryer. Be sure to review all the information in this guide to ensure the transition to your new appliance is as smooth as possible.


Note: Please refer to your model’s user manual for additional instructions and information. You can also check out our guide for setting up a new washer.

A Samsung washer in a laundry room A Samsung washer in a laundry room

Samsung dryer setup and installation

Select a dryer that fits

A nice laundry room missing a Samsung washer

Samsung dryers come in a variety of options so that you can find one to match your existing washer or home decor. They also have dryers with different features, like steam. Our steam dryers take water from the washer’s cold water supply to add mist or steam to select dryer cycles.

Space requirements


Whether your dryer is going to be placed in a basement, laundry room, garage, etc., you need to make sure there is enough space for it, as well as enough room to get it to its location.


  • Make sure you have at least a 4 inch clearance behind the dryer for the vent. If your washer has a different clearance requirement, use the higher clearance value for both appliances.
  • Make sure there is enough space at the front of the dryer for loading it. If it is being installed in a laundry closet or alcove with a washer, you must have two unobstructed air openings for a combined, minimum total area of 72 square inches.
  • You need to have at least a 1 inch clearance on the sides and top of the dryer.
  • Many of our dryers can be installed on top of a compatible washer. To do this, you will need a stacking kit, which is available on our website. Since the height of the washers and dryers vary, it is best to check their dimensions to get an idea of how much clearance you will need from the top to the bottom. However, you still need 4 inches behind, 1 inch on both sides, and enough room in the front, or 72 square inches if it’s in a closet.
  • If your dryer is installed in a garage or any other non-climate controlled area, it needs to be placed at least 18 inches above the floor on a platform or installed on a pedestal. This will allow the dryer to radiate heat properly, especially during the winter months.

Venting and exhausting requirements


If you are getting a dryer for the first time and need to install a duct to vent the heat and moisture outside, we recommend contacting a professional installer. If you are replacing a dryer, you more than likely will have an existing duct that vents the heat outside of your home. Be sure to follow these guidelines:

  • Make sure the exhaust system meets all applicable local, state, and national regulations.
  • Do not use a flexible plastic duct. Instead, use a 4 inch diameter rigid aluminum or galvanized steel duct.
  • Clean all lint from the duct.

    Note: This would be a good time to get the entire duct system cleaned out if it has been a while since the last cleaning. There are duct cleaning services that can help or you can use a strong vacuum to clean it out.
  • Make sure the duct is not kinked or crushed.
  • Make sure the exhaust hood damper opens and closes freely.

For more details on the ducting requirements and the exhausting requirements for your dryer, refer to the user manual.

Electric vs Gas


If you already have a gas line installed in your laundry room, you can easily go with a new gas dryer or switch from gas to electric. If you do not have an existing gas line and would like to switch to gas from electric, we recommend reaching out to your local gas company to ask about getting a gas line installed in your laundry room. These are the requirements for both gas and electric, so you can decide:


Electric

  • Electric dryers need to be plugged into a 240 volt, 60 Hz AC outlet with a 30-amp fuse or circuit breaker on both sides of the line.
  • The power cord is not included with your dryer. If your home was built before the year 2000, you probably have a 3-prong dryer outlet, and will need a 3-prong power cord. Otherwise, you will need a 4-prong dryer cord. You may be able to use the cord from your previous dryer or your installer may be able to provide a cord, but confirm ahead of time so you are prepared.
  • There are wiring diagrams for both 3 and 4-prong power cords included in the user manual for your electric dryer.


Gas


  • Use only natural or LP (liquid propane) gasses. The dryer comes with a burner vent for use with natural gas. If you want to use it with LP, it must be converted by a qualified service technician.
  • Gas dryers need to be plugged into a 120 volt, 60 Hz AC outlet with a 15-amp fuse or circuit breaker and do include their power cord.
  • The user manual for your gas dryer has more specific details.
Read less

Delivery, installation, and haul-away options

A professional is finishing the installation of a Samsung washer

You have delivery options when you purchase from Samsung. You can choose basic delivery or delivery with installation, which also gives you the option of “haul away.” Haul away means they will also remove and dispose of your old dryer.

Delivery only


  • This service will deliver the dryer to your home, unbox it, and take it to your room of choice. If you have stairs, please be aware that the deliverers will only move the dryer a maximum of 3 flights of stairs.
  • Inspection of unit and confirmation of correct model.
  • Removal of packaging if requested during delivery.

Delivery and installation


  • This service will deliver the dryer to your home, unbox it, and take it to your room of choice. If you have stairs, please be aware that the deliverers will only move the dryer a maximum of 3 flights of stairs.
  • Installation of dryer, including replacing connectors with new parts, such as a 3 or 4-prong power cord for electric dryers, gas connectors for gas dryers, a dryer vent with clamps, and a steam dryer kit for steam dryers.
  • Plugging in the dryer and confirming it is fully functional.
  • Leveling the new dryer.
  • Removal of the packaging.

Haul away


Haul away includes the removal of the old dryer. It must be emptied of any personal belongings beforehand.


Other retailers may have similar delivery, installation, and haul away options, but you will need to confirm their options with them when you purchase your new dryer.

Read less

Prepare for your new dryer

Now that you have selected and purchased a dryer, there are a few things to complete before bringing it into your laundry space. Follow the steps below, or check out our helpful video on preparing for your new dryer.


  1. Unplug the old dryer and disconnect the vent. Again, this is a great time to get the vent cleaned out. You can get some of the larger lint from the vent in your laundry space using a vacuum or a duster, but you may also want to consider a professional dryer vent cleaning service.
  2. Make sure you have a clear path to where you want the new dryer to go. Check the dimensions of the model you purchased so you can determine which door will work best for bringing it inside, and make sure there is nothing in the way so it will be as easy as possible to get the dryer into place. This also includes making sure there is nothing in the pathway to the location.
  3. Have a plan for what to do with your old dryer. Your delivery service more than likely offers a haul away option. If not, you will need to look into your local waste options and rules for proper disposal. If your old dryer still works, you may be able to donate it to a local charity, some of which may be able to pick it up for you.
Read less

Install the dryer

A Samsung washer in a laundry room

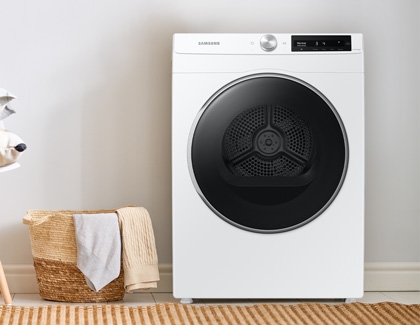
Your dryer is here, and it's time to install it. This guide includes an overview of many things you need to get your dryer installed, but you should still refer to your user manual for specific details.

Tools required


  • Pliers
  • Box cutter or similar for cutting the new vent hose, if necessary
  • Flathead and Phillips head screwdrivers
  • Level
  • Hose clamp (2) or Duct tape
  • Wrench
  • For gas installation: Pipe wrench and an LPG-safe compound or Teflon tape (optional)
  • For steam dryer installation: Additional water hose (not included), Y connector, and short water hose


Move the dryer to its location and connect the exhaust vent


We recommend that you leave the protective film on the door during installation to prevent accidental scratching.

  1. Move the dryer to its location. To make it easier to move, you can use two of the cushions from the packaging and lay the dryer on its side, which will allow it to slide easily to its location.
  2. Depending on the orientation of your laundry space, it may be easier for your dryer door to open the opposite way. You can reverse the dryer door to make it work the way you need it to in your space. If you purchased a pedestal to go with your dryer, this is the best time to install it.
  3. Clear any packaging material from the exhaust vent on the dryer, and then connect the exhaust vent. You may need to cut it to keep the ducts as short as possible. Use hose clamps or duct tape to fasten it to the dryer and the wall vent.

Connect the power cord (for electric models)


Depending on whether you have a 3-prong or 4-prong outlet, the wiring for the power cord will be different. The user manual for your dryer includes a wiring diagram and steps for both 3 and 4-wire power cords.

Connect the gas line (for gas models)


We recommend hiring a professional installer if you need to connect a gas line. There are more details for connecting the gas line in the user manual for your gas dryer.

Connect the water hose (steam models only)


Your dryer must be connected to a cold water tap using the provided accessories. The Y-connector can be connected directly to your cold water tap, or you can connect it with the provided short hose used as an extension.

  1. Close the cold water tap. If you have a washer’s cold water hose attached to the cold water tap, unscrew and remove the hose, and then connect the female end of the Y-connector or the short hose to the cold water tap.

    Note: Do not overtighten or you may damage the coupling. If using the short hose as an extension, connect the Y-connector to the short hose after connecting it to the cold water tap.
  2. Connect the straight end of the water hose to the Y-connector. Tighten the hose coupling by hand.
  3. Using pliers, tighten the coupling an additional two-thirds turn. Do not over tighten or you may damage the coupling.
  4. Connect the angled end of the water hose to the filling valve at the bottom rear of the dryer. Turn the coupling by hand until it is tight.
  5. Using pliers, tighten the coupling an additional two-thirds turn. Do not overtighten or you may damage the coupling.
  6. If you detached the cold water hose from your washer, attach the hose to the open end of the Y-connector, tighten the coupling by hand until it is tight, and then, using pliers, tighten an additional two-thirds turn. Do not overtighten.
  7. Open the cold water tap, and then check for any leaks.

Level the dryer


  1. Using a level, check if the dryer is leveled side to side and then front to back. If not, turn the leveling feet clockwise to lower the dryer or counterclockwise to raise it.
  2. To set the dryer to the same height as your washer, fully retract the leveling feet by turning them counterclockwise, and then loosen them by turning them clockwise. Once the dryer is the same height as the washer, follow the directions in Step 1 to level the dryer.

Power on


Make sure all gas connections (gas models only), the exhaust line, and all wiring is connected correctly, and then plug the power cord into the power outlet. Proceed to the next section for the final check.

Final check


When you are finished installing, you need to confirm that:

  • The dryer is plugged into an electrical outlet and grounded properly.
  • The exhaust ductwork is connected, the joints are taped, and you have used rigid or stiff-walled flexible metal duct material, not plastic flexible duct.
  • The dryer is level and is sitting firmly on the floor.
  • The dryer starts, runs, heats, and shuts off properly. This can be tested by starting a Time Dry cycle for 30 seconds and then turning the dryer off.
  • The gas is supplied properly with no leaks (for gas models only).

    Caution: The burner may not initially ignite due to air in the gas line. Allowing your dryer to operate on a heat setting will purge the line. If the gas does not ignite within 5 minutes, turn your dryer off and wait 5 minutes. Be sure the gas supply to your dryer has been turned on. To confirm the gas ignition, check the exhaust for heat.
  • Run a vent blockage test to ensure that your duct system is properly installed. The test can detect the status of the ducts and report any blockage or other issues.
Read less
Was this content helpful?
We're here for you

Contact Samsung Support

Contact us online through chat and get support from an expert on your computer, mobile device or tablet. Support is also available on your mobile device through the Samsung Members App.
auto-contact_us-pc-2x auto-contact_us-pc-2x