How to clean your Samsung washer

How to clean your Samsung washer
Keep it fresh between cleanings

The following sections will help you clean specific parts of your washer, but there are a couple of ways to make sure it stays fresh in between routine and monthly cleanings.
If you normally wash with cold water, occasionally run a cycle with warm or hot water to help slow down soil and detergent buildup.
Leaving the washer's door and the detergent drawer open helps air them out and prevents moisture from lingering long enough to let mold or mildew form. If mold or mildew has already formed, see our guide for troubleshooting.
Clean your washer's surface

Routinely clean and dry your washer’s surface to remove any residual cleaner or water. If there is a spill, it should be cleaned up immediately, since water or detergent residue can cause surface blemishes on the washer's door. A mild detergent and a damp cloth will remove most spots.
If you've already tried that and the spots remain the same, you can use a small amount of Cerama Bryte cooktop cleaner.
- Dispense a small amount of mild detergent or Cerama Bryte onto a clean, damp, microfiber cloth.
- Clean the affected area by gently scrubbing in a repeating circular motion.
- When you're finished scrubbing, use a clean, damp, microfiber cloth to clean off the area.
- Use a clean, dry, microfiber cloth to dry the area.
Run a Self Clean or Pure Cycle to clean the interior
Self Clean (also called Pure Cycle or Self Clean+) is a special cycle that prevents mold. It's designed to clean areas of the tub where moisture and detergent residue may accumulate. A normal cycle may not be able to reach these areas. It takes approximately one hour to run Self Clean on a top load washer and four hours to run Self Clean on a front load washer. After the Self Clean cycle begins, the estimated remaining time will display.
- To run a Self Clean cycle, first make sure the washer is empty.
- Press Self Clean, and then press Start.
- You don't need to add cleaner when running Self Clean. However, we do recommend using bleach if you already have an existing mold smell (see our guide for details).
If you notice suds or residue in the washer tub during the Self Clean cycle, we recommend running another Self Clean cycle afterwards. The Self Clean reminder LED will display after 20 washes on a top load model or 40 washes on a front load model. Although you do not need to run a Self Clean cycle immediately after the reminder appears, we recommend that you run one at your earliest opportunity. It's also a good idea to run one at least once per month if you do not do many washes in a month.
Clean without a Self Clean or Pure Cycle

We recommend using Self Clean as the primary method of cleaning the interior of your washer once per month. However, some models may not have a Self Clean or Pure Cycle. In this case, using any washing machine cleaner will do. Carefully follow the instructions for the cleaner you purchase because they may vary between products.
Removing existing odors

Routine maintenance helps prevent odors from occurring in the first place, but if you already have odors in your washer, you may need a little extra help. See our guide for a washer (or laundry) that smells bad for steps specific for this issue.
Clean the detergent drawer

Using too much detergent can gunk up the detergent drawer, causing less to reach your clothes. It can even contribute to odors and other issues with your washer. You can easily keep the detergent drawer clean by wiping it dry after every wash session. You can also deep clean it at least once per month just to be thorough.
- Pull and open the washer detergent drawer until it stops.
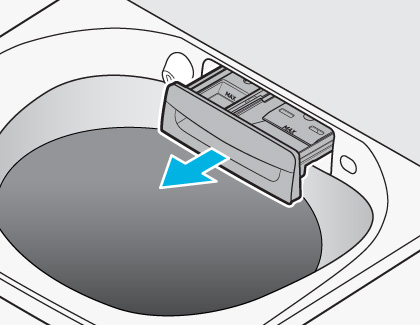
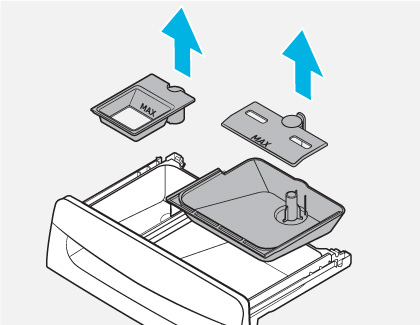
- Remove the detergent dispensers by lifting them out. Then, rinse them with warm water to remove traces of detergent residue. You can use a soft brush to clean them as well.
- You'll need to completely remove the drawer to clean the drawer opening.
• On a front load washer, you can remove the washer detergent drawer by pushing in on the ends of each side of the drawer at the same time and then pulling it out.
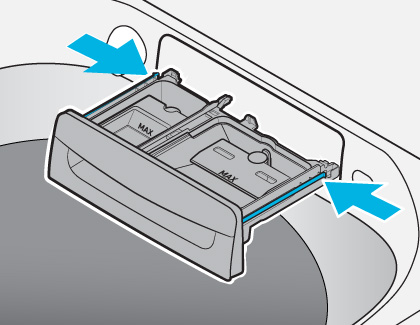
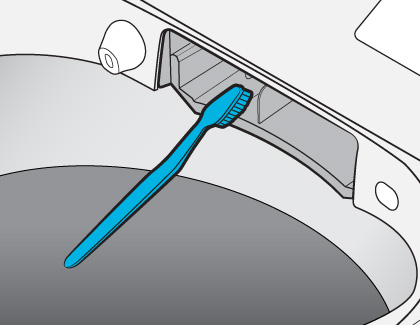
• On a top load washer, pull the drawer out, and then tip it up to remove it. - Clean the detergent drawer opening with a soft cloth or non-metallic brush. Cleaning this often will help prevent detergent buildup.
- When you are finished, place the inserts back into the drawer, and then align the drawer with the compartment rails. Push the drawer back to close it fully.
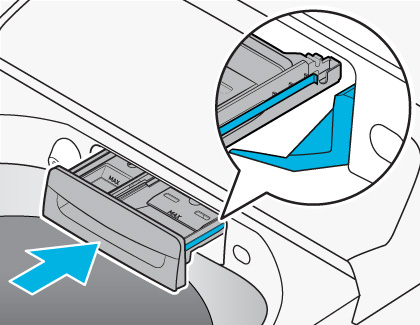
Clean the auto dispenser detergent drawer (model WF50A8800AV)
This model comes with an auto dispenser detergent drawer, which should be wiped clean after every wash, and deep cleaned once per month. Doing so will prevent detergent build up, odors, and other issues with your washer.
- While holding down the release lever on the inner part of the detergent drawer, pull the drawer out to remove it.
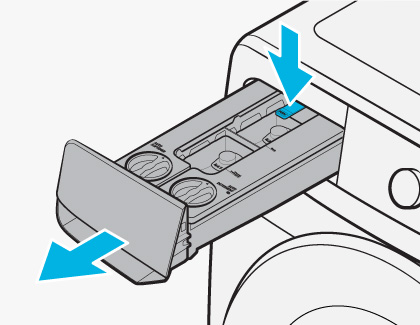
- Remove the tops of both compartments using the pull tabs. These are located near the back of the lid.
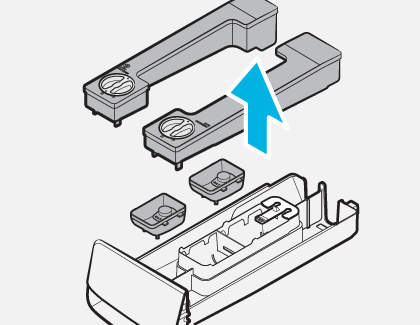
- Then, clean inside the compartments using a soft brush and warm water.
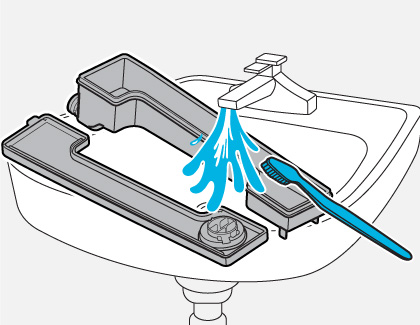
- Next, wipe down the compartments with a dry towel.
- If there is detergent residue in the compartments, you may pour lukewarm water into the compartments to dissolve the residue. Then, clean the compartment interior and rear valve thoroughly with a soft brush and warm water to remove the residue.
- Use a soft brush to clean the drawer recess as well.
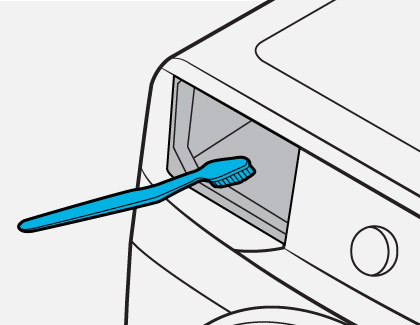
- When you’re finished, replace the tops of both compartments, making sure that they form a snug seal all the way around the lip. Then, reinsert the drawer back into the washer.
Note: Make sure the drawer recess is completely dry before reinserting the drawer.
Clean the washer pump filter (front load only)

The pump filter on your front load washer, also called the debris filter, helps filter lint and other debris from entering the washer's drain system. (Top load washers do not have a pump filter.) We recommend cleaning the pump filter at least once per month or approximately every 40 washes, whichever is more frequent. Keeping the pump filter clean will help prevent odors, reduce the likelihood of mold and mildew, and ensure your washer drains properly.
- To begin, locate the pump filter access panel. It may be located near the bottom of your washer. Open the panel by pressing the top or center of the panel.
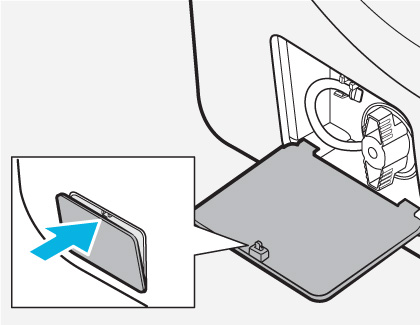
- Locate the rubber drain hose and prepare to drain the water. You will need a towel and a container large enough for the amount of water in the washer, like an oil drain pan.
- Remove the cap from the drain hose by holding the hose and twisting the cap. The cap can be tough to remove because it forms an airtight seal, so make sure to use a little elbow grease. Once the cap is removed, drain the water.
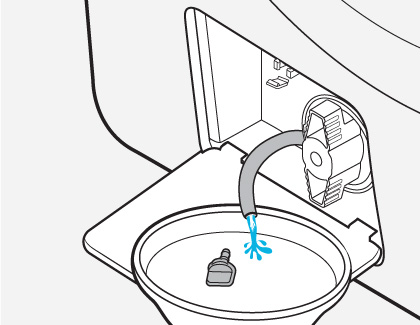
- Once all the water is drained, remove the washer pump filter by twisting it counter-clockwise.
Note: On some Samsung washers, the washer pump filter (A) is similar to the cap on a medicine bottle. Push in and twist to remove.
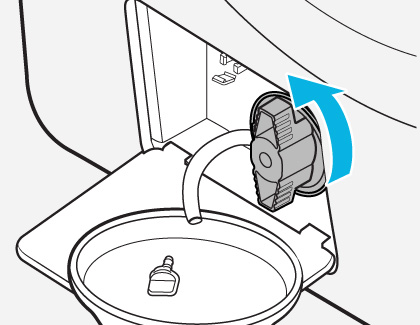
- Using a small toothbrush or other similar soft bristle brush, wash any dirt or other materials from the pump filter. Inspect the drain pump impeller located inside the pump filter housing to make sure it is clean.
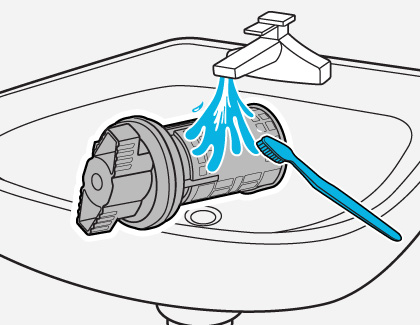
- Once the pump filter is clean, reinsert it and twist it clockwise until it's secured in the vertical position.
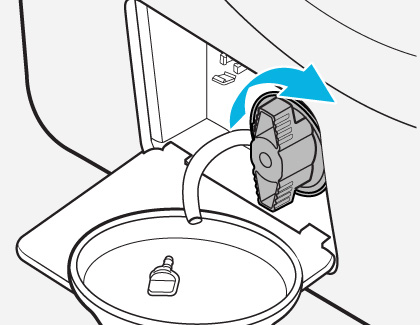
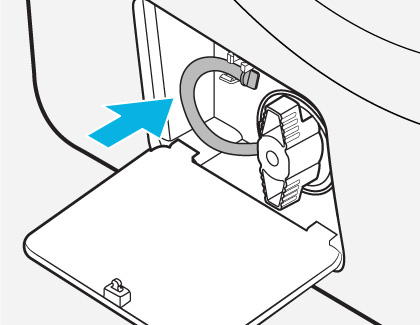
- Place the drain hose's cap firmly back onto the drain hose and secure the drain hose in the mounted clip before closing the access panel.
Note: If these steps don't match your front load washing machine, please refer to your user manual.


Contact Samsung Support


