Invite members using the SmartThings app

The more, the merrier. You can let your family or friends use your smart devices by inviting them to be members of your SmartThings account. Just send an invitation for a specific location in your account, and if they accept, they'll become members. After accepting, they will be able to control or manage any of the connected devices in that location.
Note: Inviting members is only available for locations. You cannot add a member directly to a room, only the main location.
You can invite people to join certain locations in your account through their Samsung account. Once they’ve accepted your invitation, you will both be able to use the same smart devices.
Step 1. To invite a Samsung account member, navigate to and open the SmartThings app.
Step 2. Tap the Favourites tab, then tap the Home icon. Select your desired location.
Step 3. Tap Add (the plus sign), then tap Member.
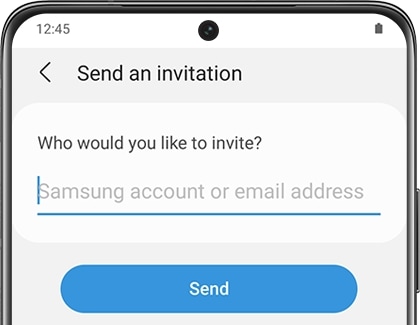
Step 4. Select Send an invitation, then enter the email used for their Samsung account.
Step 5. Next, tap Send. Once the user receives the invitation and accepts it, they'll be good to go.

Note:
- If the person you want to invite does not have a Samsung account, you can use a regular email to send an invitation.
- When an invitation is sent via an email that is not associated with a Samsung account, the person will be prompted to sign up for a Samsung account before being able to accept your invitation.
You can also invite Samsung account members using a QR code.
Step 1. Navigate to and open the SmartThings app, then tap the Favourites tab.
Step 2. Tap the Home icon, then select your desired location.
Step 3. Tap Add (the plus sign), then tap Member.
Step 4. Select Use a QR code and a barcode will appear. The person you want to invite can then scan the QR code using their phone.
Step 5. The invited person will need to navigate to SmartThings on their phone and tap the Favourites tab.
Step 6. Next, they will need to tap the Home icon, tap Manage locations, then tap Add (the plus sign). Then, they can tap Accept QR code invitation.
Step 7. From there, they can follow the on-screen instructions and scan the code to become a member of your account.
Note:
- Galaxy users can use the Galaxy Camera to accept invitations through QR code scanning.
It's not a party unless everyone is invited. To receive an invitation, the person you want to invite must have the SmartThings app installed on their phone and be signed into their Samsung account.
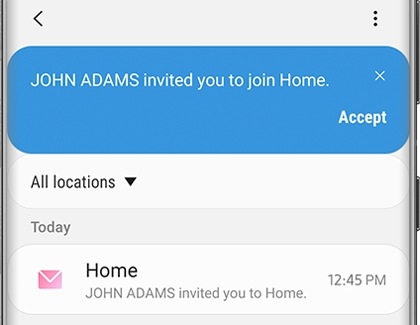
They'll get the invitation as a notification on their phone. All they have to do is tap the notification, then tap Accept. Once this is complete, they can control the devices added in that specific location.
Another option is to open SmartThings and tap Menu (the three horizontal lines). Tap Messages; a message will appear that informs the user of the invitation. They can tap the notice, then tap Accept to be added as a member.

If someone doesn't use SmartThings anymore, the owner of the location can remove their membership. You can also view all members in a location in case you lose track of who has been added.
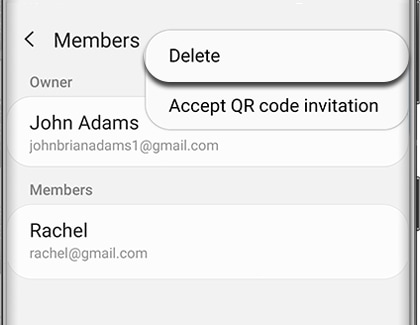
To view or remove a member, navigate to the location with your desired member. Tap Menu (the three horizontal lines), then tap Members. Here you can view the location's owner and its current members.
To remove a member, tap More options (the three vertical dots), then tap Delete. Choose the members you want to delete, then tap Delete. Tap Remove to confirm. The member or members you have chosen will now be removed from that location and won't be able to control any of its devices.

Note:
- Only the owner of the location can remove members.
- The member’s devices will be deleted when you remove the member.
Thank you for your feedback!
Please answer all questions.