How to use the Galaxy Watch
Galaxy Watch is designed to handle almost anything from adding apps, sending emails, connecting to Spotify or syncing with your smartphone, to ensure your day goes smoothly. Here are a few ways to set up your Galaxy Watch so you can enjoy everything it has to offer straight away.

Once you have connected your Galaxy Watch to your smartphone, you can start enjoying several features.
Please note: Syncing your watch with a smartphone will set the date and time automatically. You can only set the date and time manually if your watch and smartphone are not paired.
To manually set the date and time, follow these steps:


Step 1. Open the main screen and tap the Settings icon.


Step 2. Tap “General”.


Step 3. Tap “Date and time”.


Step 4. Tap “Set date”.


Step 5. Adjust by tapping the day, month and year, then tap “Done”.


Step 6. Tap “Set time”.


Step 7. Adjust the time by tapping the hour and minute values, then tap “Done”.
To manually connect to a Wi-Fi network, follow these steps:


Step 1. Swipe up on the main screen and tap the Settings icon.


Step 2. Tap “Connections”.


Step 3. Tap “Wi-Fi”.


Step 4. Tap the toggle button to “On”.


Step 5. Scroll down and tap the Wi-Fi network you would like to connect to.


Step 6. Enter the Wi-Fi password and tap “Connect”.
Please note: Connecting your Galaxy Watch to your smartphone via Bluetooth will automatically disable the Wi-Fi. Use Wi-Fi when needed.
To add an app to your Galaxy Watch, follow these steps:
Please note: You must be logged into a Google™ Account to access the Play Store.


Step 1. Swipe up on the main screen and tap the Play Store icon.


Step 2. Enter the name of the app you would like to download, then tap the search button on the keyboard.


Step 3. Tap the app you would like to download from the list of search results.


Step 4. Tap “Install”.


Step 5. Once the app is downloaded and installed, tap “Open”.
Please note: To function properly, some apps will require permissions from your Galaxy Watch or installation of an associated app on your connected device. Read through the terms and conditions and ensure you have activated the proper permissions and installed the necessary apps on your phone before downloading apps to your device.
To make a phone call with your Galaxy Watch use the following steps:


Step 1. Swipe up on the main screen and tap the Phone icon.


Step 2. Tap the Keypad or contact icon.


Step 3. Enter the phone number or tap the contact you would like to call.


Step 4. Tap the phone icon.
Please note: This feature is not supported on Wi-Fi only models.
To extend your Galaxy Watch’s battery life, follow these steps:
Activate Power saving mode


Step 1. Swipe and tap the Settings icon.


Step 2. Swipe up to and tap Battery.


Step 3. Tap Power saving.
* Galaxy Watch features may vary by model.
Close background apps


Step 1. Swipe and tap the Settings icon.


Step 2. Swipe up to and tap Device care > Swipe up to and tap Memory.


Step 3. Swipe up to and tap Clean now.
Turn off unused health trackers


Step 1. Swipe and tap the Samsung Health icon.


Step 2. Swipe to and tap Settings > Tap Heart rate, Stress, or Sleep > Select options from the list available to change the duration of the feature.


Step 3. Swipe left to return to Settings > Swipe up to Activities to detect > Tap the switch.
Turn off “Watch always on”


Step 1. Swipe and tap the Settings icon.


Step 2. Swipe up to and tap Display > Swipe up to Always On Display > Tap the switch.
Turn on Watch Only mode


Step 1. Swipe and tap the Settings icon.


Step 2. Swipe up to and tap Battery.


Step 3. Swipe up to and tap Watch only > Swipe up to and tap Turn on.
Perform a diagnostic


Step 1. Open the Samsung Members app on your phone > Tap the Discover tab > Select Diagnostics.
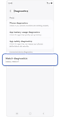

Step 2. Select Watch diagnostics.


Step 3. Select Battery status > Follow the onscreen instructions.
* Available tests may vary depending on your Galaxy Watch model.
Other battery-saving suggestions
- Do not expose your watch to extreme temperatures.
- Turn off voice wake-up in Bixby or Google Assistant.
- Customise your notification settings.
Please note: Galaxy Watch features may vary by model.
Is this content helpful?
Thank you for your feedback!
Please answer all questions.