How do I Install the Gear VR Software?
To use the Gear VR, you must manually install the Gear VR app called ‘Oculus’.
Also, connect the controller to your mobile device before controlling the Gear VR.
When you connect the mobile device to the Gear VR for the first time, the Gear VR app (Oculus) installation and controller connection will start automatically.
Note: Connect your mobile device to an active cellular network or Wi-Fi connection before performing the setup process.
1) Unlock your mobile device and turn up the volume
Install carefully a compatible mobile device onto the Gear VR compartment
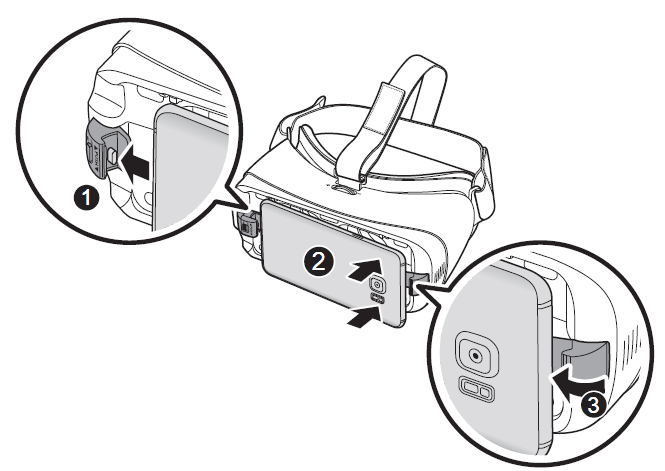
2) When a voice prompt requests you to separate the mobile device from the Gear VR, please remove the mobile device.
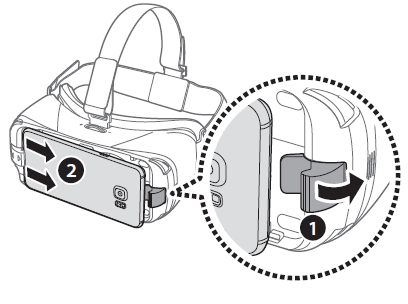
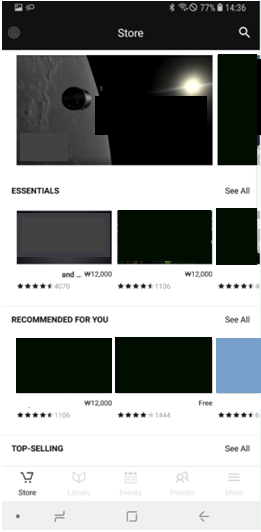
3) The Gear VR app (Oculus) installation screen will appear on the mobile device.
Tap START on the Welcome! screen and follow the prompts

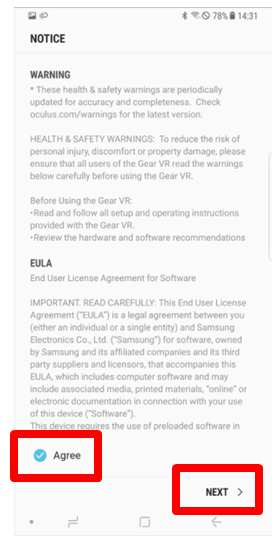
4) Read and agree to the health and safety warnings, and the terms and conditions in the End User License Agreement (EULA), and tap “Next”
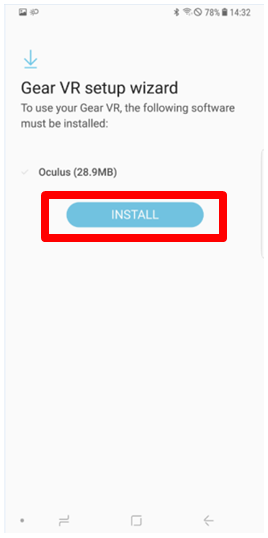
5) Tap INSTALL
The default VR apps will be automatically installed.
Note: During this initial process, you might be prompted to install additional software or update the firmware of your mobile device.
6) Enter the account information, following the on-screen instructions and tap Create Account to create an Oculus account
If you already have an Oculus account, tap Sign In and sign into it.
Your Oculus account will be used when using apps and contents provided by Oculus.

7) Follow the on-screen instructions to connect the controller and choose the hand you will use the controller with
8) When the software is installed, the Oculus app will appear on the Apps screen of the mobile device.
Reconnect your mobile device to the Gear VR and place the Gear VR on your head
Note: If the screen appears tilted or skewed while using Samsung Gear VR, please take it off and place the Gear VR on a flat surface.
Wait for 5-7 seconds before using it again.
Screen Images are for reference only.

Is this content helpful?
Thank you for your feedback!
Please answer all questions.