How to reset the picture settings on your Samsung TV

Getting the best picture quality from your Samsung TV not only enhances your viewing experience but ensures that you enjoy your favourite shows and movies just as the creators intended. However, sometimes the picture settings may not match your room’s new lighting, or they might just seem off after an update or over time. That’s where resetting your picture settings comes into play. This guide will walk you through when it's beneficial to reset your settings and provide a detailed step-by-step tutorial to simplify the process.
Note: This information is specific to televisions sold in Canada. Screen availability and settings may vary for models sold in other countries.
Resetting the picture settings on a Samsung TV can be important and useful in several situations:
- After an Update: Sometimes, after a firmware update, the TV might exhibit changes in picture quality due to adjustments in the software that controls video processing. Resetting the settings can help ensure that any new features or fixes are applied correctly.
- Poor Image Quality: If you notice the image quality has degraded or doesn’t look right (e.g., too dark, too bright, colours are off), resetting the picture settings can revert them back to the factory defaults, providing a baseline to adjust from for optimal viewing.
- Calibration: For those who want to calibrate their TV for optimal picture quality, starting with the default settings is a clean slate. This is particularly useful if previous settings were changed randomly without enhancing the viewing experience.
- Switching Viewing Modes: If you've used specific settings for a particular type of viewing like gaming or watching movies and want to switch back for regular TV watching, resetting can quickly get you back to a standard viewing mode.
- Selling or Giving Away the TV: If you're planning to sell or give away the TV, resetting the picture settings (along with other settings) can help erase personal preferences, presenting the next user with a like-new setup experience.
- Troubleshooting: In some cases, unexpected technical issues related to the display can be resolved by simply resetting the picture settings, as it eliminates any settings that might be causing the issue.
If you own a Samsung TV from 2022 or later, you might find that resetting your picture settings can enhance your viewing experience or correct any display issues. This section provides a straightforward guide on how to reset the picture settings on your modern Samsung TV, ensuring you get the most out of its capabilities.

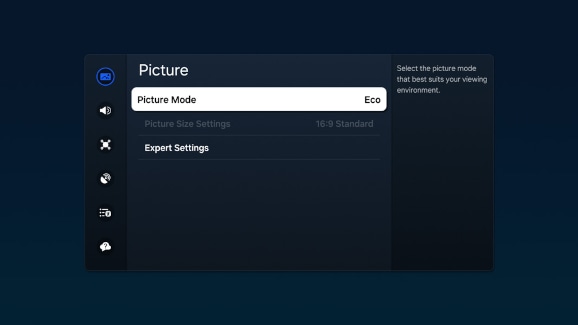
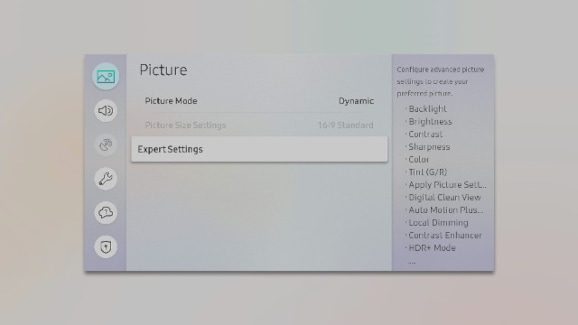
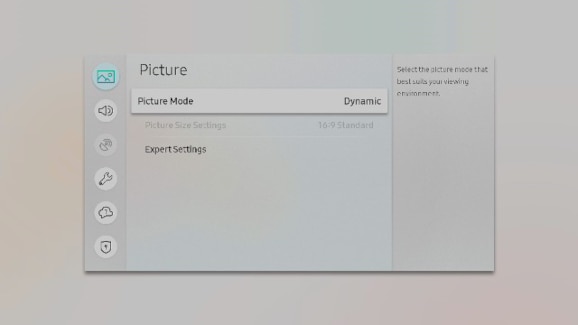
This section will guide you through the various options available in the Picture settings menu of your 2022 or newer Samsung TV. From adjusting brightness and contrast to fine-tuning colour tones and sharpness, you’ll learn how to customize every aspect to suit your viewing environment and content.
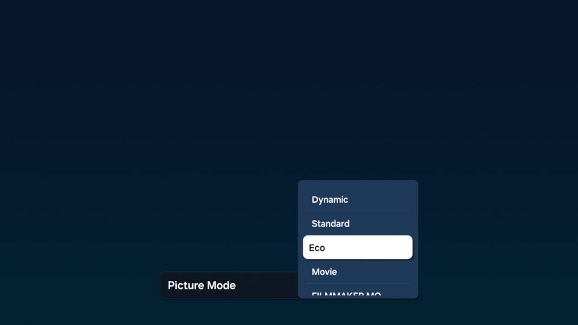
- Dynamic: Enhances brightness and clarity, ideal for bright viewing environments.
- Standard: The default mode, suitable for most viewing environments.
- Eco: Optimizes energy savings without compromising picture quality.
- Movie: Optimized for watching TV programs and movies in a dark room for a cinematic experience.
- FILMMAKER MODE: Delivers enhanced picture quality, certified by the UHD Alliance, to preserve the director's creative vision.
Note: FILMMAKER MODE may appear darker than other picture modes.
- 16:9: Displays the picture in widescreen aspect ratio, suitable for most modern content.
- Custom: Allows manual customization of the aspect ratio according to user preference.
- 4:3: Displays the picture in a standard definition aspect ratio. Ideal for VHS and standard-def broadcasts.
- Fit to Screen: Ensures the entire image is visible without any part being cut off.
- Zoom and Position: Enables adjustment of the picture's size and position. Available only when Picture Size is set to Custom.
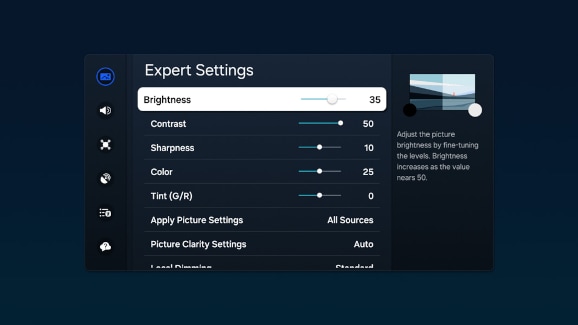
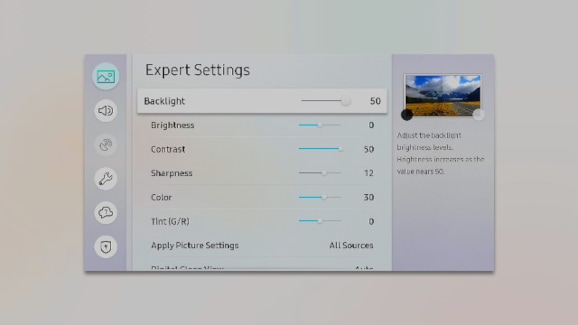
- Brightness: Adjust the overall picture brightness. A higher value, closer to 50, increases the brightness.
- Contrast: Adjust the difference between the darkest and brightest parts of the image. A higher value, closer to 50, enhances this contrast.
- Sharpness: Adjust the clarity of object outlines. Higher values, closer to 20, make outlines sharper.
- Colour: Adjust the intensity of colours in the video. Higher values, closer to 50, result in deeper colours.
- Tint (G/R): Adjust the green to red colour balance. Higher values shift the tone towards red, lower values towards green.
- Apply Picture Settings: Apply the selected picture settings either to the current input source or to all input sources.
- Picture Clarity Settings: Optimize video clarity in dynamic scenes. Note that enabling features like LED Clear Motion or Clear Motion can make the screen appear darker.
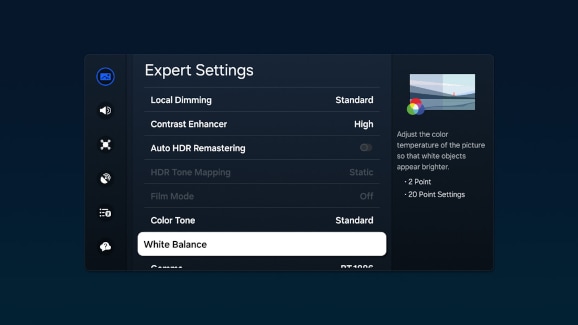
- Local Dimming: Enhances contrast ratio by automatically adjusting brightness across different sections of the screen. Availability of this feature may vary by model and region.
- Contrast Enhancer: Automatically adjusts contrast to balance brightness between the lighter and darker areas, ensuring more detailed imagery.
- Auto HDR Remastering: Enhances SDR content to HDR-like quality by intensifying highlights, enriching colours, and clarifying details, leveraging the differences between SDR and HDR.
- HDR Tone Mapping: Adjusts screen brightness and tone based on HDR content information. Availability of this feature may vary by model and region.
- Film Mode: Improves the quality of older video content for a better viewing experience. Note: This function is available only with TV or HDMI input (1080i) and may vary based on the model.
- Colour Tone: Choose the best colour tone to suit the viewing conditions for an optimal visual experience.
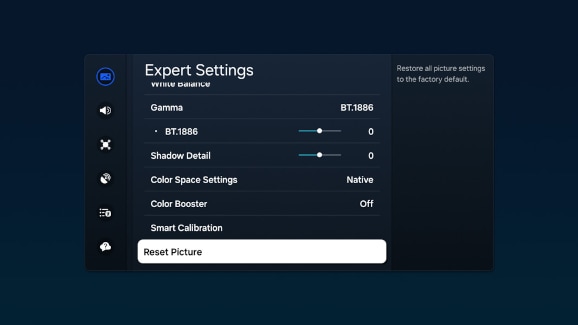
- White Balance: Adjusts the red, green, and blue brightness levels to ensure the brightest area of the picture is white, enhancing overall colour accuracy.

- Gamma: Adjust the mid-tone brightness levels of a video, enhancing details in the mid-range between the darkest and lightest parts.
- Shadow Detail: Adjust the visibility of details in dark areas of the picture. Higher values, closer to 5, brighten these areas.
- Colour Space Settings: Choose the range of colours that can be displayed on the screen, enhancing the colour accuracy and vividness.
- Colour Booster: Enhance the intensity of colours in the picture for more vibrant visuals.
- Smart Calibration: Automatically adjust the picture quality to match the original intent of the movie's producers. This feature requires a compatible phone (2019 models or newer) and may not be supported on all TV models. Availability can vary by region and model.
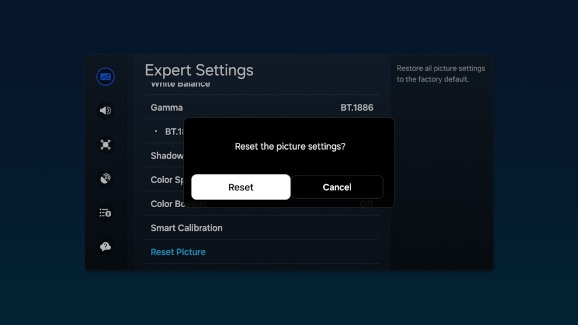
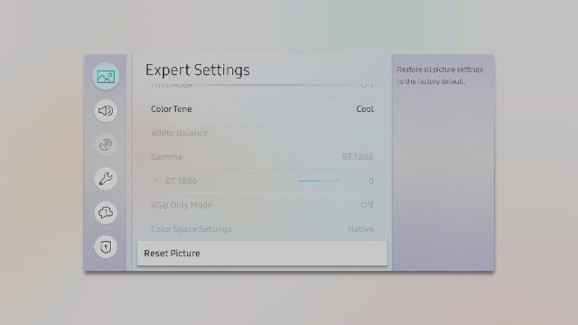
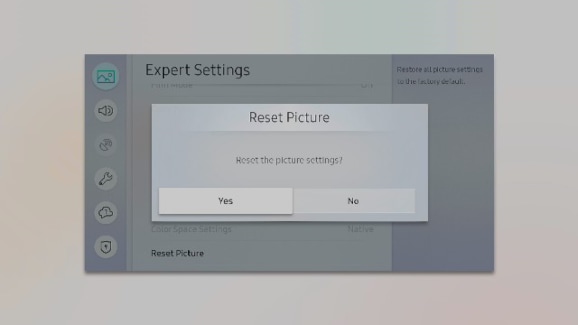
- Reset Picture: Restore all picture settings to their factory default values, effectively undoing any customized adjustments.
If you have a Samsung TV model from 2021 or earlier, resetting your picture settings can help restore the original display quality and correct any visual issues you might be experiencing. This section will guide you through the steps to reset your picture settings to their factory defaults, ensuring your TV performs at its best.
Adjusting the picture settings on your Samsung TV can significantly enhance your viewing experience. This section will guide you through the various settings available on 2021 and older models, helping you tailor the display to your preferences and viewing conditions.
- Standard: The default mode, suitable for most viewing environments.
- Dynamic: Enhances brightness and clarity, ideal for bright viewing environments.
- Natural: Reduces eye strain by providing a comfortable viewing experience.
- Movie: Optimized for watching TV or movies in a dark room, enhancing detail and colour accuracy.
- 16:9: Displays the picture in widescreen aspect ratio, suitable for most modern content.
- Custom: Allows manual customization of the aspect ratio according to user preference.
- 4:3: Displays the picture in a standard definition aspect ratio. Ideal for VHS and standard-def broadcasts.
- Fit to Screen: Ensures the entire image is visible without any part being cut off.
- Zoom and Position: Enables adjustment of the picture's size and position. Available only when Picture Size is set to Custom.
- Backlight: Adjusts the screen's light output. Increase this setting for brightly lit rooms and decrease it in darker settings for better viewing comfort.
- Brightness: Controls the overall brightness of the display, affecting how light or dark the screen appears.
- Contrast: Adjusts the difference between the darkest and lightest parts of the image, enhancing detail in visuals.
- Sharpness: Modifies the clarity of images, making details more distinct and edges more precise.
- Colour: Enhances colour saturation, making the colours on your screen more vivid.
- Tint (G/R): Shifts the colour balance between green and red, allowing for fine-tuning of the overall colour tone.
- Digital Clean View: Reduces visual noise and distractions, such as flickering, for a cleaner and clearer picture.
- Reset Picture: Restore all picture settings to their factory default values, effectively undoing any customized adjustments.

Thank you for your feedback!
Please answer all questions.
RC01_Static Content : Hide call number function