How to connect your Samsung TV to the internet

Just when you thought your Samsung TV couldn't possibly offer more, think again: it's ready to jump online! In today’s digital age, a television without the internet is like a phone without apps: not reaching its full potential. By connecting your Samsung TV to Wi-Fi or a wired network, you unlock a world of possibilities. Imagine downloading the latest apps with a snap, streaming your favorite shows in seamless high definition, diving deep into online searches, or even controlling your home's smart devices directly from your screen. The internet doesn't just enhance your TV; it transforms it into a multimedia powerhouse, central to your digital lifestyle. Ready to get connected?
Note: The information provided applies to Samsung TVs sold in Canada. Settings and options may vary for models available in other countries.
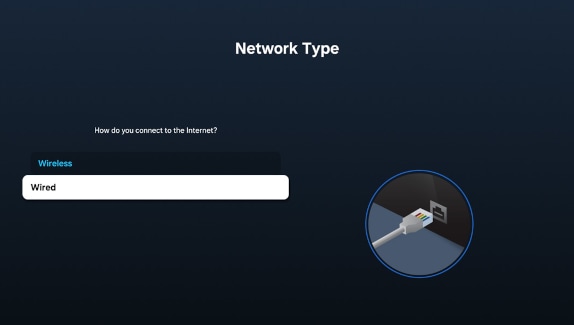
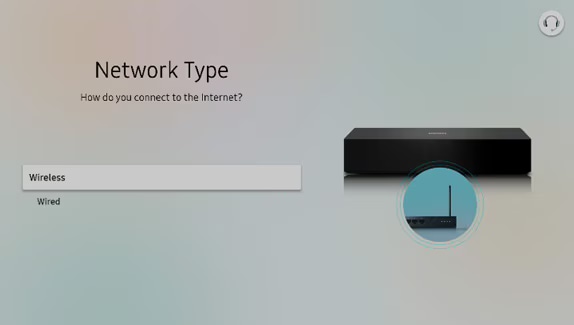
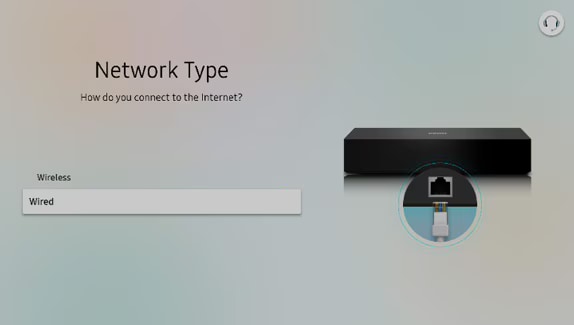
When setting up your Samsung TV for internet access, you have two primary options: a wired Ethernet connection or a wireless WiFi setup. While both methods will get your TV online, we generally recommend considering a wired connection if possible. Ethernet cables provide a stable, fast, and secure internet experience, which can enhance your viewing by reducing buffering and interruptions—ideal for streaming your favorite shows and movies in high definition. However, the choice between wired and wireless connectivity ultimately depends on your specific setup and preferences. Below, we'll explore the benefits of each to help you make the best decision for your home entertainment system.
Speed and Stability: Ethernet connections typically provide faster and more consistent internet speeds. This is particularly advantageous for streaming high-definition video content without buffering or interruptions.
Reduced Interference: Wireless networks can be susceptible to interference from other wireless devices, walls, and even microwaves. An Ethernet cable connection avoids these issues, providing a more stable connection.
Security: Wired connections are generally more secure than wireless connections, as they are less vulnerable to certain types of wireless security threats.
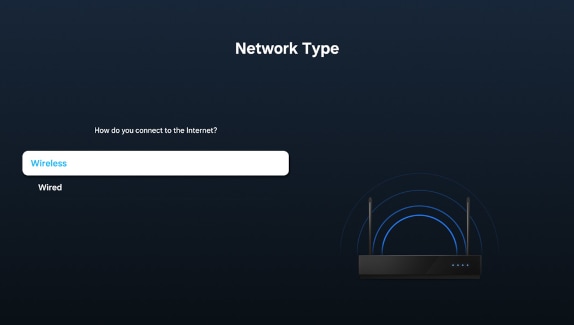
Setting up your TV to connect via a wireless network offers convenience and flexibility. Let's walk through how to enable Wi-Fi on your Samsung TV to access a world of online content without the wires.

For optimal stability and speed, connecting your TV through a wired network is the way to go. Follow these steps to connect your Samsung TV using an Ethernet cable.

Note: If there is an issue, such as the cable not being connected, you will be prompted to check the connection.
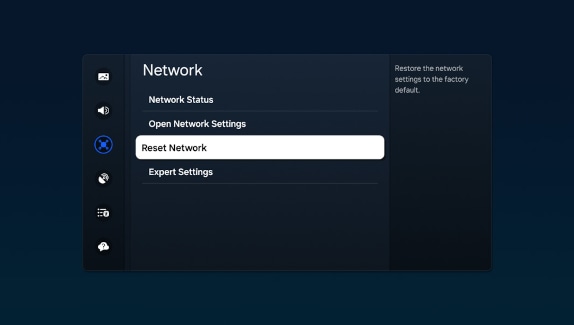
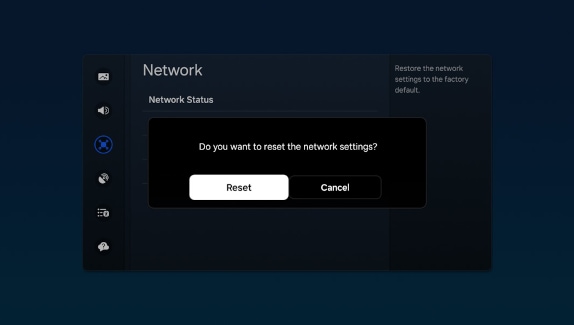
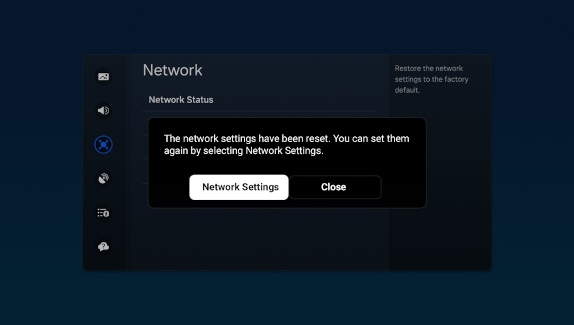
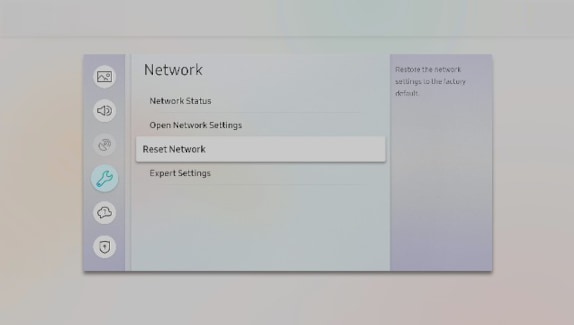
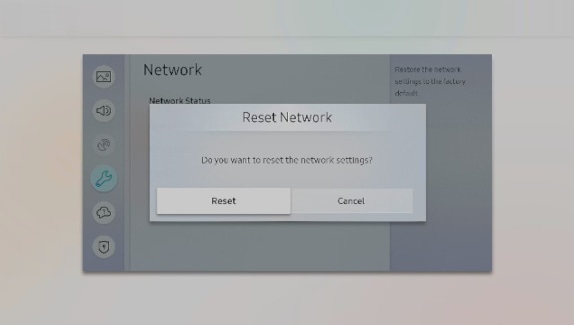
If you encounter persistent connectivity issues or need to change network configurations, resetting your Samsung TV's network settings can be a helpful step. This process restores the network settings to their original factory defaults, allowing you to set them up anew.
Note: If you need detailed guidance on setting up your internet connection, refer to the previous sections above on connecting your Samsung TV to the internet using either a wired or wireless method.
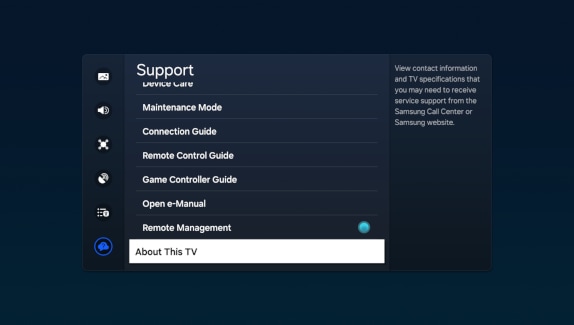
Understanding how to locate the MAC address of your Samsung TV can be crucial for network security and connectivity troubleshooting.
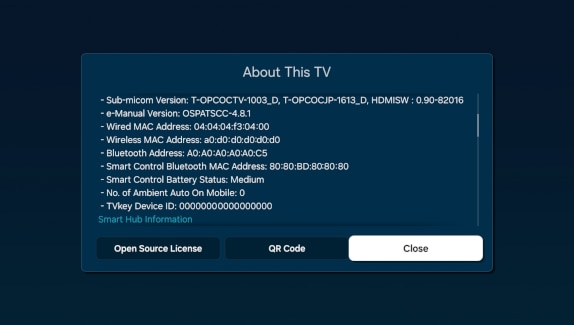
Note: The MAC address is crucial for network device identification and troubleshooting. It may be requested by our support team while diagnosing issues with your Samsung TV.
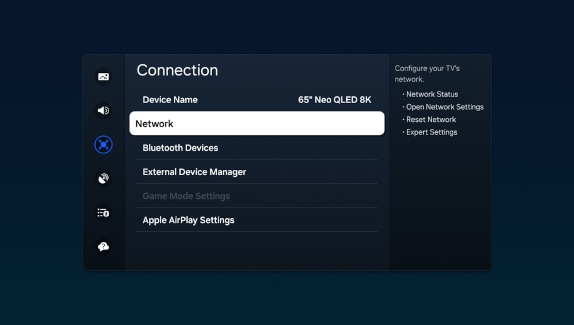
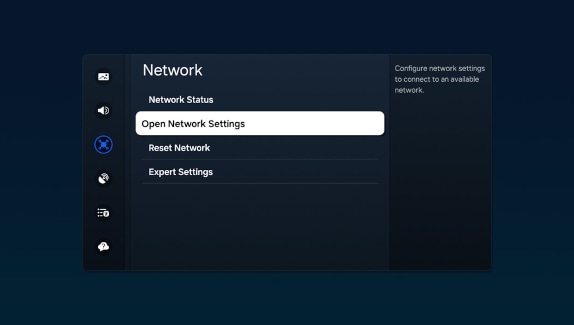
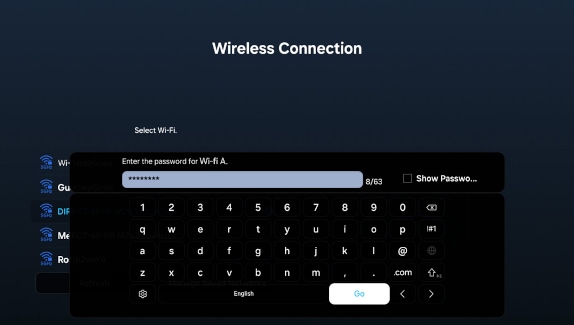
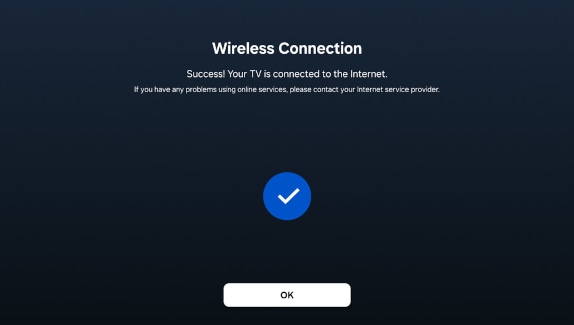
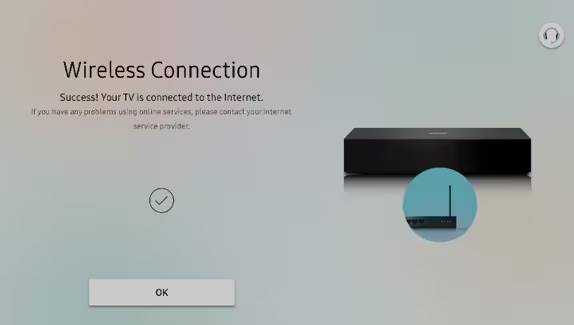
Connecting to Wi-Fi is the easiest and most seamless way to access the internet on your TV. Make sure you have your wireless network name and password before trying to connect.
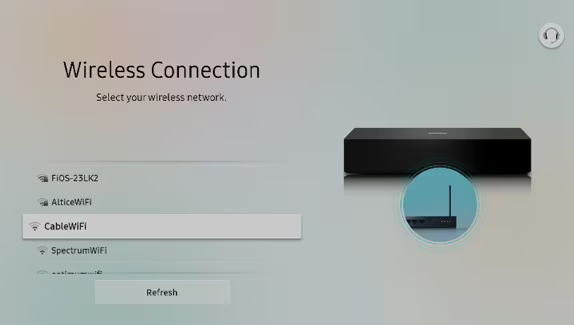
Note: Older Samsung TVs only support 2.4 GHz networks. They will not detect 5 GHz networks. If your Wi-Fi network does not appear on the list, ensure your router is configured to broadcast the 2.4 GHz band.
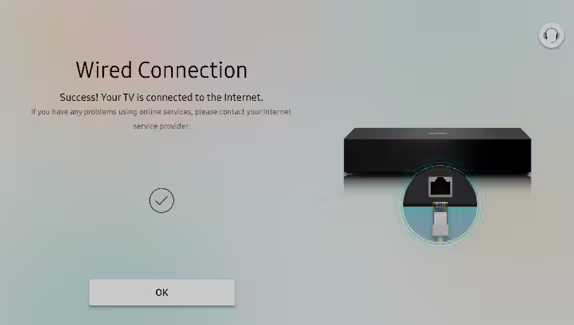
Wired connections offer the most stable and reliable internet experience, especially important for older model TVs that might not support the latest wireless standards.
Note: If there is an issue, such as the cable not being connected, you will be prompted to check the connection.
If you're facing ongoing network issues or need to update your network setup, resetting the network settings of your Samsung TV might be necessary. This action reverts the network settings back to their factory defaults, providing a clean slate for you to reconfigure your connectivity options.
Note: If you need detailed guidance on setting up your internet connection, refer to the previous sections above on connecting your Samsung TV to the internet using either a wired or wireless method.
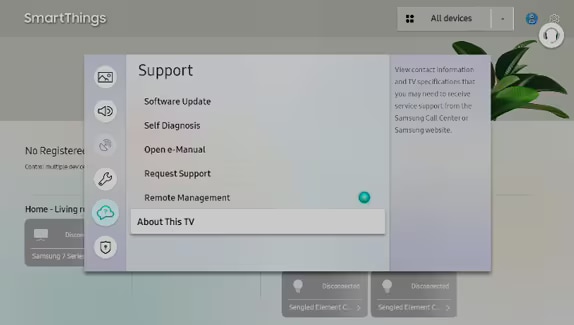
Locating the MAC address on your Samsung TV is essential for managing network permissions and troubleshooting connectivity issues.
Note: On some TVs, you may need to select Contact Samsung instead of About This TV.
Note: The MAC address is crucial for network device identification and troubleshooting. It may be requested by our support team while diagnosing issues with your Samsung TV.

Thank you for your feedback!
Please answer all questions.
RC01_Static Content : Hide call number function