How to insert a SIM card into the Galaxy Z Flip5, Flip6, Fold5, or Fold6

Last Update date : Aug 20. 2024

A SIM card contains subscriber information and connects your device to a cellular network. In cases where the SIM card needs to be installed or removed, such as when configuring a new mobile device, it is important to do so correctly to prevent damaging the SIM card tray. Please refer to the following instructions for how to insert a SIM card into your Galaxy Z Flip5, Galaxy Z Fold5, Galaxy Z Flip6, or Galaxy Z Fold6.
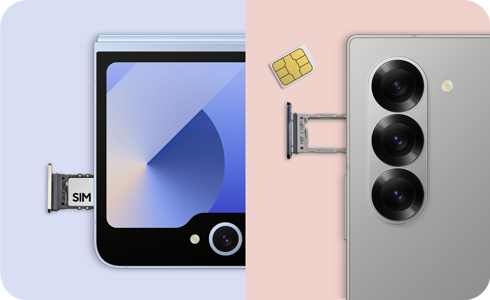
Galaxy Z series device and USIM card

Notes:

  • If using a physical SIM card, keep in mind that only a Nano SIM card is compatible with your Galaxy Z Flip5, Galaxy Z Fold5, Galaxy Z Flip6, or Galaxy Z Fold6.
  • If the SIM card is inserted into your Galaxy Z series device backwards, or if the SIM card tray is forced into the phone when it is not positioned properly, the tray may bend or break.

To insert a SIM card in your Galaxy Z Fold5 / Fold6 device correctly, please follow these steps:

Note: The Galaxy Z Fold device should be placed on a flat surface with the screen face down and the camera side facing up.

Galaxy Z Fold6

Galaxy Z Fold6 phone placed face down with arrow indicating where to insert ejector tool. Galaxy Z Fold6 phone placed face down with arrow indicating where to insert ejector tool.

Step 1. Insert and firmly press the ejector tool into the hole in the SIM card tray.

Removing SIM card tray from Galaxy Z Fold6 device. Removing SIM card tray from Galaxy Z Fold6 device.

Step 2. Remove the SIM card tray once it pops out of the phone.

Correct placement of USIM card into SIM card tray. Correct placement of USIM card into SIM card tray.

Step 3. Place the Nano SIM card into the SIM card tray with the metal chip facing down. Ensure that the card is accurately aligned with the shape of the tray and that the card is level with the tray.

Inserting SIM card tray back into Galaxy Z Fold5 device. Inserting SIM card tray back into Galaxy Z Fold5 device.

Step 4. Insert and press the SIM card tray completely into the SIM card slot on your device.

Note: Insert the SIM card as shown in the top image in step 3 for a single SIM slot or as shown in the bottom image in step 3 for a dual SIM slot.

Galaxy Z Fold5

Galaxy Z Fold5 phone placed face down with arrow indicating where to insert ejector tool. Galaxy Z Fold5 phone placed face down with arrow indicating where to insert ejector tool.

Step 1. Insert and firmly press the ejector tool into the hole in the SIM card tray.

Removing SIM card tray from Galaxy Z Fold5 device. Removing SIM card tray from Galaxy Z Fold5 device.

Step 2. Remove the SIM card tray once it pops out of the phone.

Correct placement of USIM card into SIM card tray. Correct placement of USIM card into SIM card tray.

Step 3. Place the Nano SIM card into the SIM card tray with the metal chip facing down. Ensure that the card is accurately aligned with the shape of the tray and that the card is level with the tray.

Inserting SIM card tray back into Galaxy Z Fold5 device. Inserting SIM card tray back into Galaxy Z Fold5 device.

Step 4. Insert and press the SIM card tray completely into the SIM card slot on your device.

Note: Insert the SIM card as shown in the top image in step 3 for a single SIM slot or as shown in the bottom image in step 3 for a dual SIM slot.

To install a SIM card in your Galaxy Z Flip device correctly, please follow these steps:

Galaxy Z Flip6

The Galaxy Z Flip6 device should be closed for this process.

Galaxy Z Flip6 Galaxy Z Flip6

Step 1. Insert and firmly press the ejector tool into the hole in the SIM card tray.

Removing SIM card tray from Galaxy Z Flip6 device. Removing SIM card tray from Galaxy Z Flip6 device.

Step 2. Remove the SIM card tray once it pops out of the phone.

Correct placement of USIM card into SIM card tray. Correct placement of USIM card into SIM card tray.

Step 3. Place the Nano SIM card into the SIM card tray with the metal chip facing down. Ensure that the card is accurately aligned with the shape of the tray and that the card is level with the tray.

Inserting SIM card tray back into Galaxy Z Flip6 device. Inserting SIM card tray back into Galaxy Z Flip6 device.

Step 4. Insert and press the SIM card tray completely into the SIM card slot on your device.

Galaxy Z Flip5

The Galaxy Z Flip5 device should be fully open for this process.

Galaxy Z Flip5 phone fully open with arrow indicating where to insert ejector tool. Galaxy Z Flip5 phone fully open with arrow indicating where to insert ejector tool.

Step 1. Insert and firmly press the ejector tool into the hole in the SIM card tray.

Removing SIM card tray from Galaxy Z Flip5 device. Removing SIM card tray from Galaxy Z Flip5 device.

Step 2. Remove the SIM card tray once it pops out of the phone.

Correct placement of USIM card into SIM card tray. Correct placement of USIM card into SIM card tray.

Step 3. Place the Nano SIM card into the SIM card tray with the metal chip facing down. Ensure that the card is accurately aligned with the shape of the tray and that the card is level with the tray.

Inserting SIM card tray back into Galaxy Z Flip5 device. Inserting SIM card tray back into Galaxy Z Flip5 device.

Step 4. Insert and press the SIM card tray completely into the SIM card slot on your device.

Call us!

Call us!

We would love to help you out

Contact Samsung Assistance at 1-800-SAMSUNG (726-7864)

Thank you for your feedback!

The coding for Contact US > Call > View more function. And this text is only displayed on the editor page, please do not delet this component from Support Home. Thank you