Connect your Samsung laptop or notebook to a network

Windows 10 makes it easy to connect and manage your networks. You can connect your laptop or notebook wirelessly or through an Ethernet cable. Pick a method you are most comfortable with, and let’s get started.
Information provided applies to devices sold in Canada. Available screens and settings may vary for laptops and notebooks sold in other countries.
Connecting wirelessly to Wi-Fi is one of the most convenient methods to get access to the Internet.
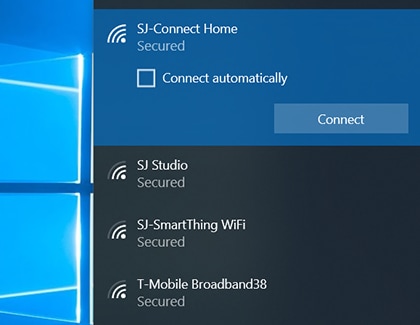
From Settings, click Network & Internet, and then click Wi-Fi on the sidebar. If the Wi-Fi is off, click the switch to turn it on. Click Show available networks, and then select your desired network. Click Connect, and input a password if needed.
Wi-Fi is great, but it's not always reliable, like when there's a bad storm. To make sure you always have a stable connection, connect your laptop or notebook to the internet using an Ethernet cable. First, connect the Ethernet cable to the Ethernet port on your laptop or notebook. Then, connect the other end to an active Ethernet port in the wall or an internet router.
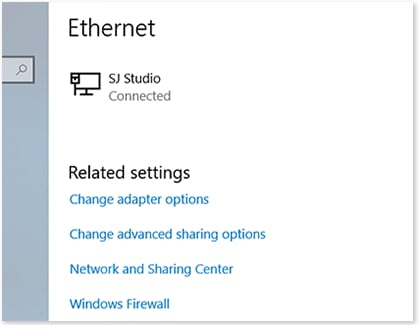
To verify the connection is successful, open Settings, click Network & Internet, and then click Ethernet from the sidebar. You will see the connection status of your network. For the best results, turn off your Wi-Fi.
There is no Ethernet port on the Galaxy Book S.
Wi-Fi networks can be hidden so strangers can't try to access them without permission. But how do you connect to a network you can't see? It's easy. Click the Wi-Fi icon in the bottom right corner of the taskbar. Scroll down to the bottom of the list, select Hidden Network, and then select Connect.
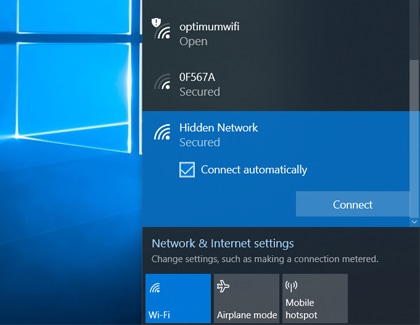
Fill out the necessary information. If you entered everything correctly, your computer will connect to the hidden network.
Every device that can connect to the internet has its own MAC (Media Access Control) address - even laptop or notebook. This special address helps identify which device is which on your local network. In other words, it helps your router send the correct data to the correct device. Additionally, as an extra security measure, some wireless networks require the MAC address of your device before you can connect.
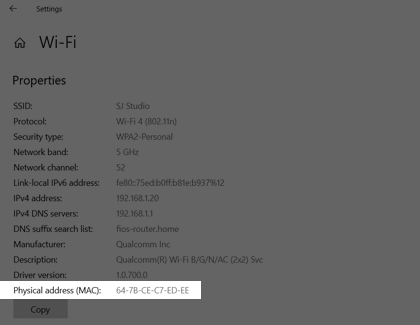
To locate your laptop or notebook's MAC address, navigate to and open the Control Panel app. Click Network and Internet, and then click Network and Sharing Center. Click on the network you are currently connected to. Click Details under "Signal Quality". Your MAC address will appear next to "Physical Address (MAC)".
In Windows 10, removing a wireless network is the same as forgetting a network on a Galaxy phone.
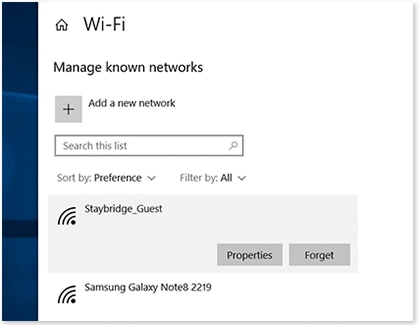
From Settings, click Network & Internet, and then click Wi-Fi from the sidebar. Next, click Manage known networks, and then select the network name you want to remove. Click Forget, and you're all set.
Is this content helpful?
Thank you for your feedback!
Please answer all questions.