Use SmartThings on your Windows 10 or 11 PC
With the SmartThings app for Windows 10 or 11, you can conveniently control and manage your connected devices right from your computer. Whether you want to turn devices on or off, activate scenes, or organize your rooms, the SmartThings app provides a seamless experience. Additionally, you can utilize the SmartThings Find feature to locate your lost devices. While the Windows version of the app has some limitations, it still offers essential functionality to enhance your smart home experience. Get started by downloading the latest version of the SmartThings app from the Microsoft Store and sign in with your Samsung account to access your registered devices. Let's explore the possibilities of using SmartThings on your Windows PC!
If you haven’t already, make sure to download the new version of the SmartThings app from the Microsoft Store. The first time you open it, you’ll be asked to sign into your Samsung account and allow different permissions. Make sure to log in to the same Samsung account that has your connected SmartThings devices. Once you’re signed in, your registered devices will automatically appear.
The SmartThings app for Windows allows you to do the following from your Windows PC or device:
- Turn connected devices on or off.
- Activate existing Scenes.
- Edit your existing Rooms or add new Rooms .
- Access and view the SmartThings Find feature.
However, there are a few limitations when using the Windows version of the app:
- It cannot connect new devices or create new Scenes.
- It cannot access or control Automations.
- It cannot access or control SmartApps other than SmartThings Find.
- It cannot edit connected devices or Scenes.
- It cannot access device details which may limit your control of certain devices.
Getting around SmartThings on your Windows PC isn’t very different from navigating the mobile app.
The Navigation panel on the left side gives you access to different features in the app, such as your connected devices, your favourites, and the settings menu. Simply click on your preferred category to be taken to its options. You can also select Menu (the three horizontal lines) in the upper left-hand corner to hide the Navigation panel if you’re not currently using it.
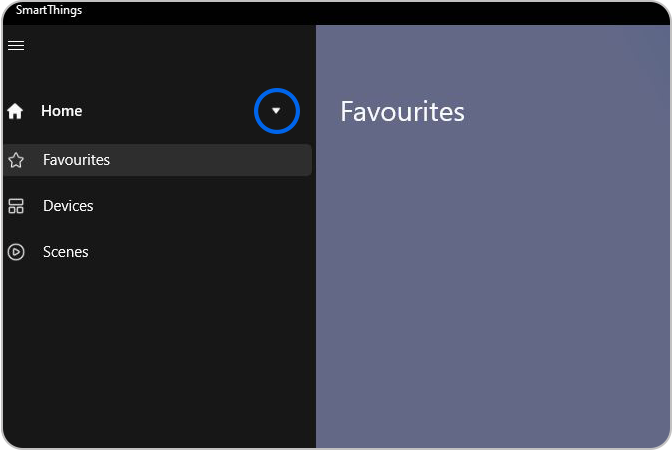
To go to another location in your SmartThings account, select the Down arrow next to the current location (e.g., Home), and then choose your desired new location.
The Favourites feature lets you quickly access and control your most used devices and Scenes all in one place.
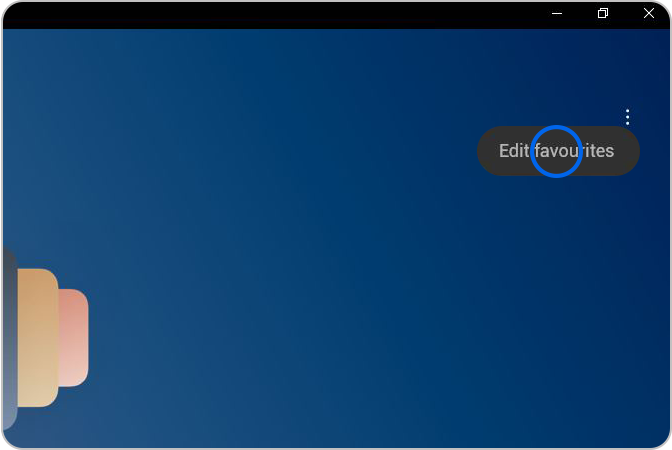
Note: If you ever want to remove something from your favourites, navigate back to the Favourites page, select the More options icon (the three vertical dots) and then select Edit Favourites. Select the Delete icon (the minus sign) next to the device you want to remove from your favourites. Select Save to confirm.
Note: Devices will have limited controls when using the PC version of the app.
On the SmartThings Windows app, you can't add new devices, but you can turn your existing devices on or off. Additionally, you can activate your existing Scenes, which gives you more power over your devices.
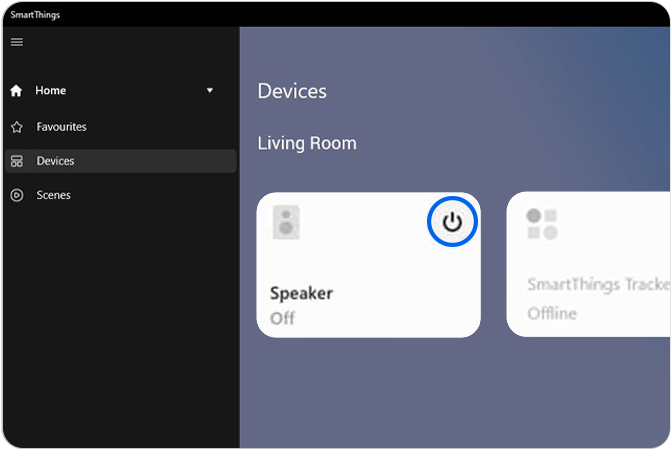
From the Navigation panel, go to your preferred Location, and then select Devices. Select the Power icon next to your desired device to turn it on and off. If your PC has a touchscreen, you can move your devices into different Rooms by simply dragging and dropping them with your finger.
To activate a Scene, open the Navigation panel, and then select Scenes. Select the Play icon next to your desired Scene, and it will automatically activate if the associated devices are online.
You may not be able to add devices or Scenes through the Windows PC app, but you can add new Rooms! You can also rename, reorder, and delete Rooms if needed.
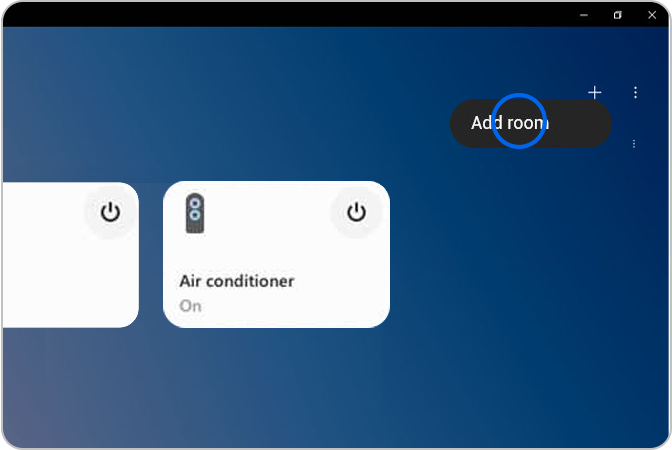
Add a Room
Navigate to your desired Location for the new Room. Select the Add icon (the plus icon) in the top right corner, and then select Add room. Type in the name of the room, and then select Done. The new room will appear in your current Location. You can then drag and drop devices into the new room.
Rename a Room
Select the More options icon (the three vertical dots) next to the name of your desired Room, but do not select the More options icon next to Devices at the top of the screen. Select Rename, and then enter your preferred name. Select Rename to confirm.

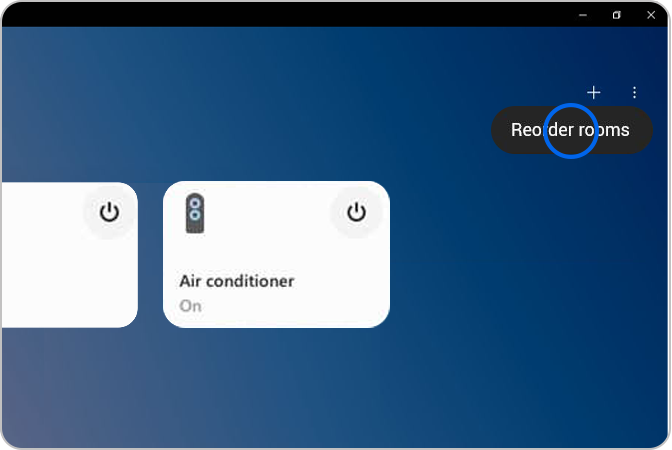
Reorder your Rooms
Select the More options icon at the top of the screen, next to Devices. Select Reorder rooms, and then drag and drop the arrows to reorder your Rooms. Select Save to confirm the new order.
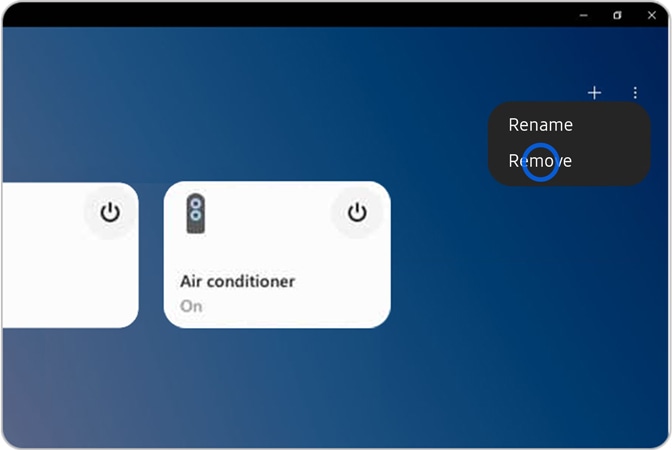
Delete a Room
Select the More options icon (the three vertical dots) next to the name of your desired Room but do not select the More options icon next to Devices at the top of the screen. Select Remove and select which Room the devices will move to once the current Room is deleted. Select Remove to confirm.
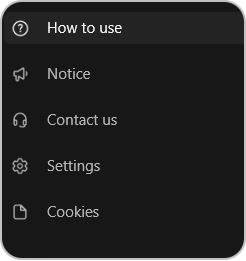
From the Navigation panel, you can access extra resources, like the Settings menu or SmartThings Support contact information. You can open the Navigation panel by selecting the Menu icon (the three horizontal lines) in the upper left-hand corner.
The available options are listed here:
- How to use: View helpful guides for using the SmartThings app.
- Contact us: Create a request with SmartThings Support or access SmartThings FAQs.
- Settings: Adjust notification settings, log out of the app, or view your personal data and app information.
- Cookies: Track and identify your device(s) across different websites, services, devices and/or browsing sessions.
Is this content helpful?
Thank you for your feedback!
Please answer all questions.